Welcome Inspire Pilots!
Join our free DJI Inspire community today!
Sign up

Inspire2-X7 panoramic technique success

Joined
Jul 6, 2020
Messages
33
Reaction score
19
Age
76
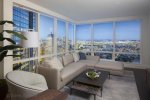
True story. Following up on my "must launch from garage roof" post...The job required a panoramic view mural 8ft hi and 26ft wide to show the view from a new condo tower at 380 ft AGL, day & evening. The solution used the 24mm lens on X7, breaking the pano up into 24 parts: a grid of 3 vertical x 8 horizontal, overlapping. Recombine in Lightroom "PhotoMerge." Several attempts at this were made, and all of them stitched up very well, although each one had some stitching errors (bricks, window mullions, antennas) that could be fixed. Gimbal yaw was used to move the camera, instead of turning the AC, to minimize parallax on nearby buildings. Day exposures easy. Twilight exposures f2.8, 1/8 sec, ISO 800...surprisingly good, with noise that could be reduced in post. Finished pano was 19,000 pixels wide x 5400 px high. Then fixed, adjusted, and scaled up. I would not have believed such a thing possible. FOV - approx 130 degrees. Contact me off-line for more info and sample. Thanks to those who gave helpful advice, all much appreciated. (BTW - many, many tests in advance, to confirm technique.)
 
Well done. For the twilight photos at 1/8 sec, you did not find them soft due to camera / drone movement?
Hello, Ray -
Plenty of sharpness at 1/8 sec...which is quite amazing. My tests show sharp photos at 1/8 frequently, as long as the wind is low. At 1/4 sec, sharp images 50% of the time. At 1/2 sec, yield is low...but not zero. In this case, I did not dare go below 1/8 because all 24 images have to be at the same exposure and all have to be good. A little earlier, shooting at 1/15 sec, was less risky. ...This technique is pushing the outer edge of photo reality. It is amazing that it works so well. Jumping to higher ISO, the images are pretty noisy.
This is true as long as the Inspire 2 is holding the position in hover reliably well. Not every specimen does that due to the dreaded hovering wobble. That said, I'm employing Litchi app to execute automated panoramic sequences with any grid pattern successfully for years. With rotating gimbal option it is the fastest, most efficient way no other app known to me is able to surpass. I have mastered gigasize 360x100 spherical panoramas, stitched with 156 images taken by 56mm lens on X5S camera. This technique will deliver wall size prints at 300dpi resolution ...
 
Indeed - accurate hover is required, and not always possible. Thanks for your note about Litchi, which I must learn.
 
This is true as long as the Inspire 2 is holding the position in hover reliably well. Not every specimen does that due to the dreaded hovering wobble. That said, I'm employing Litchi app to execute automated panoramic sequences with any grid pattern successfully for years. With rotating gimbal option it is the fastest, most efficient way no other app known to me is able to surpass. I have mastered gigasize 360x100 spherical panoramas, stitched with 156 images taken by 56mm lens on X5S camera. This technique will deliver wall size prints at 300dpi resolution ...
Yes, the Litchi App is very helpful in this regard.
 
You can try an app called HDRPano to easily set the grid. It also supports the inception mode which is cool.
I used Kolor gigapano for stitching back in the days when they were still around, easily getting over 30k horizontal which I had to downscale due to limitation of photoshop. Not sure if it’s still an issue nowadays.
 
True story. Following up on my "must launch from garage roof" post...The job required a panoramic view mural 8ft hi and 26ft wide to show the view from a new condo tower at 380 ft AGL, day & evening. The solution used the 24mm lens on X7, breaking the pano up into 24 parts: a grid of 3 vertical x 8 horizontal, overlapping. Recombine in Lightroom "PhotoMerge." Several attempts at this were made, and all of them stitched up very well, although each one had some stitching errors (bricks, window mullions, antennas) that could be fixed. Gimbal yaw was used to move the camera, instead of turning the AC, to minimize parallax on nearby buildings. Day exposures easy. Twilight exposures f2.8, 1/8 sec, ISO 800...surprisingly good, with noise that could be reduced in post. Finished pano was 19,000 pixels wide x 5400 px high. Then fixed, adjusted, and scaled up. I would not have believed such a thing possible. FOV - approx 130 degrees. Contact me off-line for more info and sample. Thanks to those who gave helpful advice, all much appreciated. (BTW - many, many tests in advance, to confirm technique.)
That's great to hear. Glad ISO 800 worked out for you.

I wouldn't mind seeing reduced versions of those images posted here.

D
 
You can try an app called HDRPano to easily set the grid. It also supports the inception mode which is cool.
I used Kolor gigapano for stitching back in the days when they were still around, easily getting over 30k horizontal which I had to downscale due to limitation of photoshop. Not sure if it’s still an issue nowadays.
Tried this app in early days of development, but it never controlled my Inspire 1 reliably. However, the lack of reliability was most likely caused by this particular specimen of Inspire 1, stubbornly refusing to cooperate for whatever reason. This prompted me to invest into Inspire 2 platform and Litchi app pano mode, the combination which works flawlessly since day one.
 
True story. Following up on my "must launch from garage roof" post...The job required a panoramic view mural 8ft hi and 26ft wide to show the view from a new condo tower at 380 ft AGL, day & evening. The solution used the 24mm lens on X7, breaking the pano up into 24 parts: a grid of 3 vertical x 8 horizontal, overlapping. Recombine in Lightroom "PhotoMerge." Several attempts at this were made, and all of them stitched up very well, although each one had some stitching errors (bricks, window mullions, antennas) that could be fixed. Gimbal yaw was used to move the camera, instead of turning the AC, to minimize parallax on nearby buildings. Day exposures easy. Twilight exposures f2.8, 1/8 sec, ISO 800...surprisingly good, with noise that could be reduced in post. Finished pano was 19,000 pixels wide x 5400 px high. Then fixed, adjusted, and scaled up. I would not have believed such a thing possible. FOV - approx 130 degrees. Contact me off-line for more info and sample. Thanks to those who gave helpful advice, all much appreciated. (BTW - many, many tests in advance, to confirm technique.)
Can you share a pano you have completed?
 
Great posts here guys, happy to here of others using the Inspire for aerial panoramas. I have been capturing 360°x180° aerial panoramas of 3Gpx resolution with the Inspire2 X7 50mm DL lens. Fantastic drone and camera. This virtual tour from altitude ~120m should be viewed on a large screen (not mobile). Click on the flags to visit other locations or use the map markers. https://www.hiddenmelbourne.com.au/aerial-tour-phillip-island-2020/
 
  • Like
Reactions: hhung516
What Dobmatt said! Litchi works very reliably with my I2/X7/50mmDL lens. HDRPano and other apps have failed or are totally unreliable. Please do an aperture check on your lenses. My X7 50mm DL is sharpest at f/5.6, therefore I keep it at that setting. (Tested on a bench, with a lens chart at various apertures). The only freedom of exposure I have is to set shutter speed and ISO. I shoot all panoramas at fixed aperture 5.6, set the lens for hyperfocal distance, because I can't rely on the lens focus accuracy when I am capturing a 360° panorama with a mix of hard and soft objects at varying distances.
 
  • Like
Reactions: hhung516
Yes - this technique works. I controlled the bird manually, because it was in a high risk environment. 8 steps across, 3 up & down, so 24 frames with the 24mm lens onX7. Client wants sunset look, so f2.8 , 1/8 sec at ISO 800. Finished photo wall, installed, is 8' high by 23 ft long, with a corner, as shown in attached image. Photo is back-lighted. You can see window mullions in this sales office, but they do NOT align with the photo elements, so the photo had to be sent to the printer as one very large image file. Many thanks to the experts on this forum, who helped to advise me. Happy client. G-85362-e4a-sd.jpg
 
  • Like
Reactions: Rene230183
If you guys haven’t tried PTGui Pro for panos you should definitely try it out.

It’s much more powerful than Lightroom and gives you lots more control on how the stitching works. You can go in and fix errors manually if you like. Well Lightroom doesn’t give you any control so that’s not saying much, but PTGui gives you ultimate control. It’s somehow much faster than Lightroom too.
What Brett8883 said! Lightroom is a very poor tool for stitching panoramas. Every large panorama that I capture is stitched in PTGUI Pro. I guess that if you're playing around with a handheld camera, Lightroom isn't too bad, but I never use it. Panoramas captured by a drone have the lens data, GPS position and gimbal yaw, pitch and roll embedded in them and PTGUI reads this data to accurately position the frames and only then searches for corresponding details in the overlapping sections to accurately stitch the frames together and also blend the lighting. For panoramas captured from a tripod PTGUI does the same and is especially effective when I use a programmed gimbal to drive the camera, in the same way that Litchi drives my gimbal on the Inspire 2.
 
Thanks for the reference on PTGUI. How do you get "Programmed gimbal"..?
Yea I’d like to know that too. I’ve been looking for a motorized solution but most gimbals require the camera to be balanced on the gimbal axis so no ability to have the lens nodal point be on the movement axis
 
Thanks for the reference on PTGUI. How do you get "Programmed gimbal"..?
As a person who uses a program that routinely programs gimbal movement, I would assume that the term "programmed gimbal" is to be taken literally. The program I use not only programs drone movement (waypoints), but it also programs gimbal movement (other than tilt) for those drones that have an 3-axis gimbal (Inspire 1, Inspire 2, etc.). It makes sense to me that panning the gimbal would be a smoother motion than yawing the drone. I assume that this is what PTGui does.

D
Donnie Frank & Brett8883: Good questions! I'll have to answer with a few examples, because this is also a new problem that I want to solve. This is the frame pattern for a 3Gpx aerial from I2/X7?50mm DL. 142 frames are shot from the air using Litchi. The upper sky frames were shot from the ground with a 16mm DL lens, but you can also capture those with a camera from the ground while the drone is in the air.
Firstly, the principle of shooting panoramas in close quarters (ie. lots of near-far objects, such as inside a room) is that the lens must rotate around the "nodal" point (say..."where the rays of light cross", to avoid parallax errors between frames). This doesn't happen with the X7/50mmDL. The lens rotates around the balance point of the mass, but because the drone is high up and the gimbal rotates (and not the drone) we experience minimal problems. Smaller drones will rotate the drone and the I2 itself probably shifts a bit in the air.
Secondly, I don't think the I2 will work on it's back, lying on a table, with the gimbal above and I've never tried it as a substitute for a programmed gimbal and I wouldn't want to fly the beast inside a room. More in next post....
FrameLayout 3Gpx.jpg
 
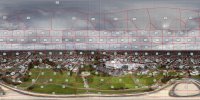
For high resolution (Gpx+) I use manual gimbals with wide lenses and a programmed gimbal with long lenses. "Long" I will define as 50mm and above, because a 50mm lens on my SonyA7R2 will give me a 2.7Gpx panorama of 360x180°. The Nodal Ninja Mecha range is very tough, programmable, and will handle long lenses like my 600mm Sony. This opening panorama from the Metro Gas Co building was shot with 50mm A7R2 and Mecha P1 C2 Melbourne from Metro Gas Co Tower
 

Members online

No members online now.

Forum statistics

Threads
22,277
Messages
210,655
Members
34,326
Latest member
BobbyeriGop