Welcome Inspire Pilots!
Join our free DJI Inspire community today!
Sign up

Finally Painted it.

Joined
Mar 5, 2015
Messages
31
Reaction score
22
Age
68
Location
West Richland , WA USA
image.jpg 
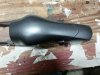
Was originally going to rattle can my Inspire
With Plastic Dip Orange Blaze paint. Changed my mind do to the dusty area I live in. Decided a shiny smooth finish would be better. Had a friend at a auto paint shop with a little 69 Camaro Hugger Orange paint left from a completed job offer it to me. I am very happy how it turned out. The orange seems to afford a better contrast to the skyline. Didn't have enough guts to screw with the camera. Maybe in the future.
Dennis
 
Joined
Mar 5, 2015
Messages
31
Reaction score
22
Age
68
Location
West Richland , WA USA
I ordered a new body from Multicopter Warehouse. Taped off the battery button and green lights and battery bottom. Had the body shop spray the spare canopy. When it was painted, I just removed the white body and put the Orange one on. This way I can always return it to stock white if needed.
Dennis
 
Joined
Apr 7, 2013
Messages
947
Reaction score
54
Age
57
Location
Chula Vista, CA
Looks great! I'm about to have mine Hydro Dipped as well. I'm assuming the body comes off easily and it has no hidden inside attachments to be careful of when removing...right??
 
Joined
Mar 5, 2015
Messages
31
Reaction score
22
Age
68
Location
West Richland , WA USA
Looks great! I'm about to have mine Hydro Dipped as well. I'm assuming the body comes off easily and it has no hidden inside attachments to be careful of when removing...right??
There is a YouTube video out there if you a search that details the canopy removal. Helped me. Be sure not to unplug the GPS antena. Just remove the 4 screws from the unit but leave the connection alone. It is a bugger to plug back in if you unplug it.
 
Joined
Apr 7, 2013
Messages
947
Reaction score
54
Age
57
Location
Chula Vista, CA
There is a YouTube video out there if you a search that details the canopy removal. Helped me. Be sure not to unplug the GPS antena. Just remove the 4 screws from the unit but leave the connection alone. It is a bugger to plug back in if you unplug it.

I'm actually ordering a complete new body and having that painted. I'm concerned about the GPS connection now that you mention it.
 
Joined
Mar 5, 2015
Messages
31
Reaction score
22
Age
68
Location
West Richland , WA USA
I'm actually ordering a complete new body and having that painted. I'm concerned about the GPS connection now that you mention it.
You won't have any problems. I've done it 3 times now. It's one of those deals where you wish you had another hand to get the screw holes lined up while you are holding the GPS Antenna that has a short ribbon cord limiting your movements. Also ...... I wouldn't paint the inside. Save the weight plus it would be very easy to load up paint in the really small screw holes and make the re-installation a tougher job. Good luck.
 
Joined
Jun 30, 2015
Messages
6
Reaction score
0
Age
44
How's the sturdiness of the paint on the battery clips? Are you going to paint every battery that you purchase in the future. I've been on the fence on painting mine just because the battery cover isn't replaceable.
 
Joined
Mar 5, 2015
Messages
31
Reaction score
22
Age
68
Location
West Richland , WA USA
  • How's the sturdiness of the paint on the battery clips? Are you going to paint every battery that you purchase in the future. I've been on the fence on painting mine just because the battery cover isn't replaceable.
    Have had the orange painted 2 batteries I have in and out of the cockpit about 20 times now. No Mars or peeling paint noticed. However the paint job was an auto body professional job. They used this sticky paint for the first coat which is specially designed to promote adhesion to plastic and to the color coat as well. Then a clear coat was applied. Good point about what I'm going to do if I buy additional batteries. Guess I will cross that bridge when it happens. :) Dennis
 
Joined
Mar 5, 2015
Messages
31
Reaction score
22
Age
68
Location
West Richland , WA USA
How did you get the battery green lights taped up nicely ?
It took a while. I pressed masking tape down into the recessed area. Used a small flathead screwdriver to make sure the tape was fully adhered to the lit area. Then I used a very pointed thin xacto knife to trim the masking tape around the stars.
 
Joined
Jun 16, 2015
Messages
26
Reaction score
2
Location
The Netherlands / Germany
It took a while. I pressed masking tape down into the recessed area. Used a small flathead screwdriver to make sure the tape was fully adhered to the lit area. Then I used a very pointed thin xacto knife to trim the masking tape around the stars.

Thanks, made mine matte black still need to do the batteries. I already purchase liquid masking but this trick will do fine I think.

Also the tip from above is worth trying , i already had the battery dissembled and did expect the transparent plastic not to be one part melted to the top
 
Joined
Jan 10, 2016
Messages
30
Reaction score
2
Age
46
Location
WESTERN AUSTRALIA
It took a while. I pressed masking tape down into the recessed area. Used a small flathead screwdriver to make sure the tape was fully adhered to the lit area. Then I used a very pointed thin xacto knife to trim the masking tape around the stars.
Hi guys, got bored with the seagull and turned it into a crow nothin too special just normal paint. Completely stripped and re assembled and still works :)
 

New Posts

Members online

Forum statistics

Threads
22,009
Messages
209,192
Members
32,402
Latest member
faheydrake