- Joined
- Dec 22, 2016
- Messages
- 32
- Reaction score
- 4
- Age
- 39
One of the things that really drew me toward the I1 was the fact that the upgradable gimbal/camera can be used for decent stabilized handheld shooting as well. I still think that makes the I1 + OSMO handle one of the best value props out there for shooting decent aerial + handheld footage.
However, since I travel, hike and generally move around quite abit, I was really disappointed to find out that the original OSMO carry case is not compatible with the I1 X3. There are other carry case options out there, but none I came across were as compact and travel-friendly as the original, nor did they allow having the OSMO out and shooting within seconds like the original case.
So after quite a bit of eye squinting & imagination, I decided I'll take the risk of ruining the case I have to try and rework it to fit the I1 X3.
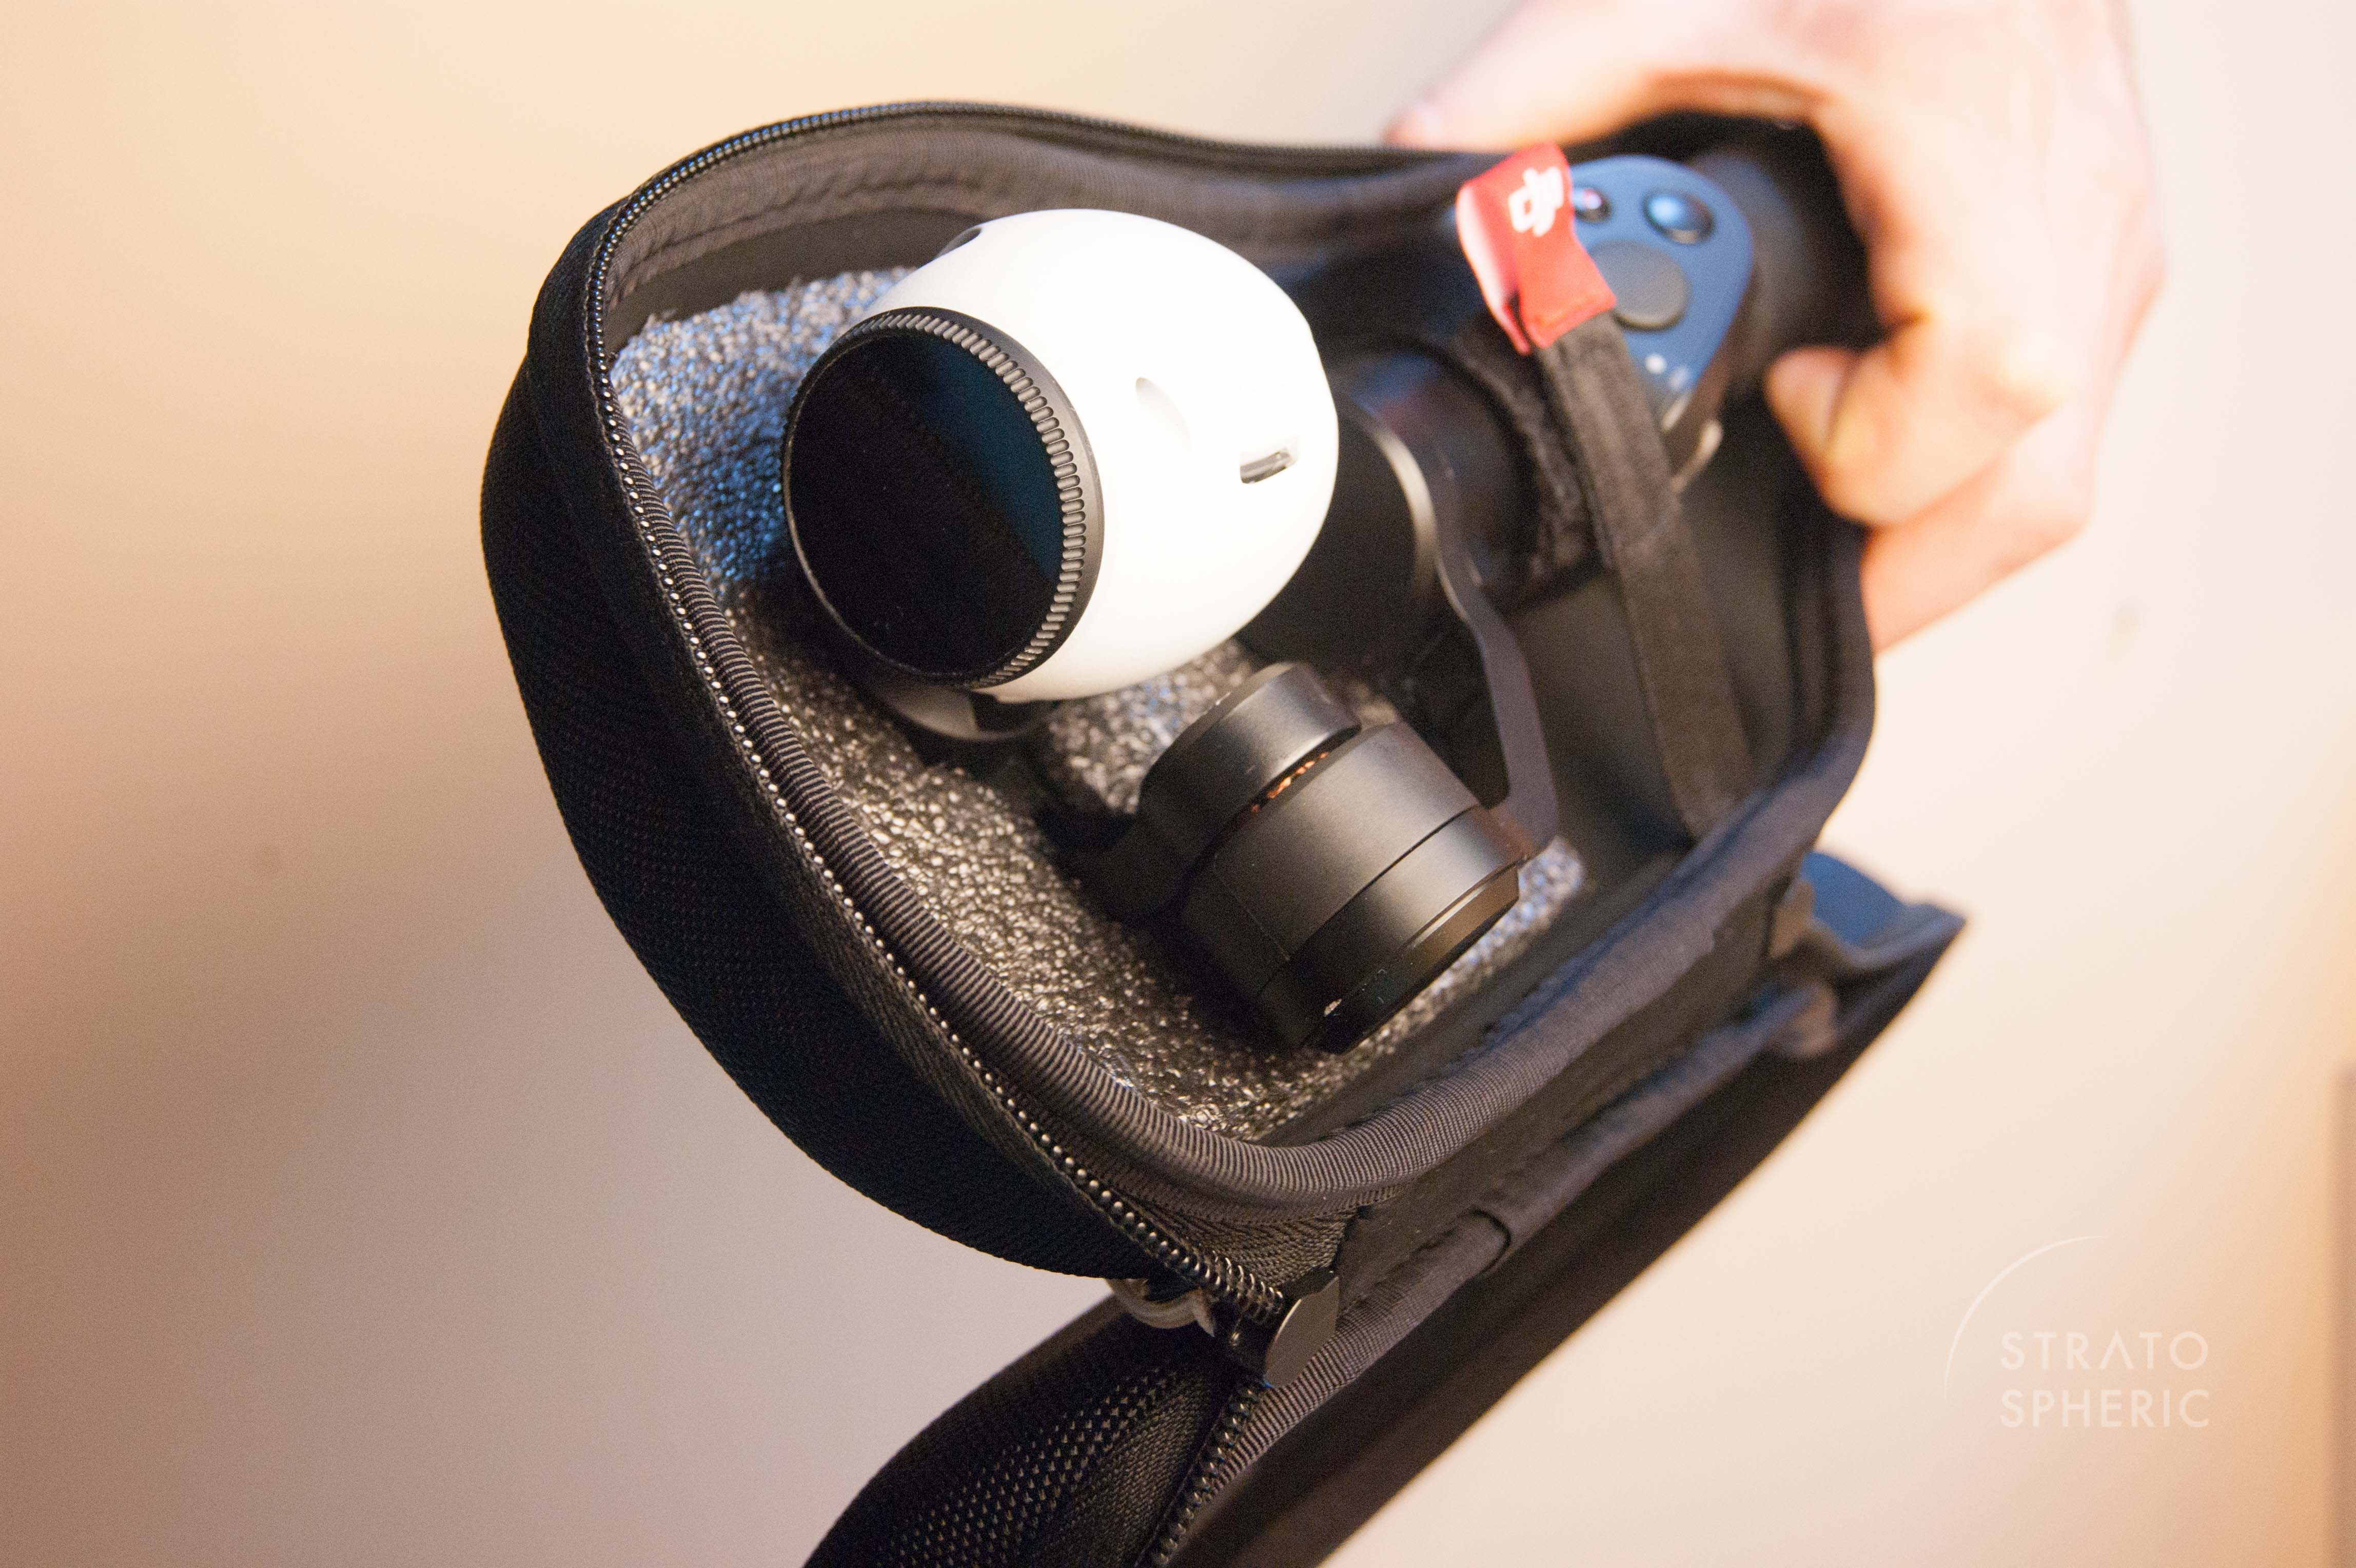
This is how the result turned out. So far seems pretty safe & easy to use:
I'll be testing it in the coming weeks and will get back with info on performance, but it seems quite solid.
I think being able to use this case really opens up possibilities for using the OSMO that are otherwise not really possible (its a huge shame DJI didn't make the effort to make the I1 X3 compatible or at least to also offer a I1 X3 modification of the case).
I decided to document the process, so here it is in case anyone is interested:
PART 1
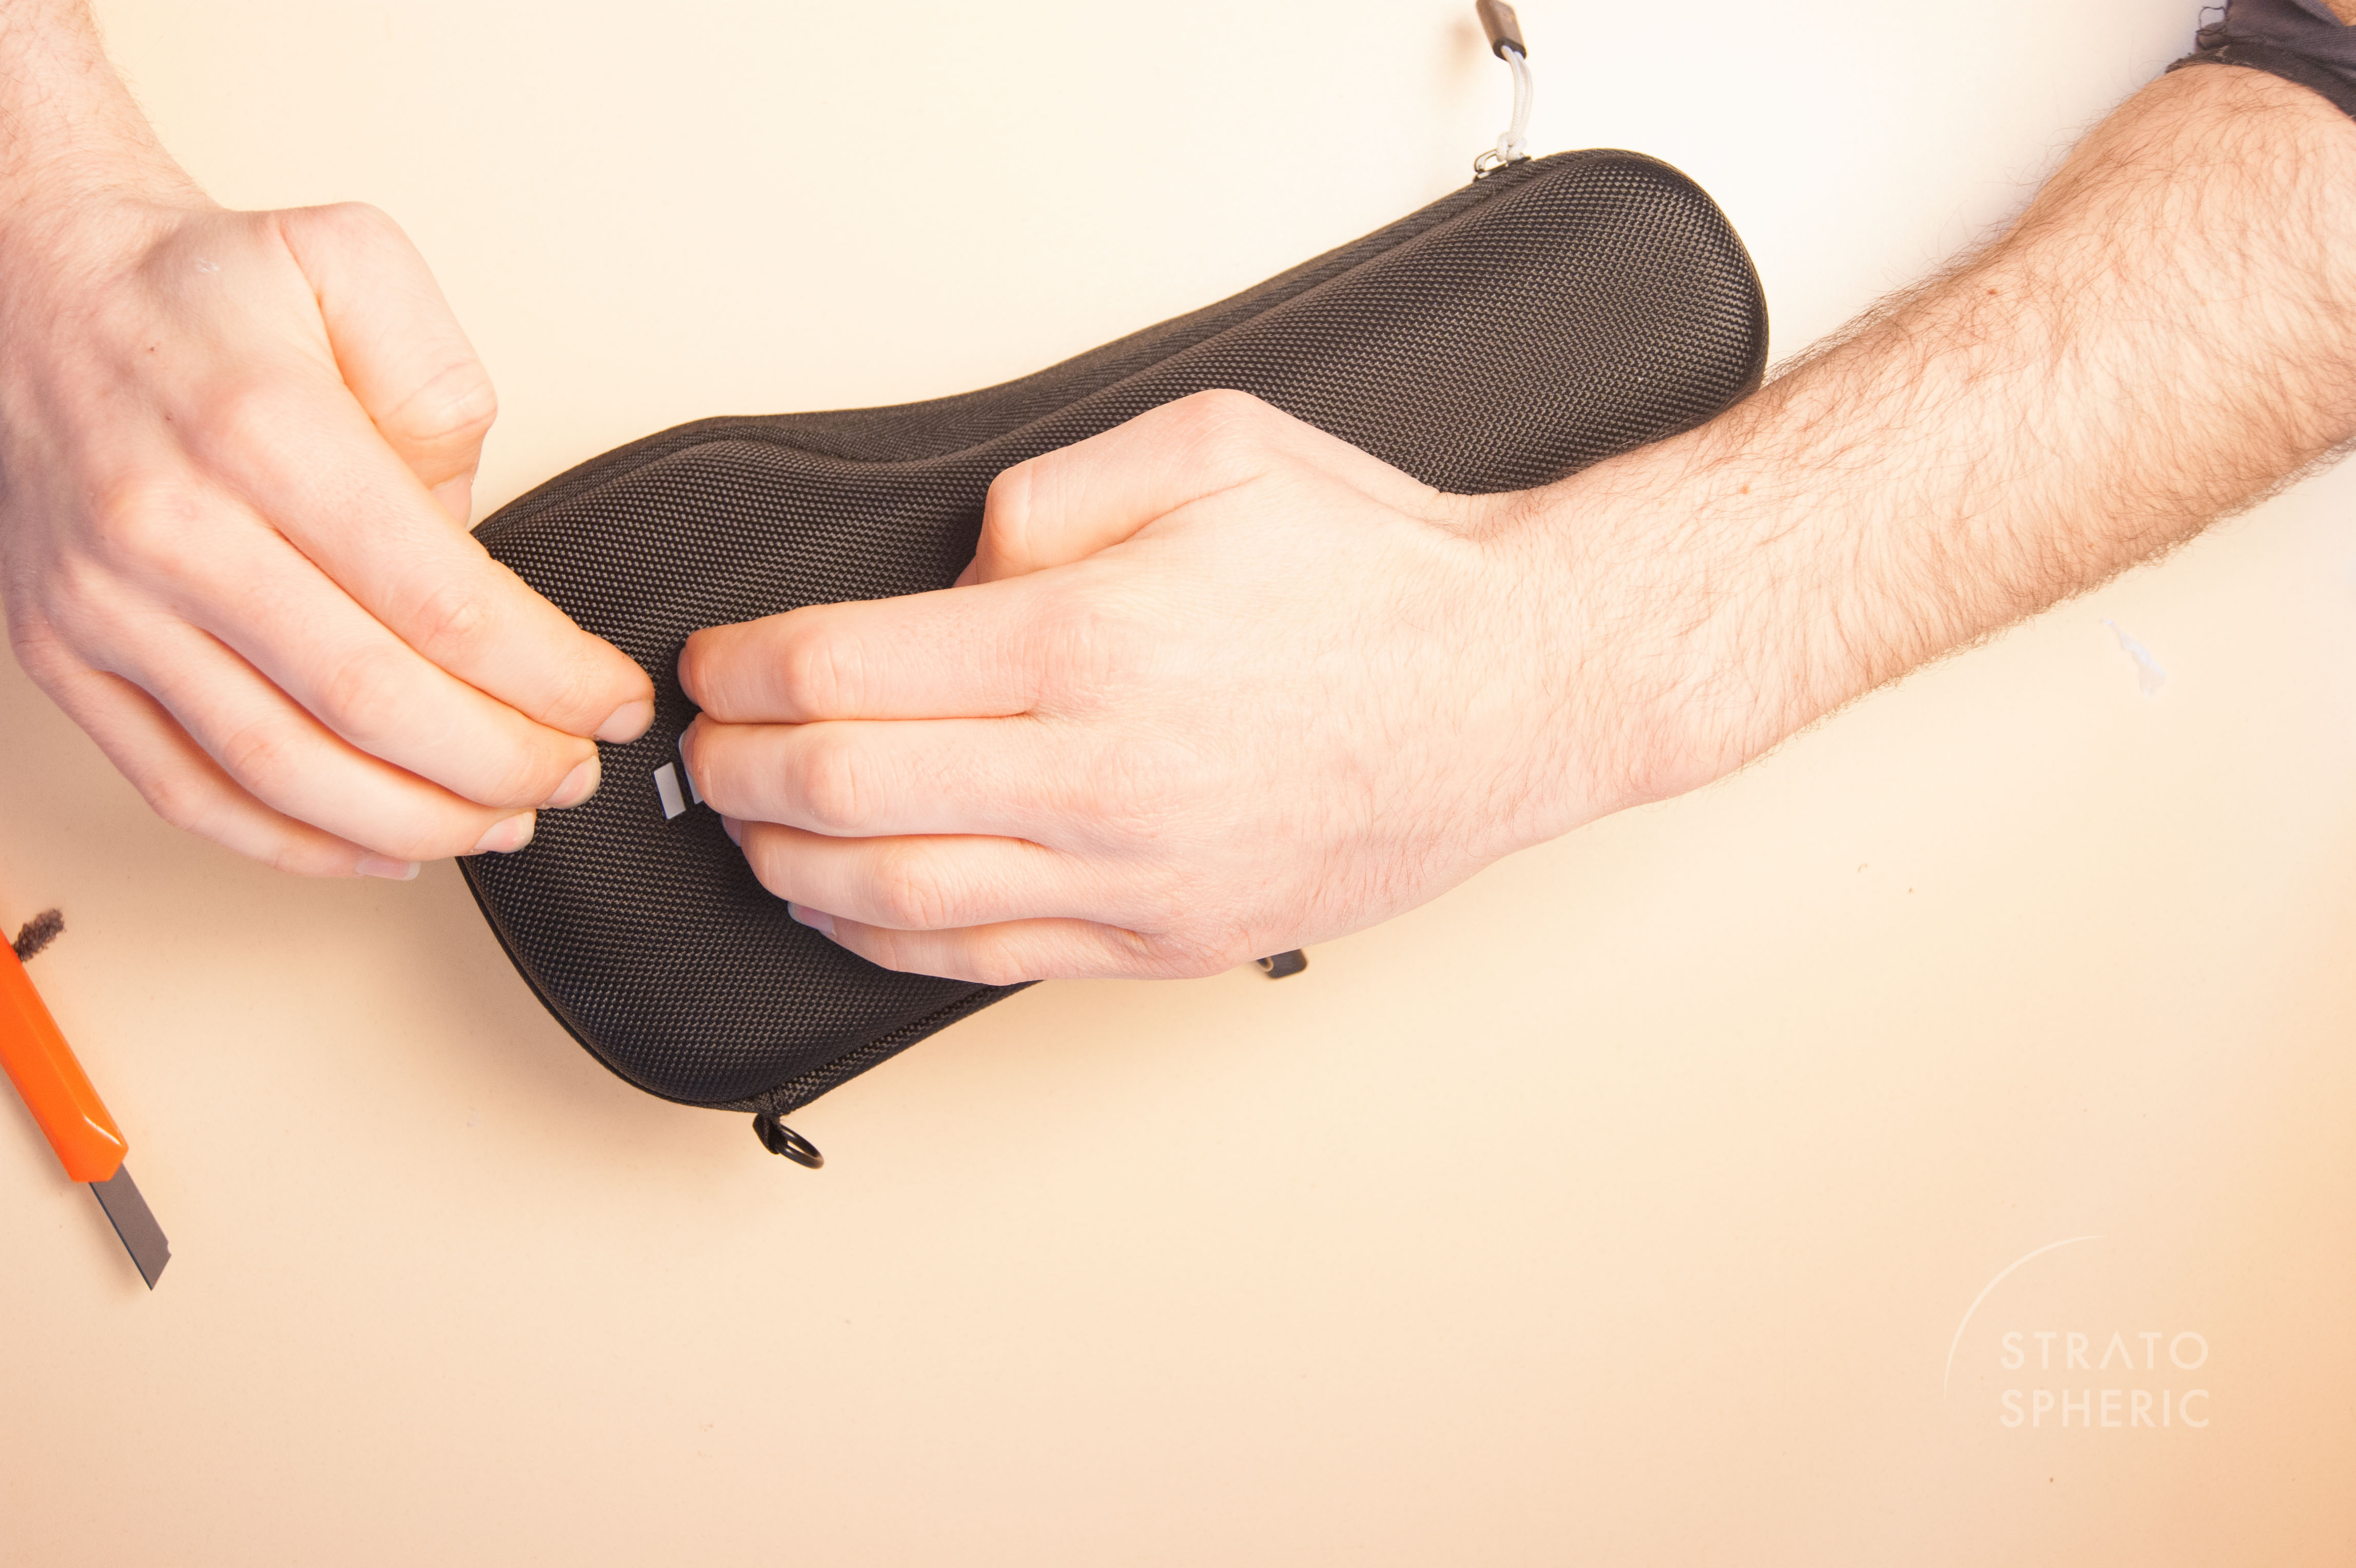
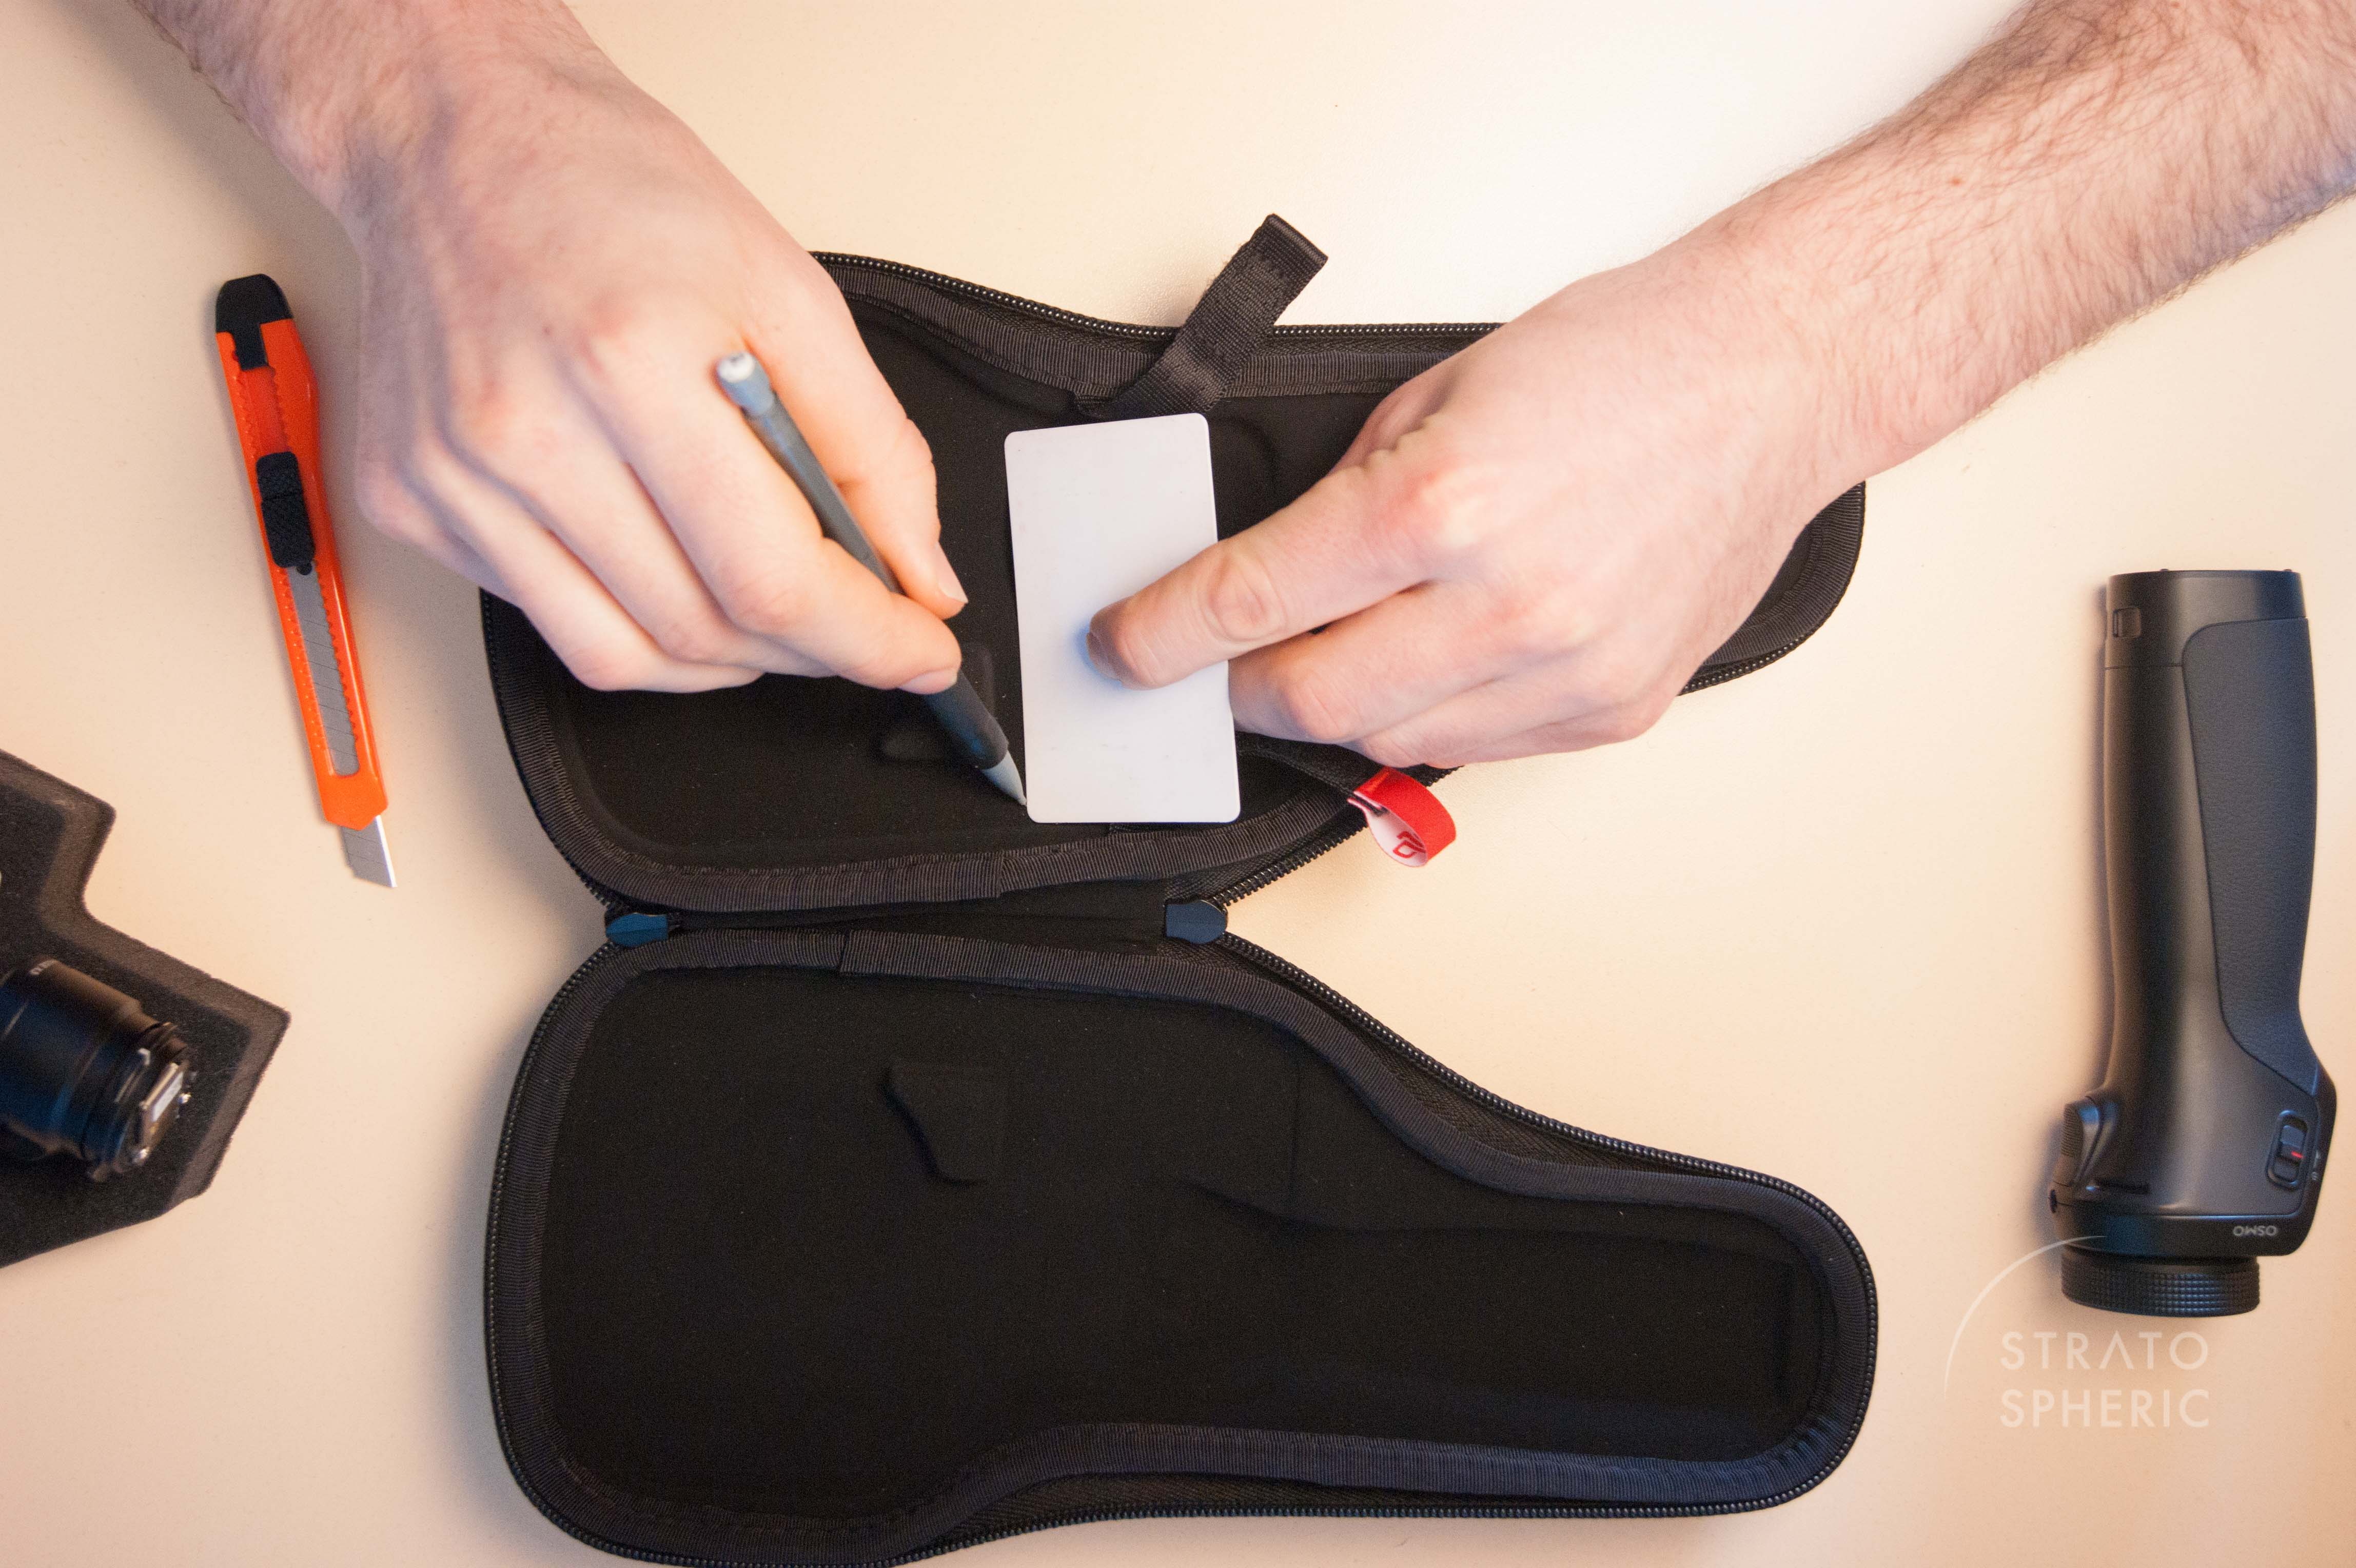
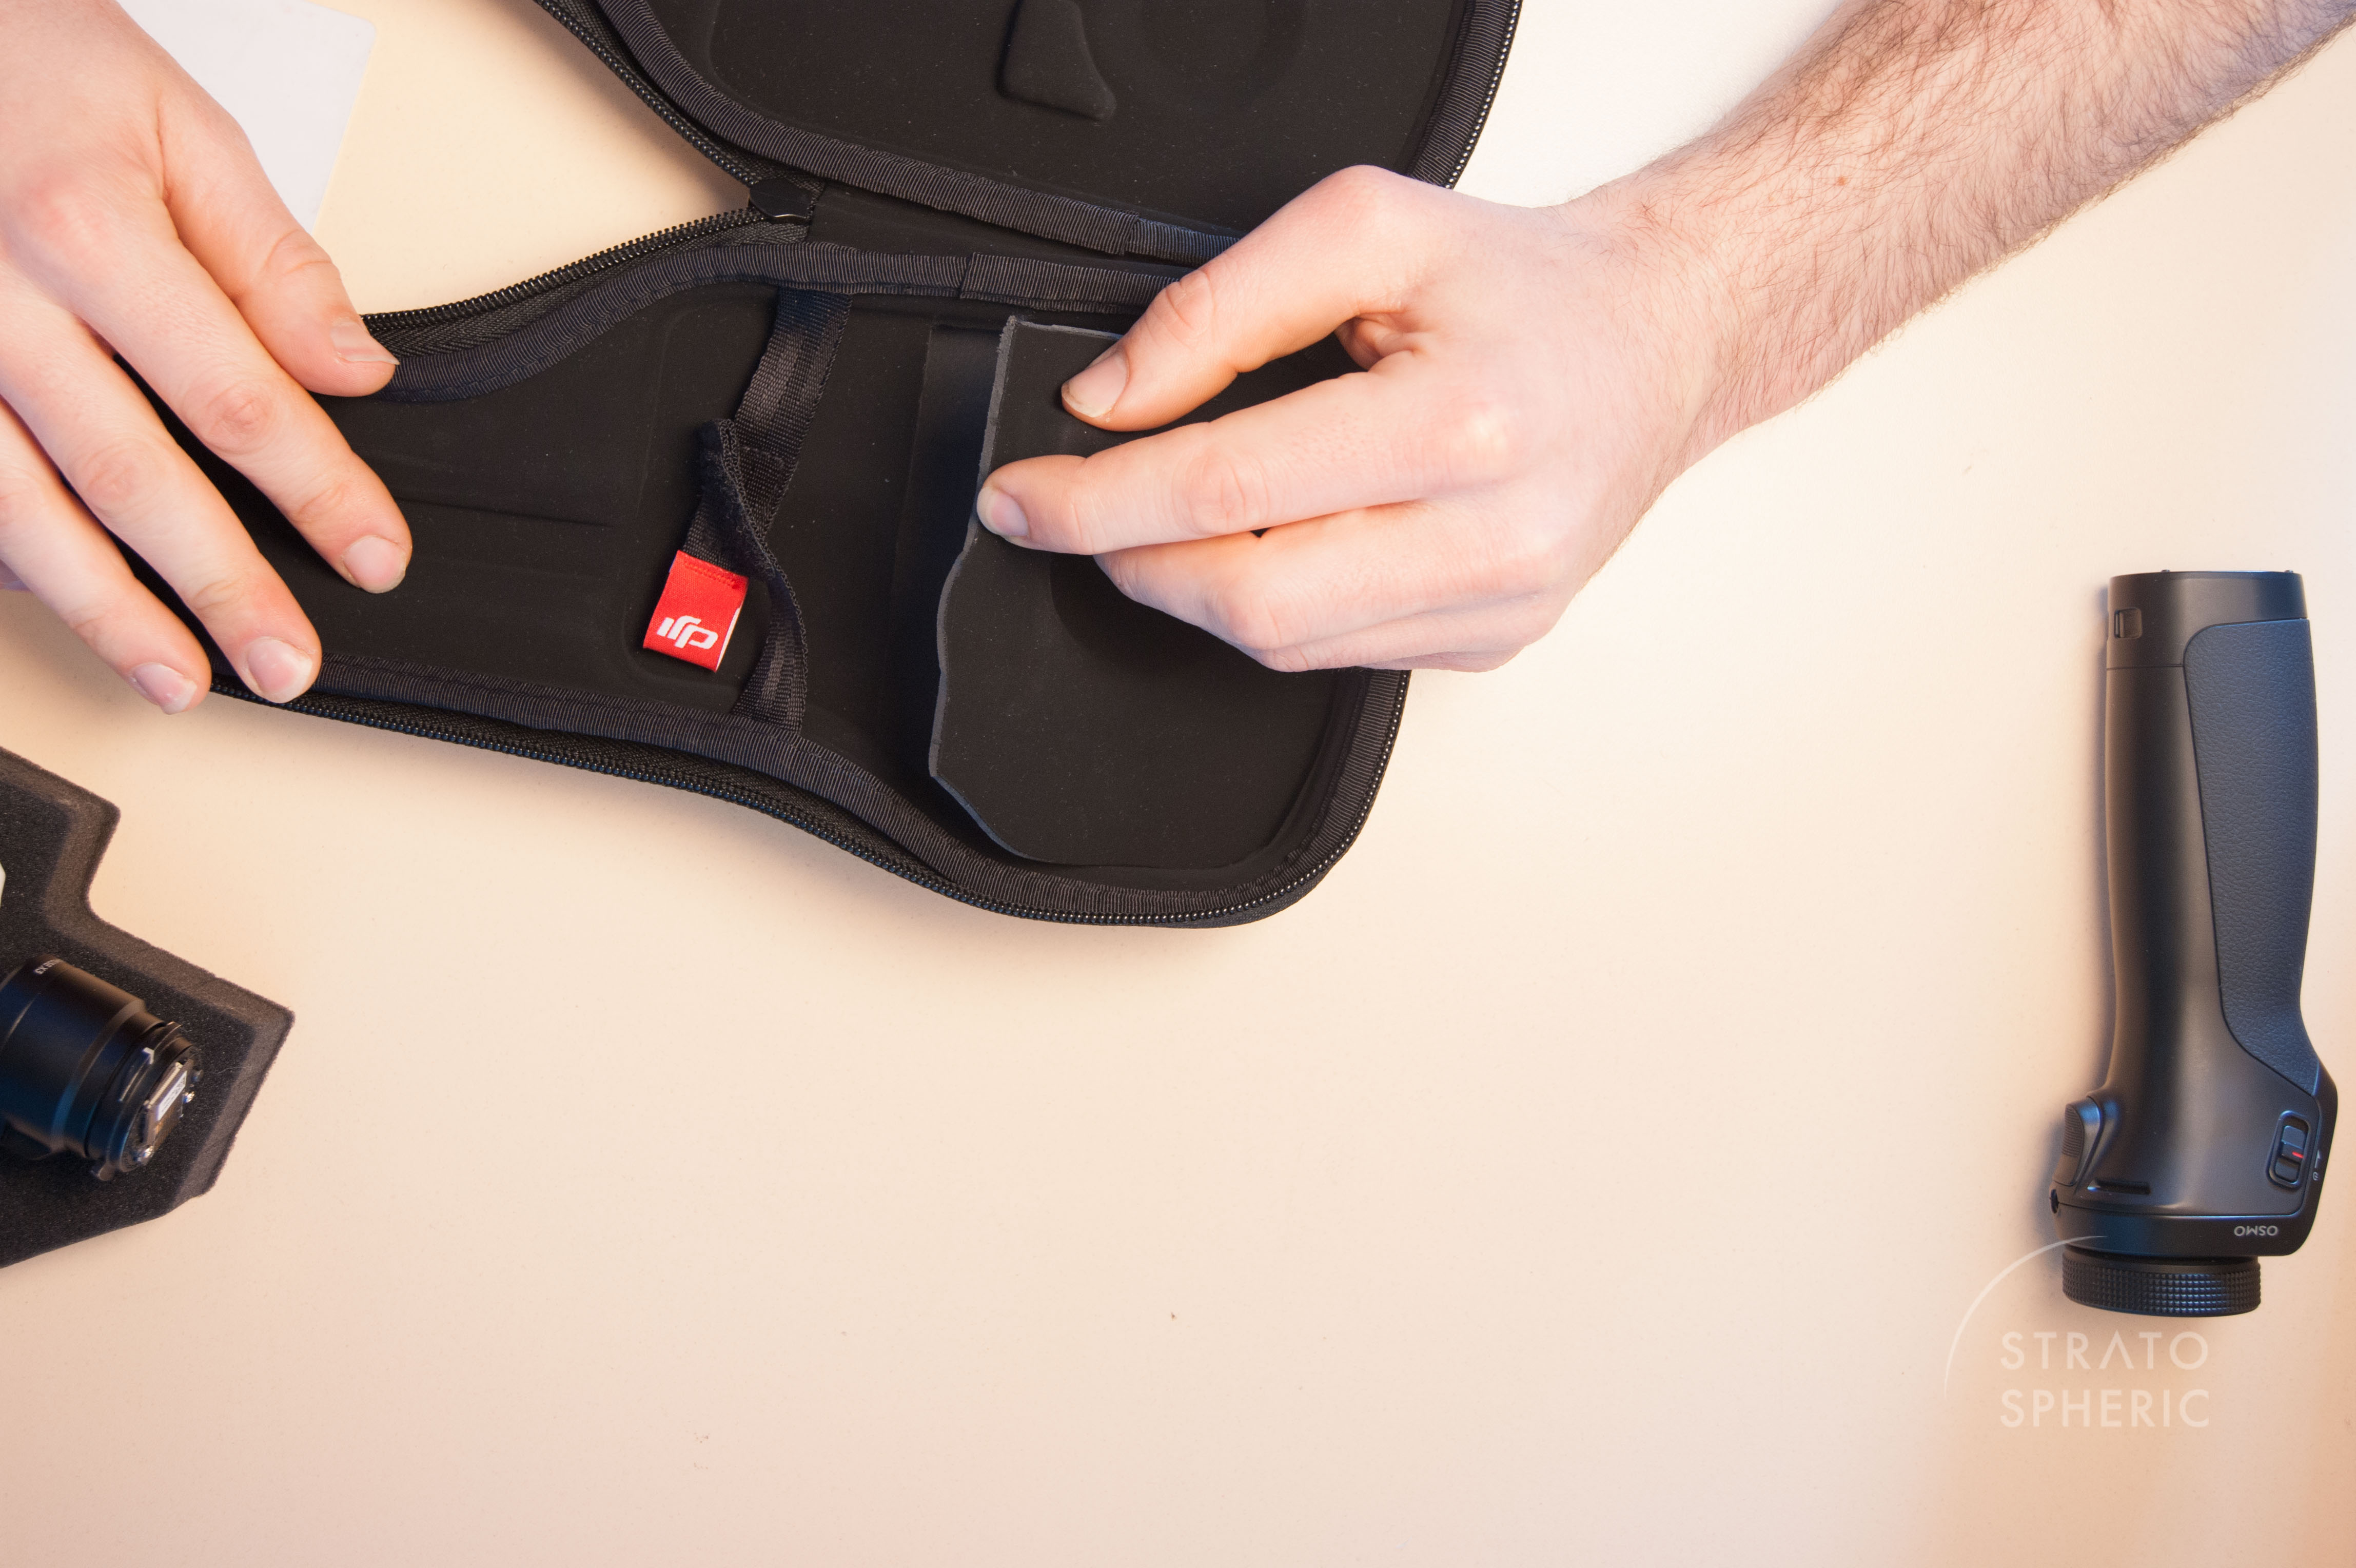
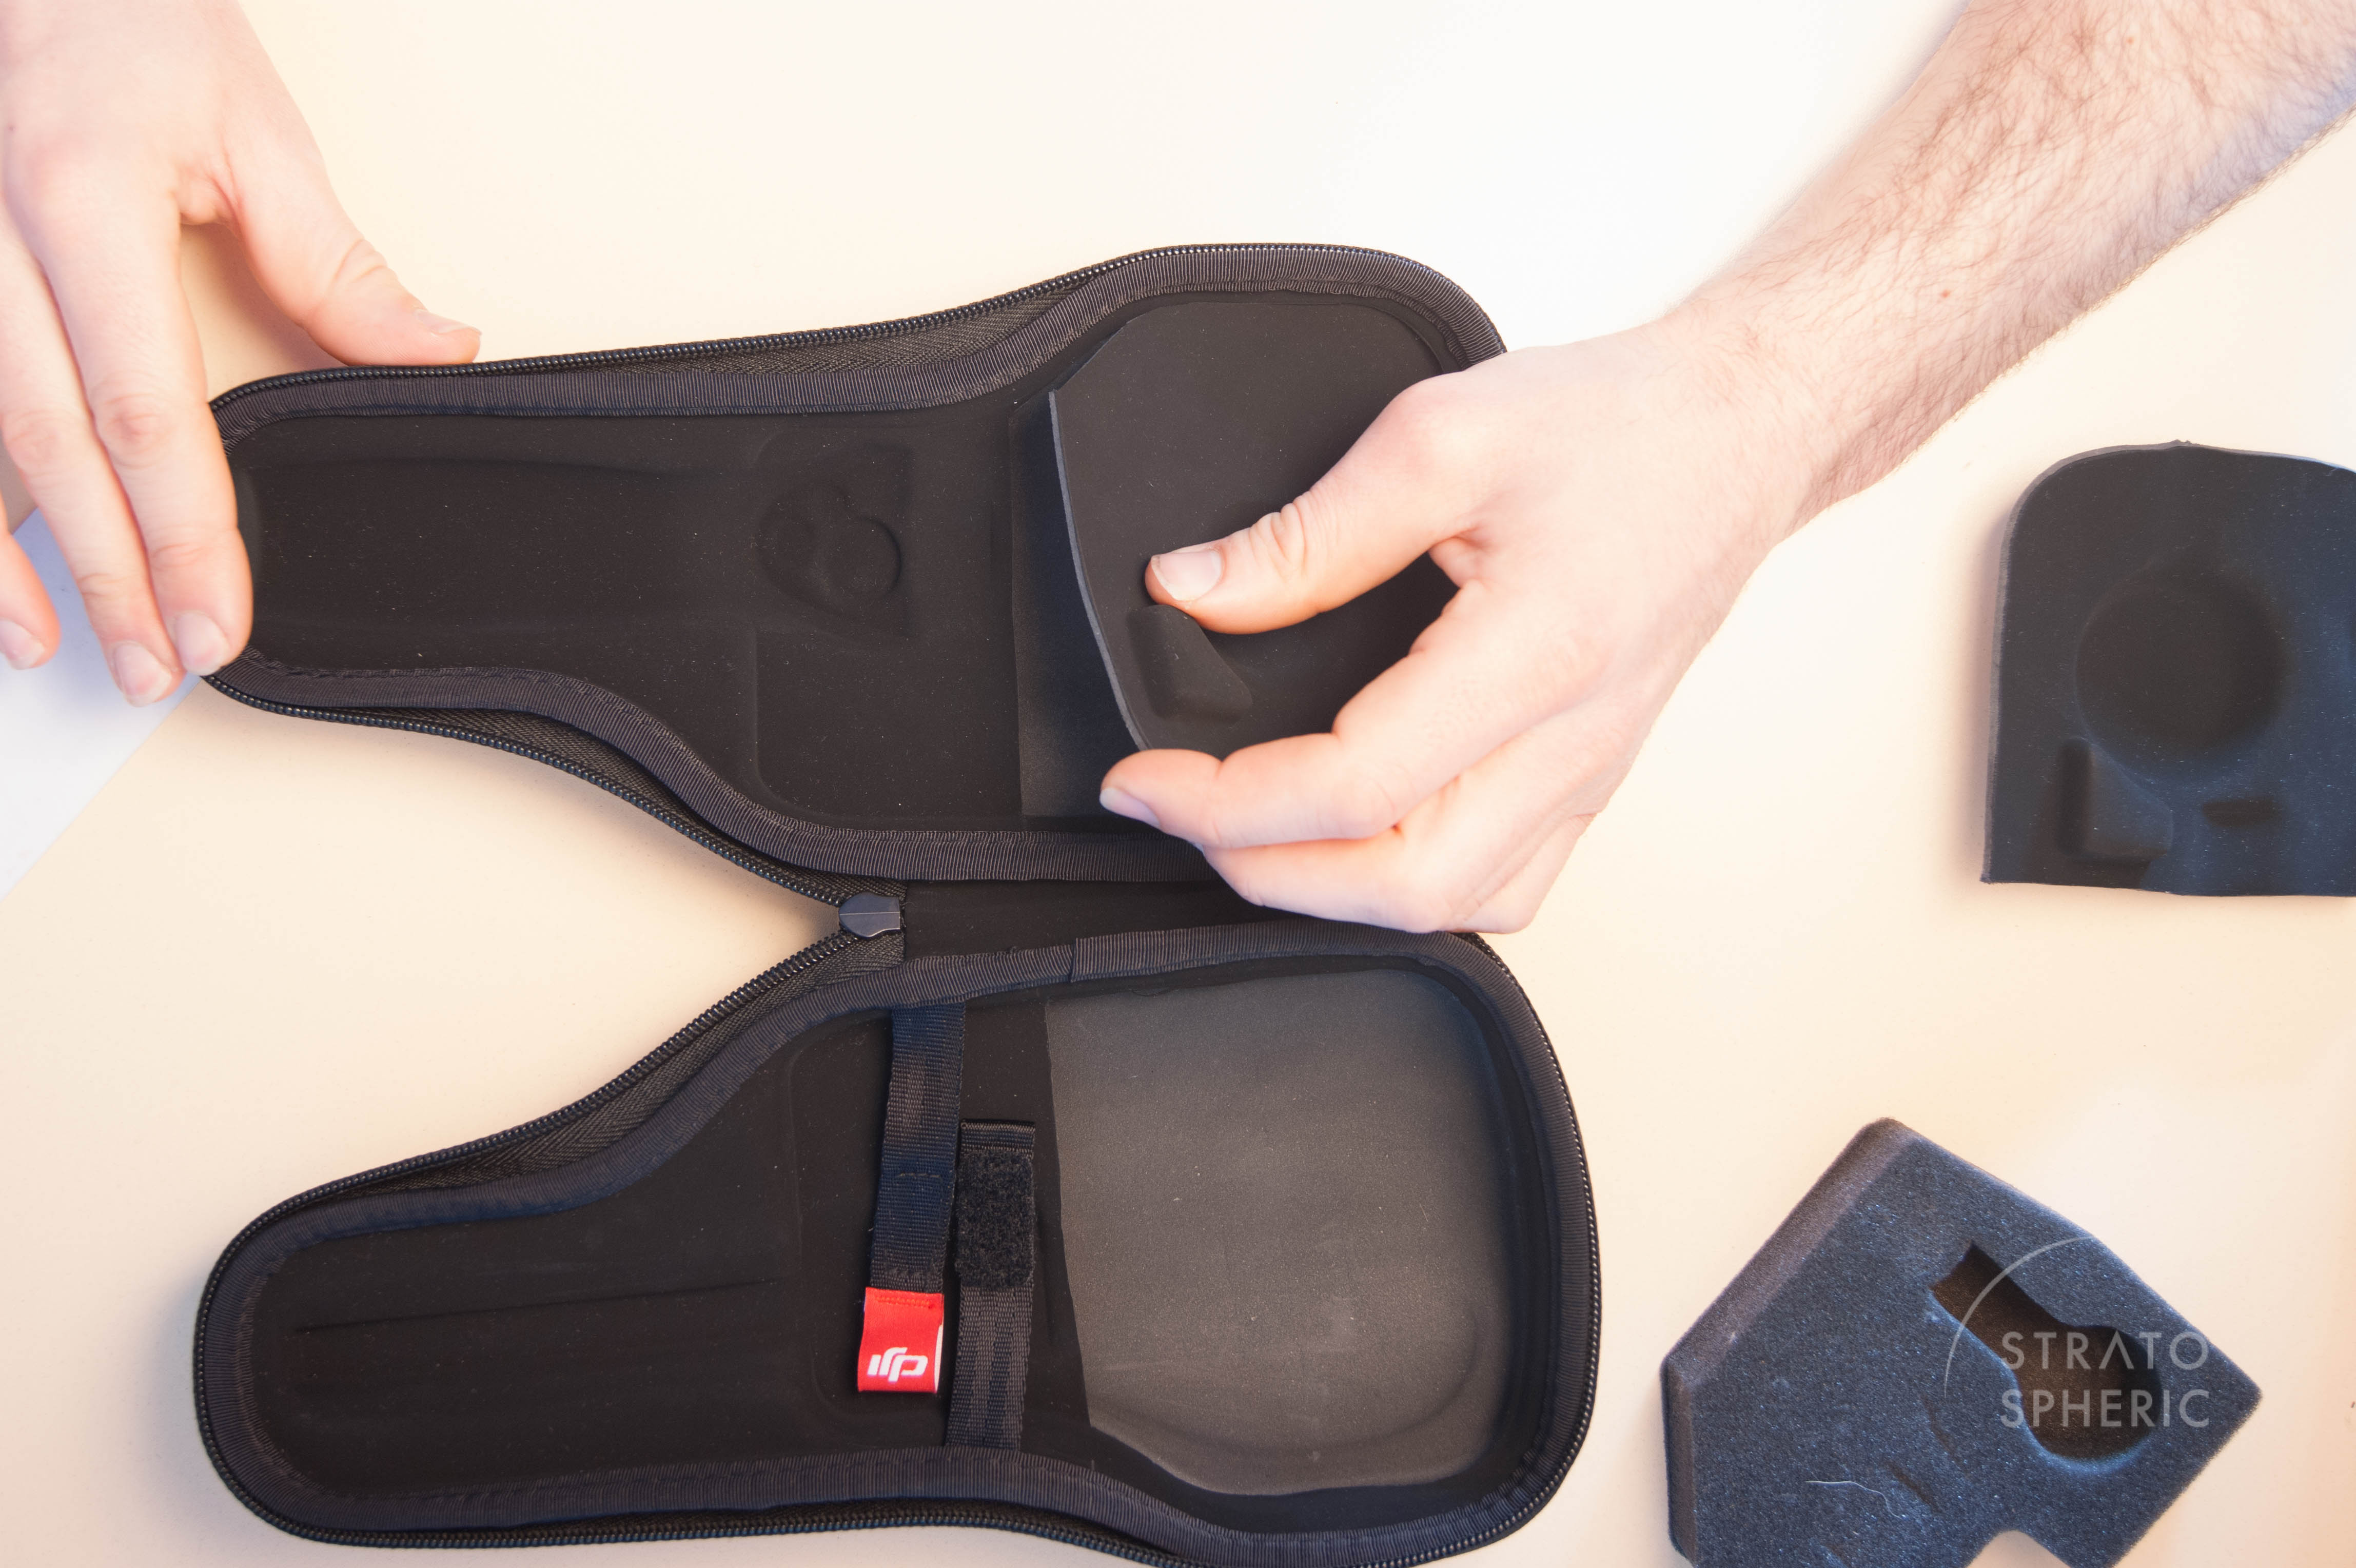
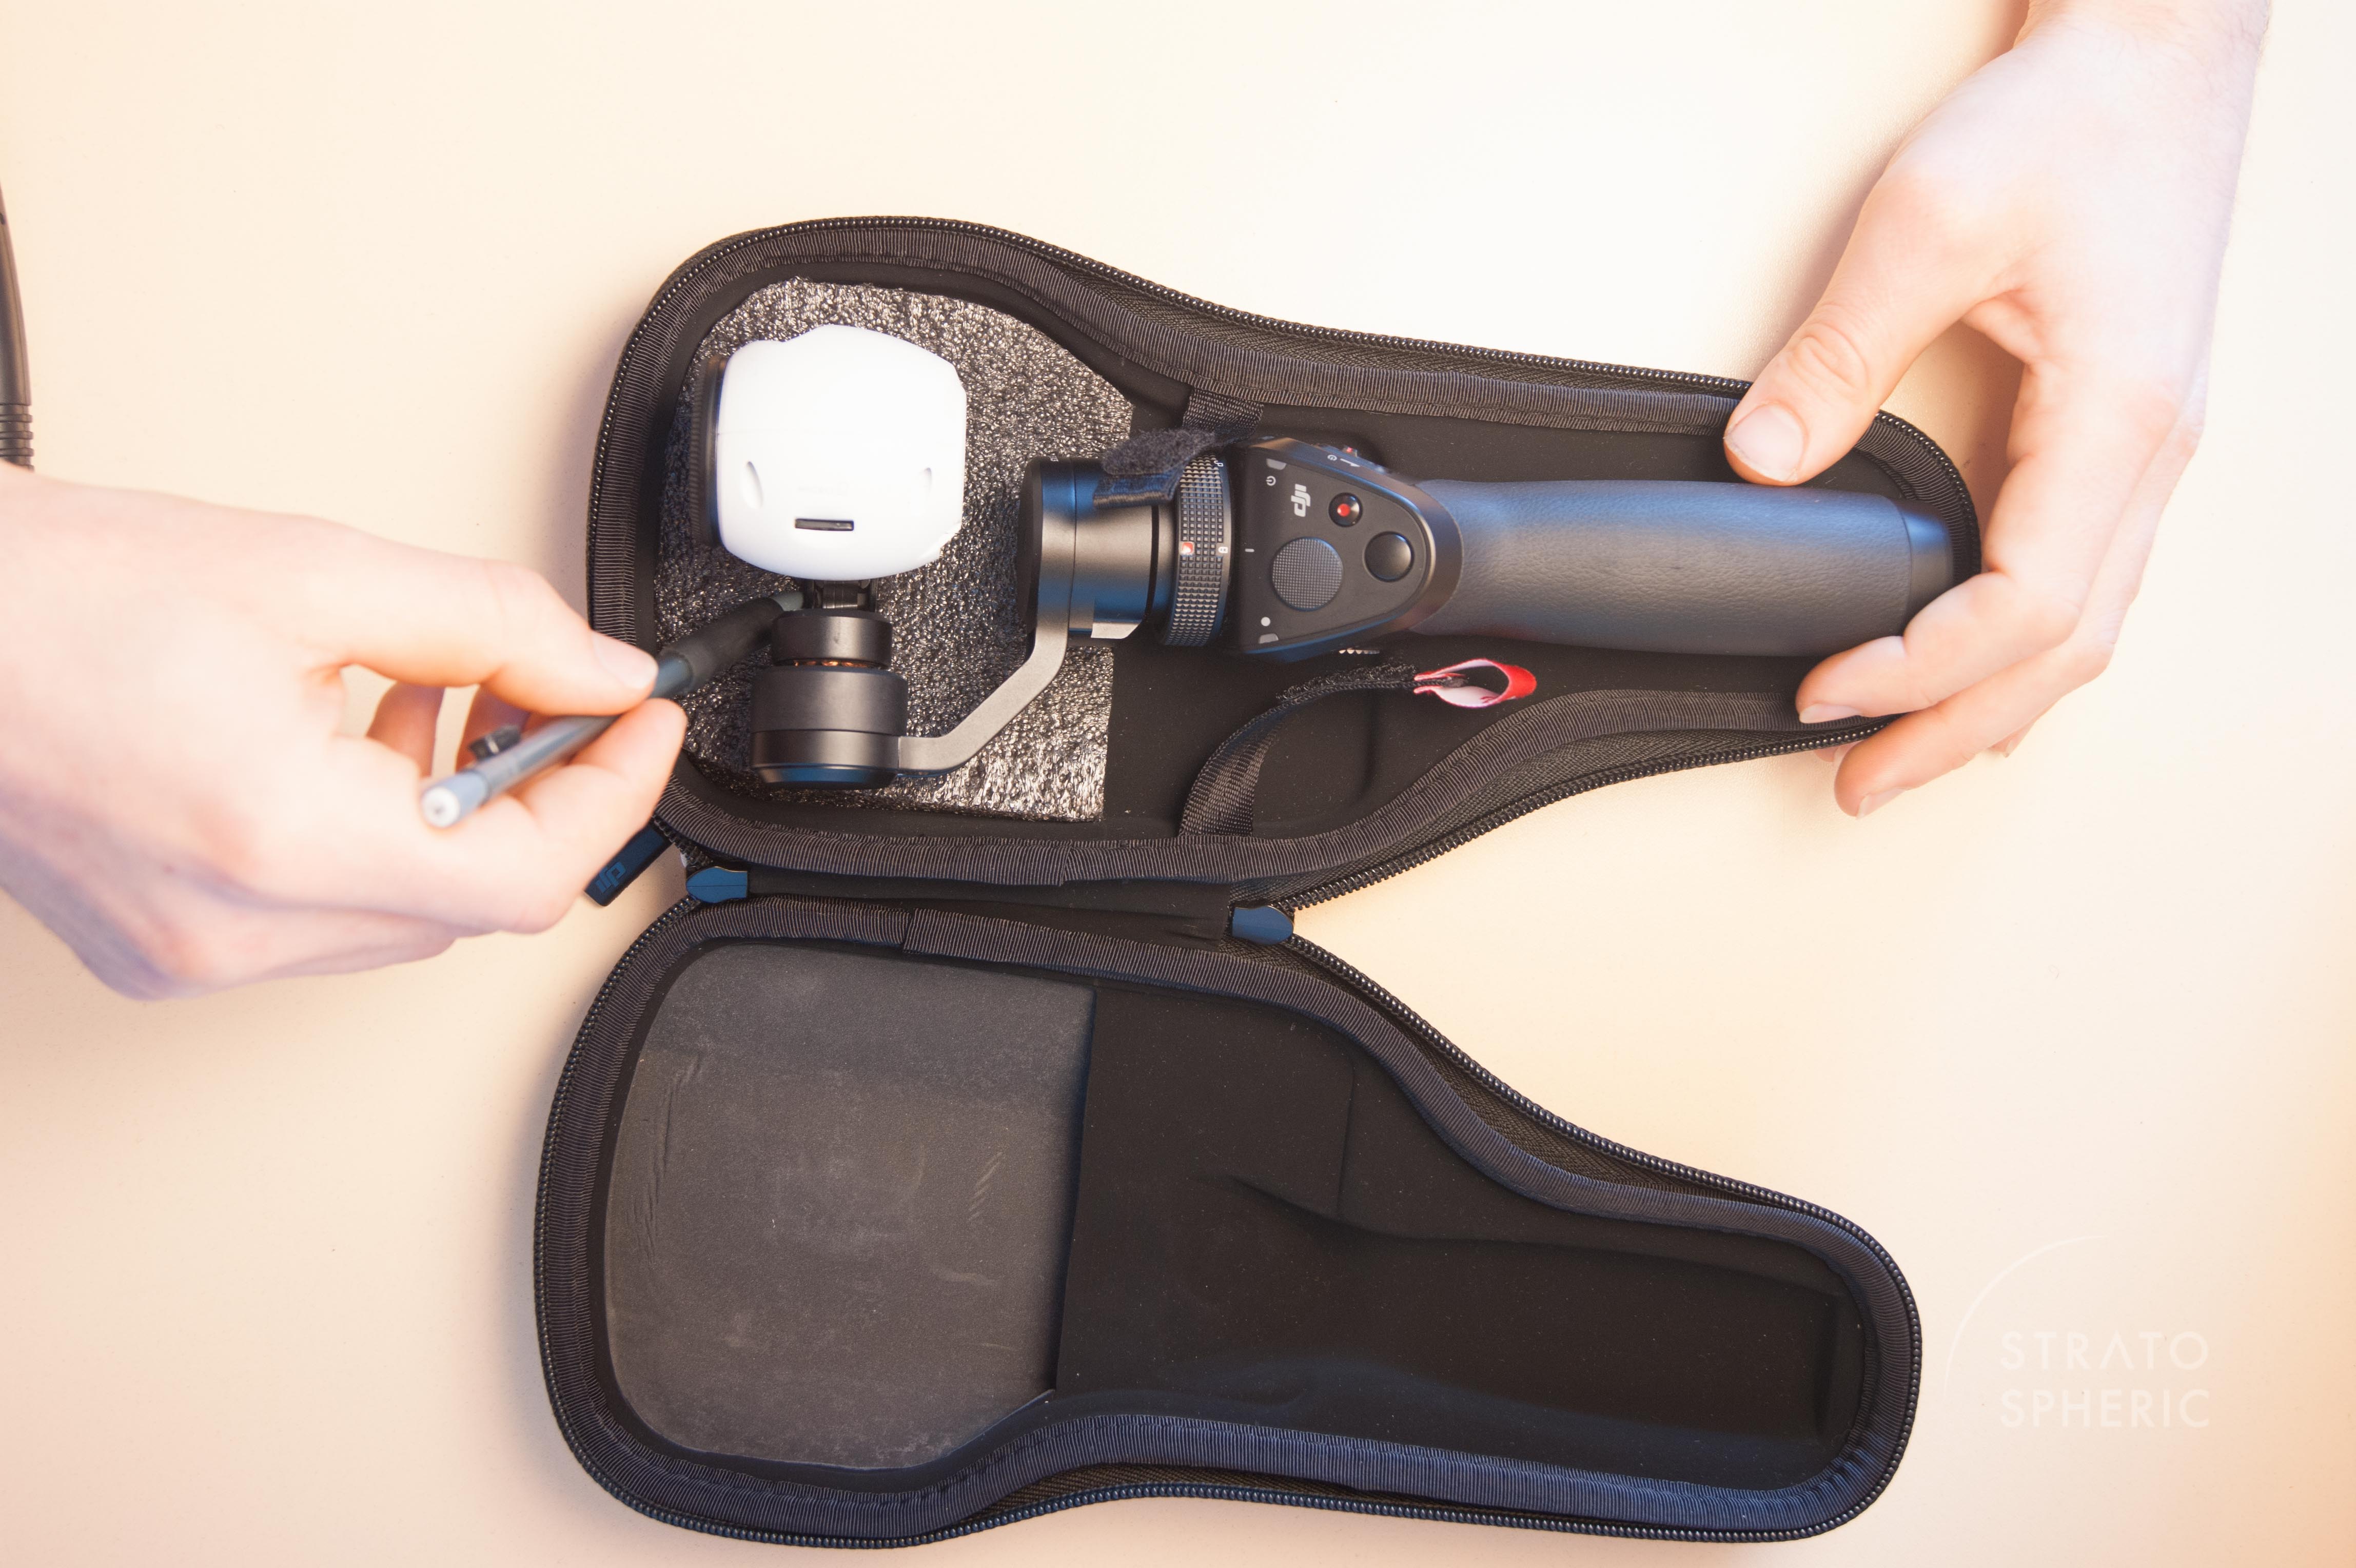
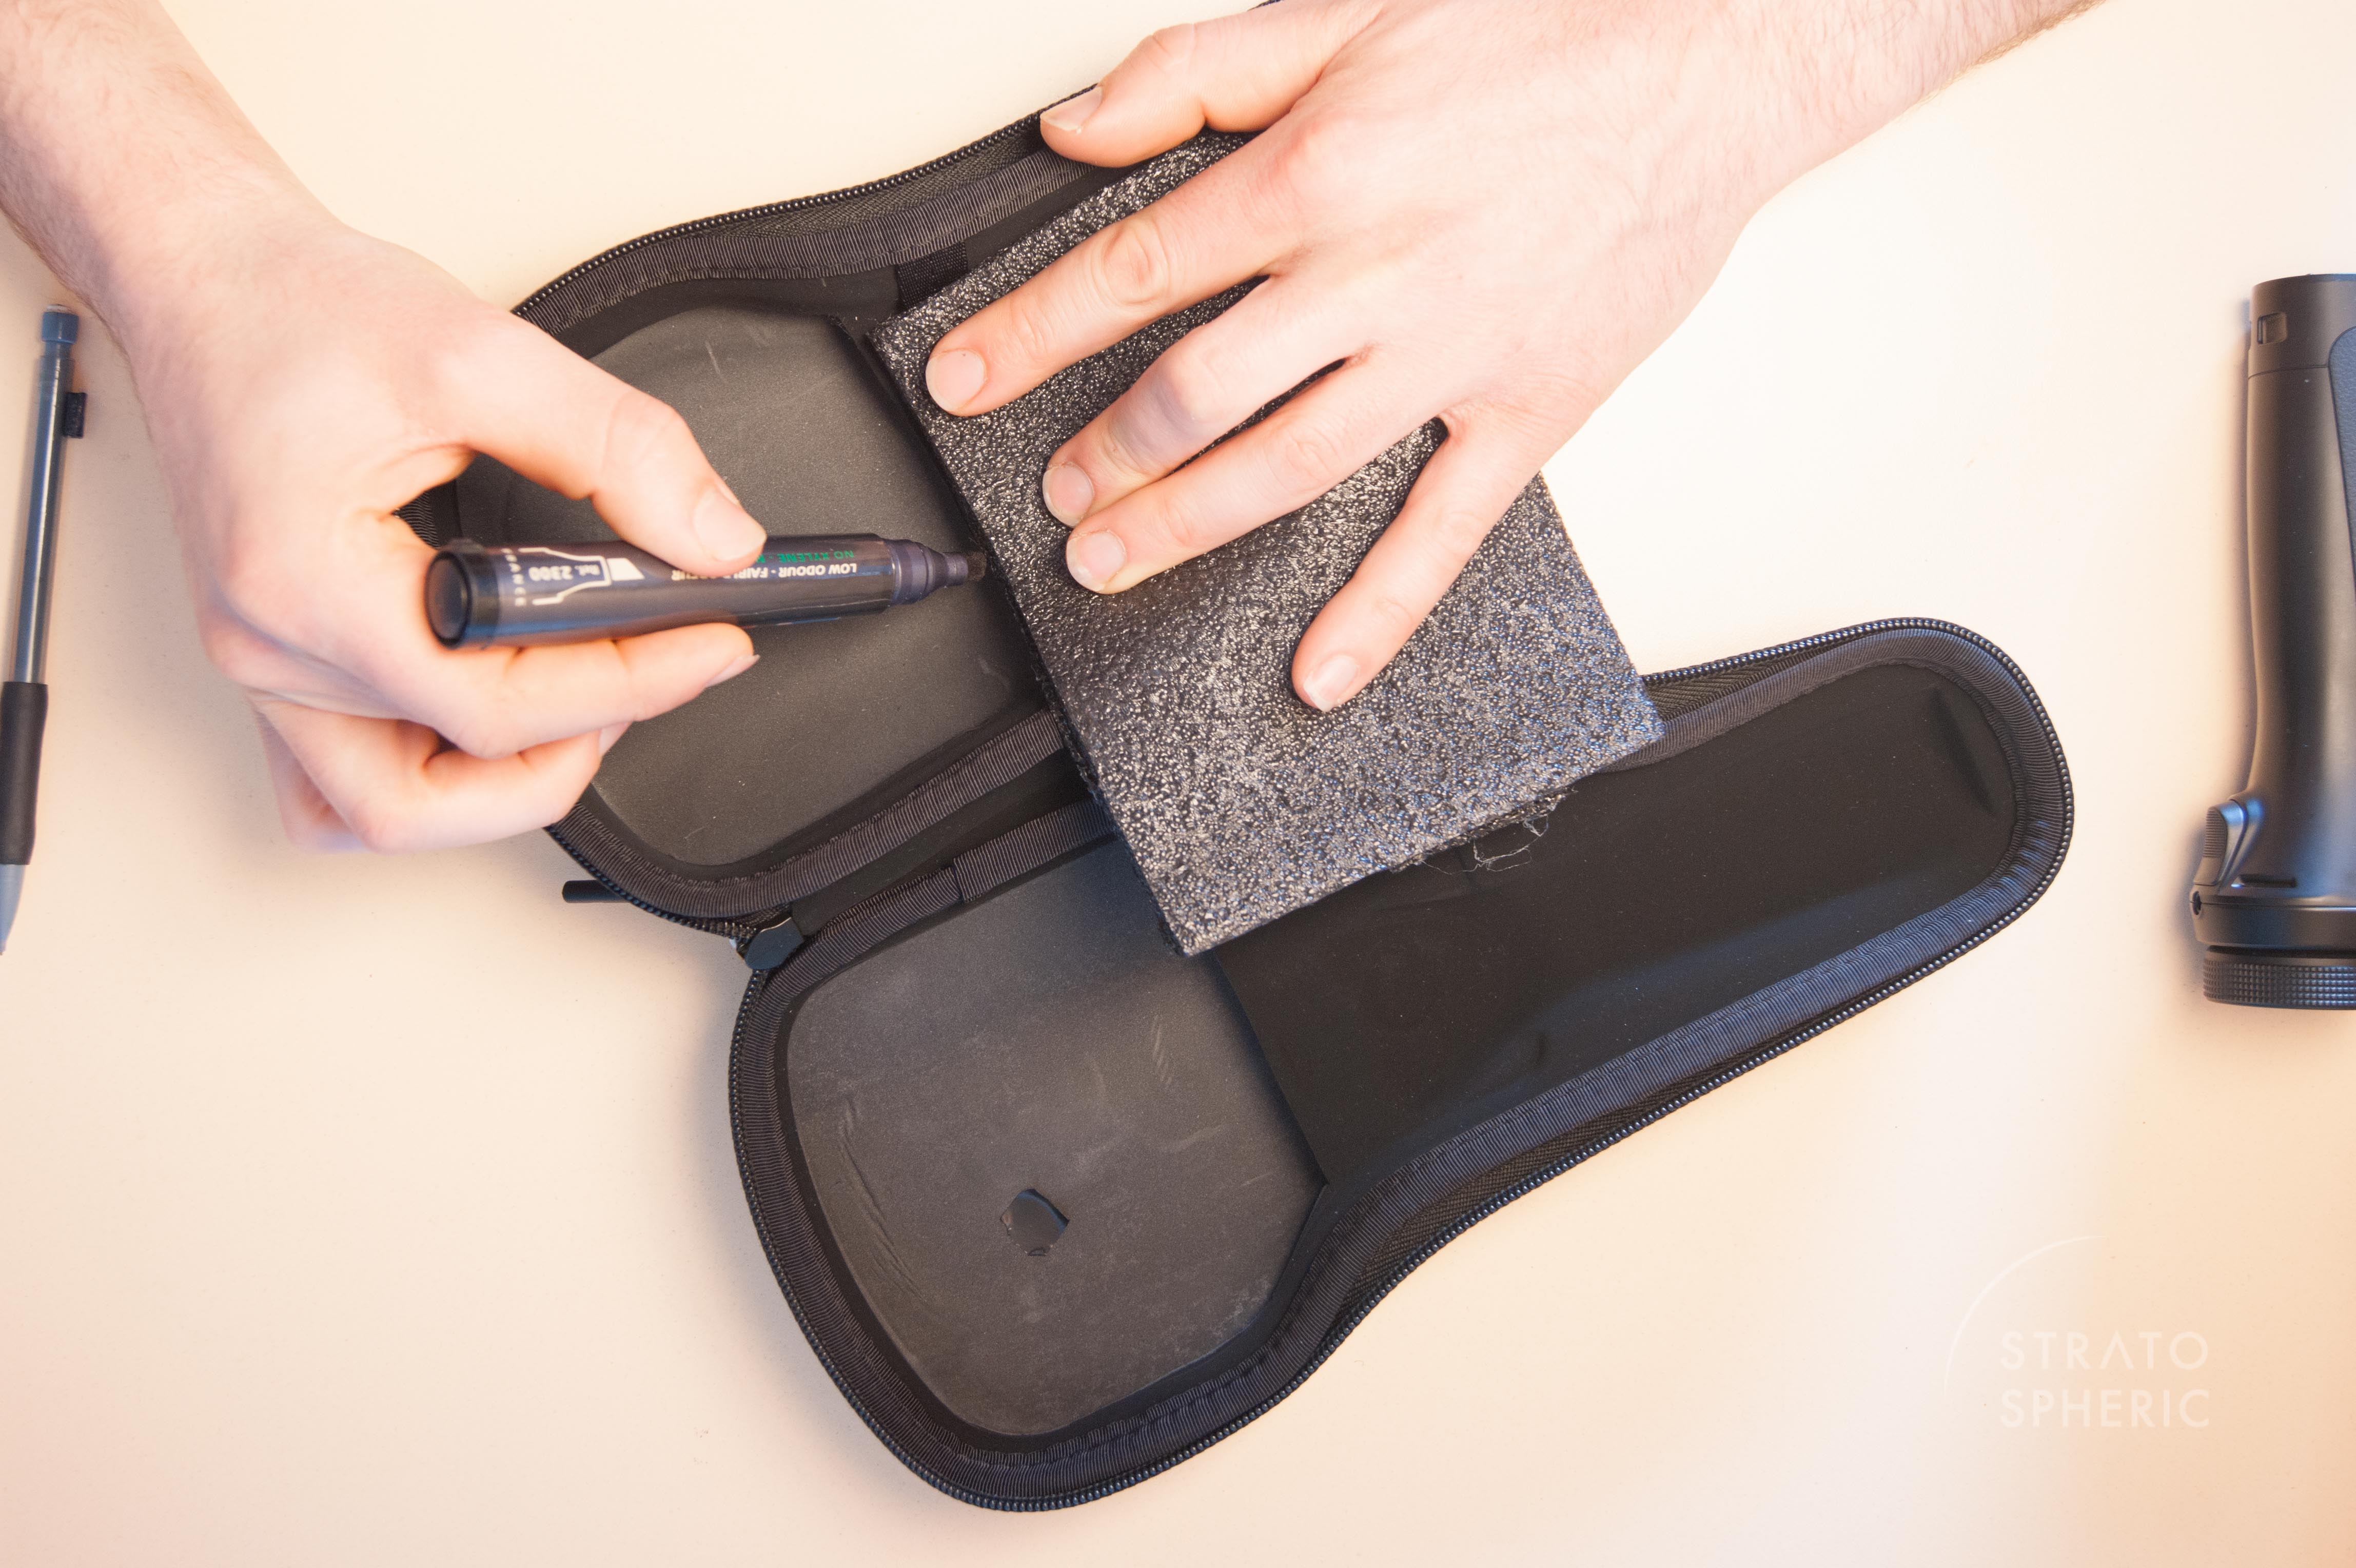
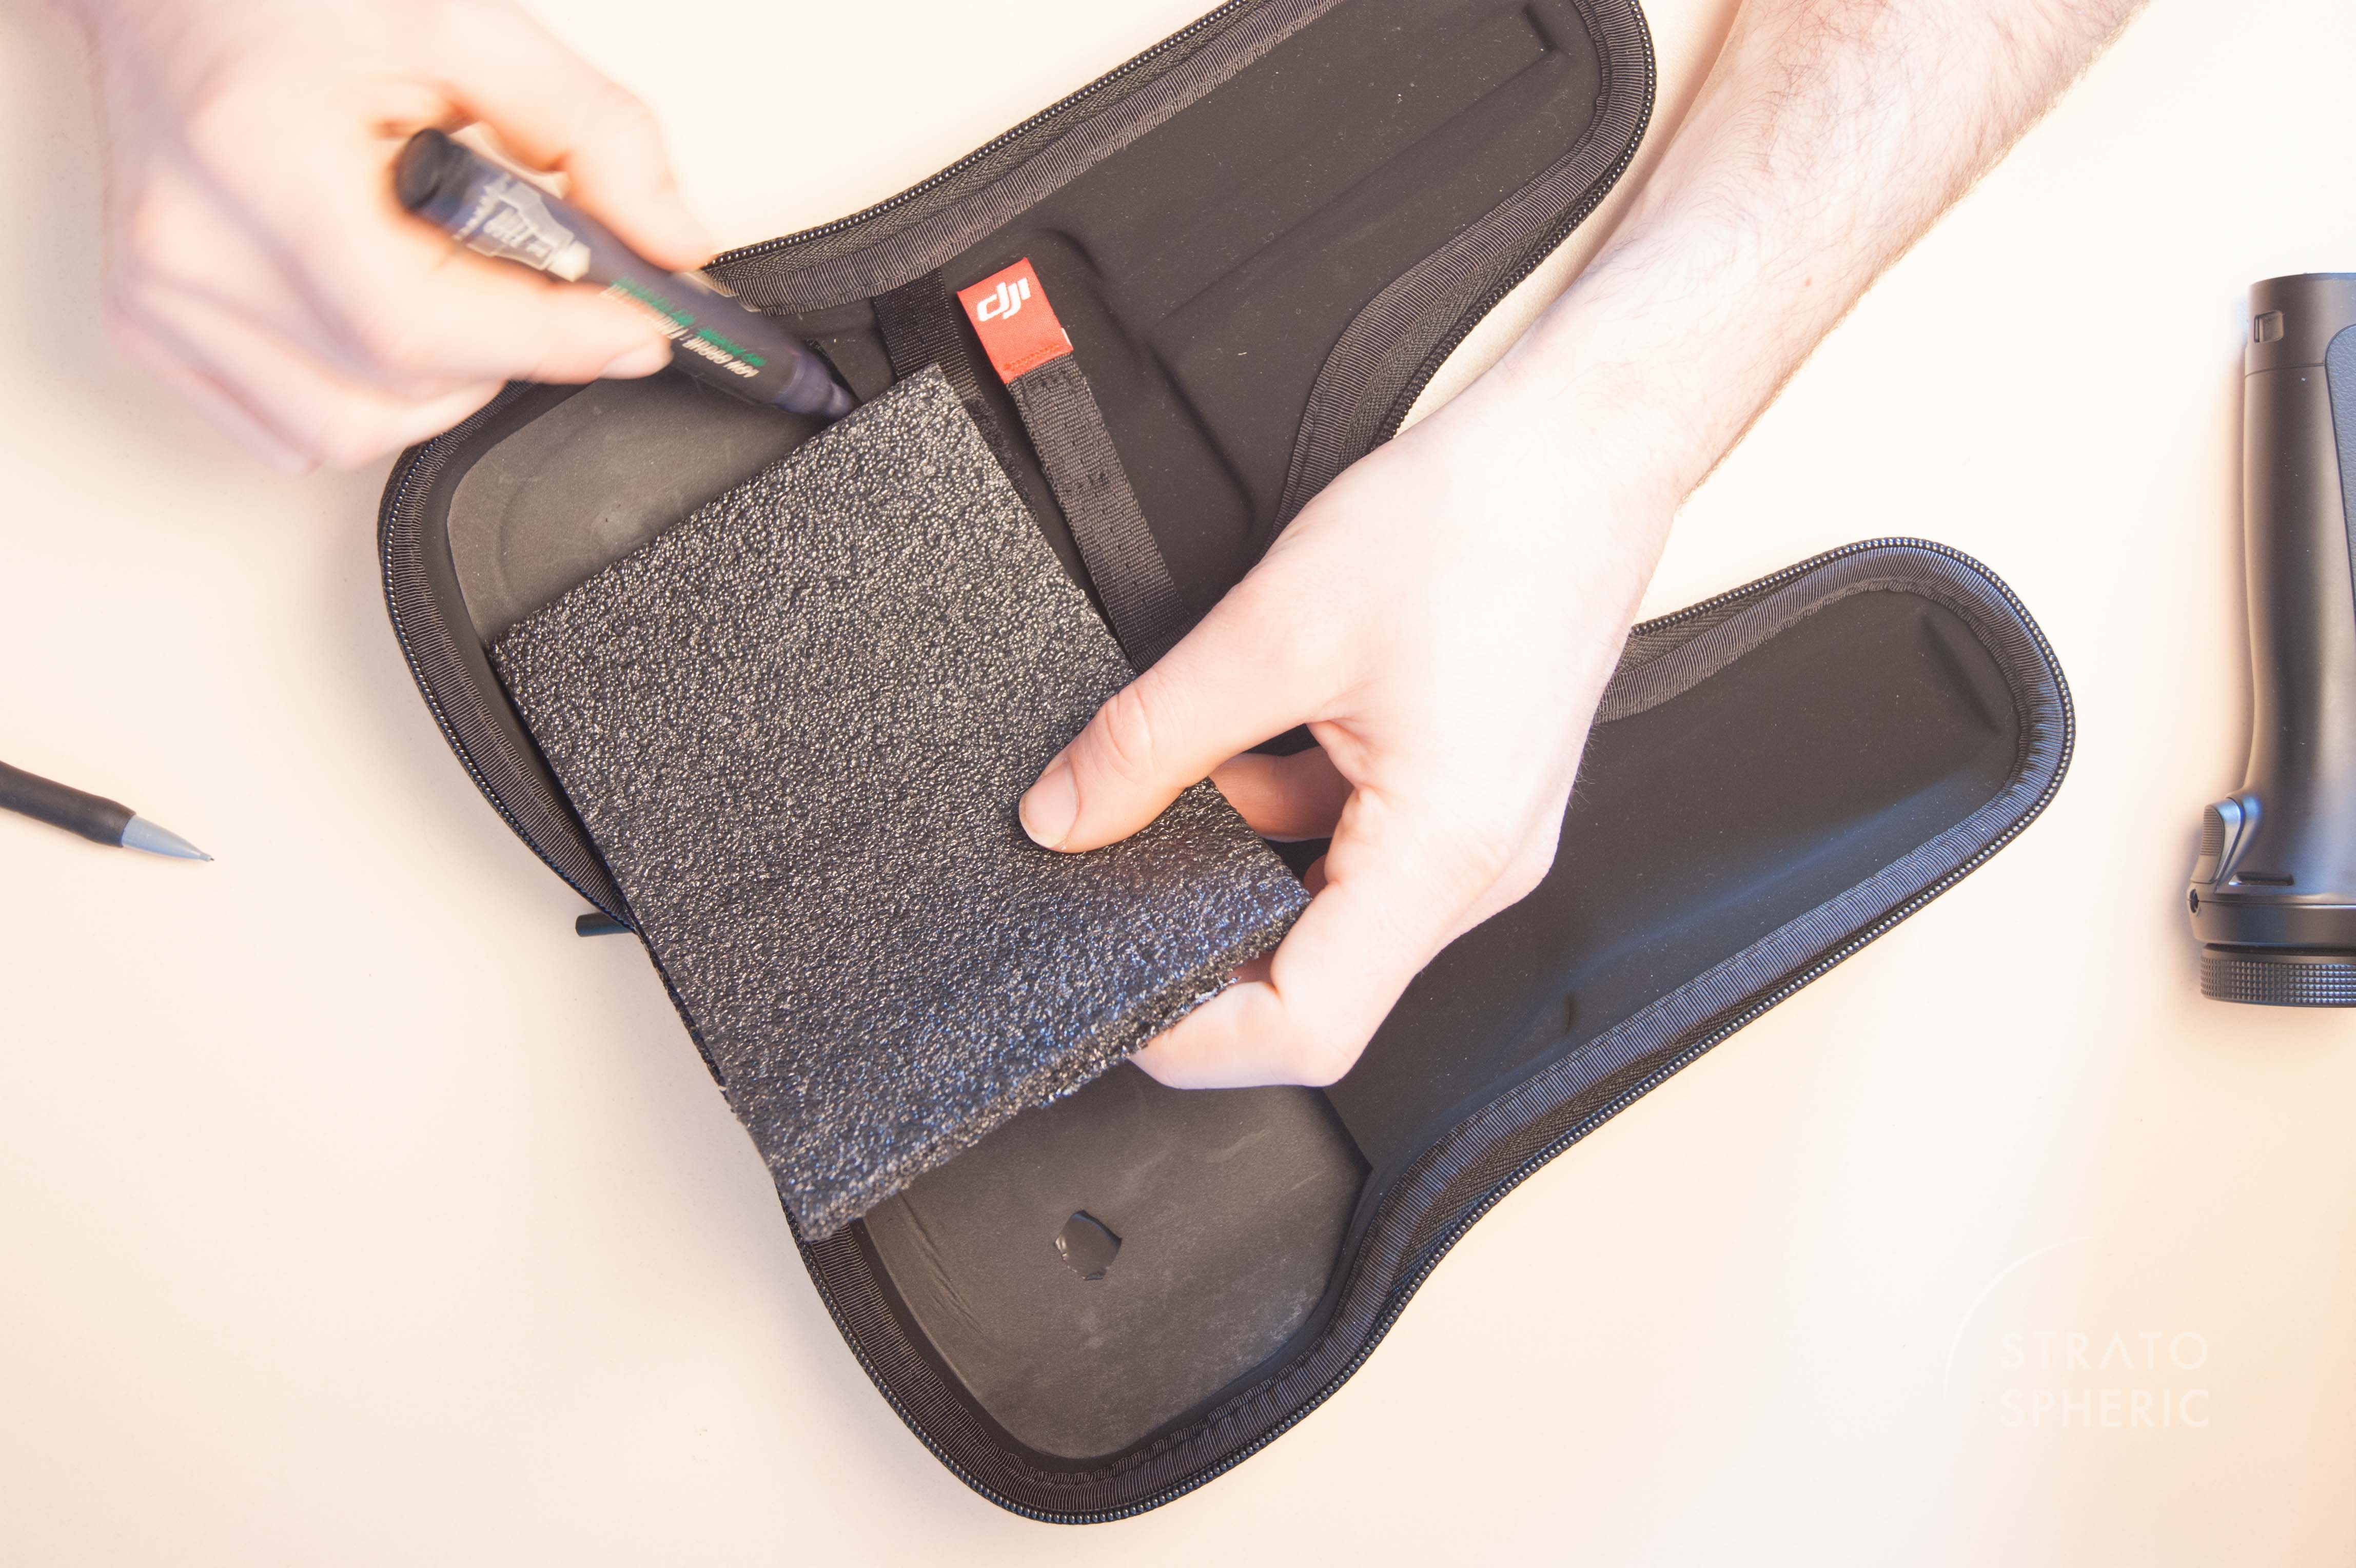
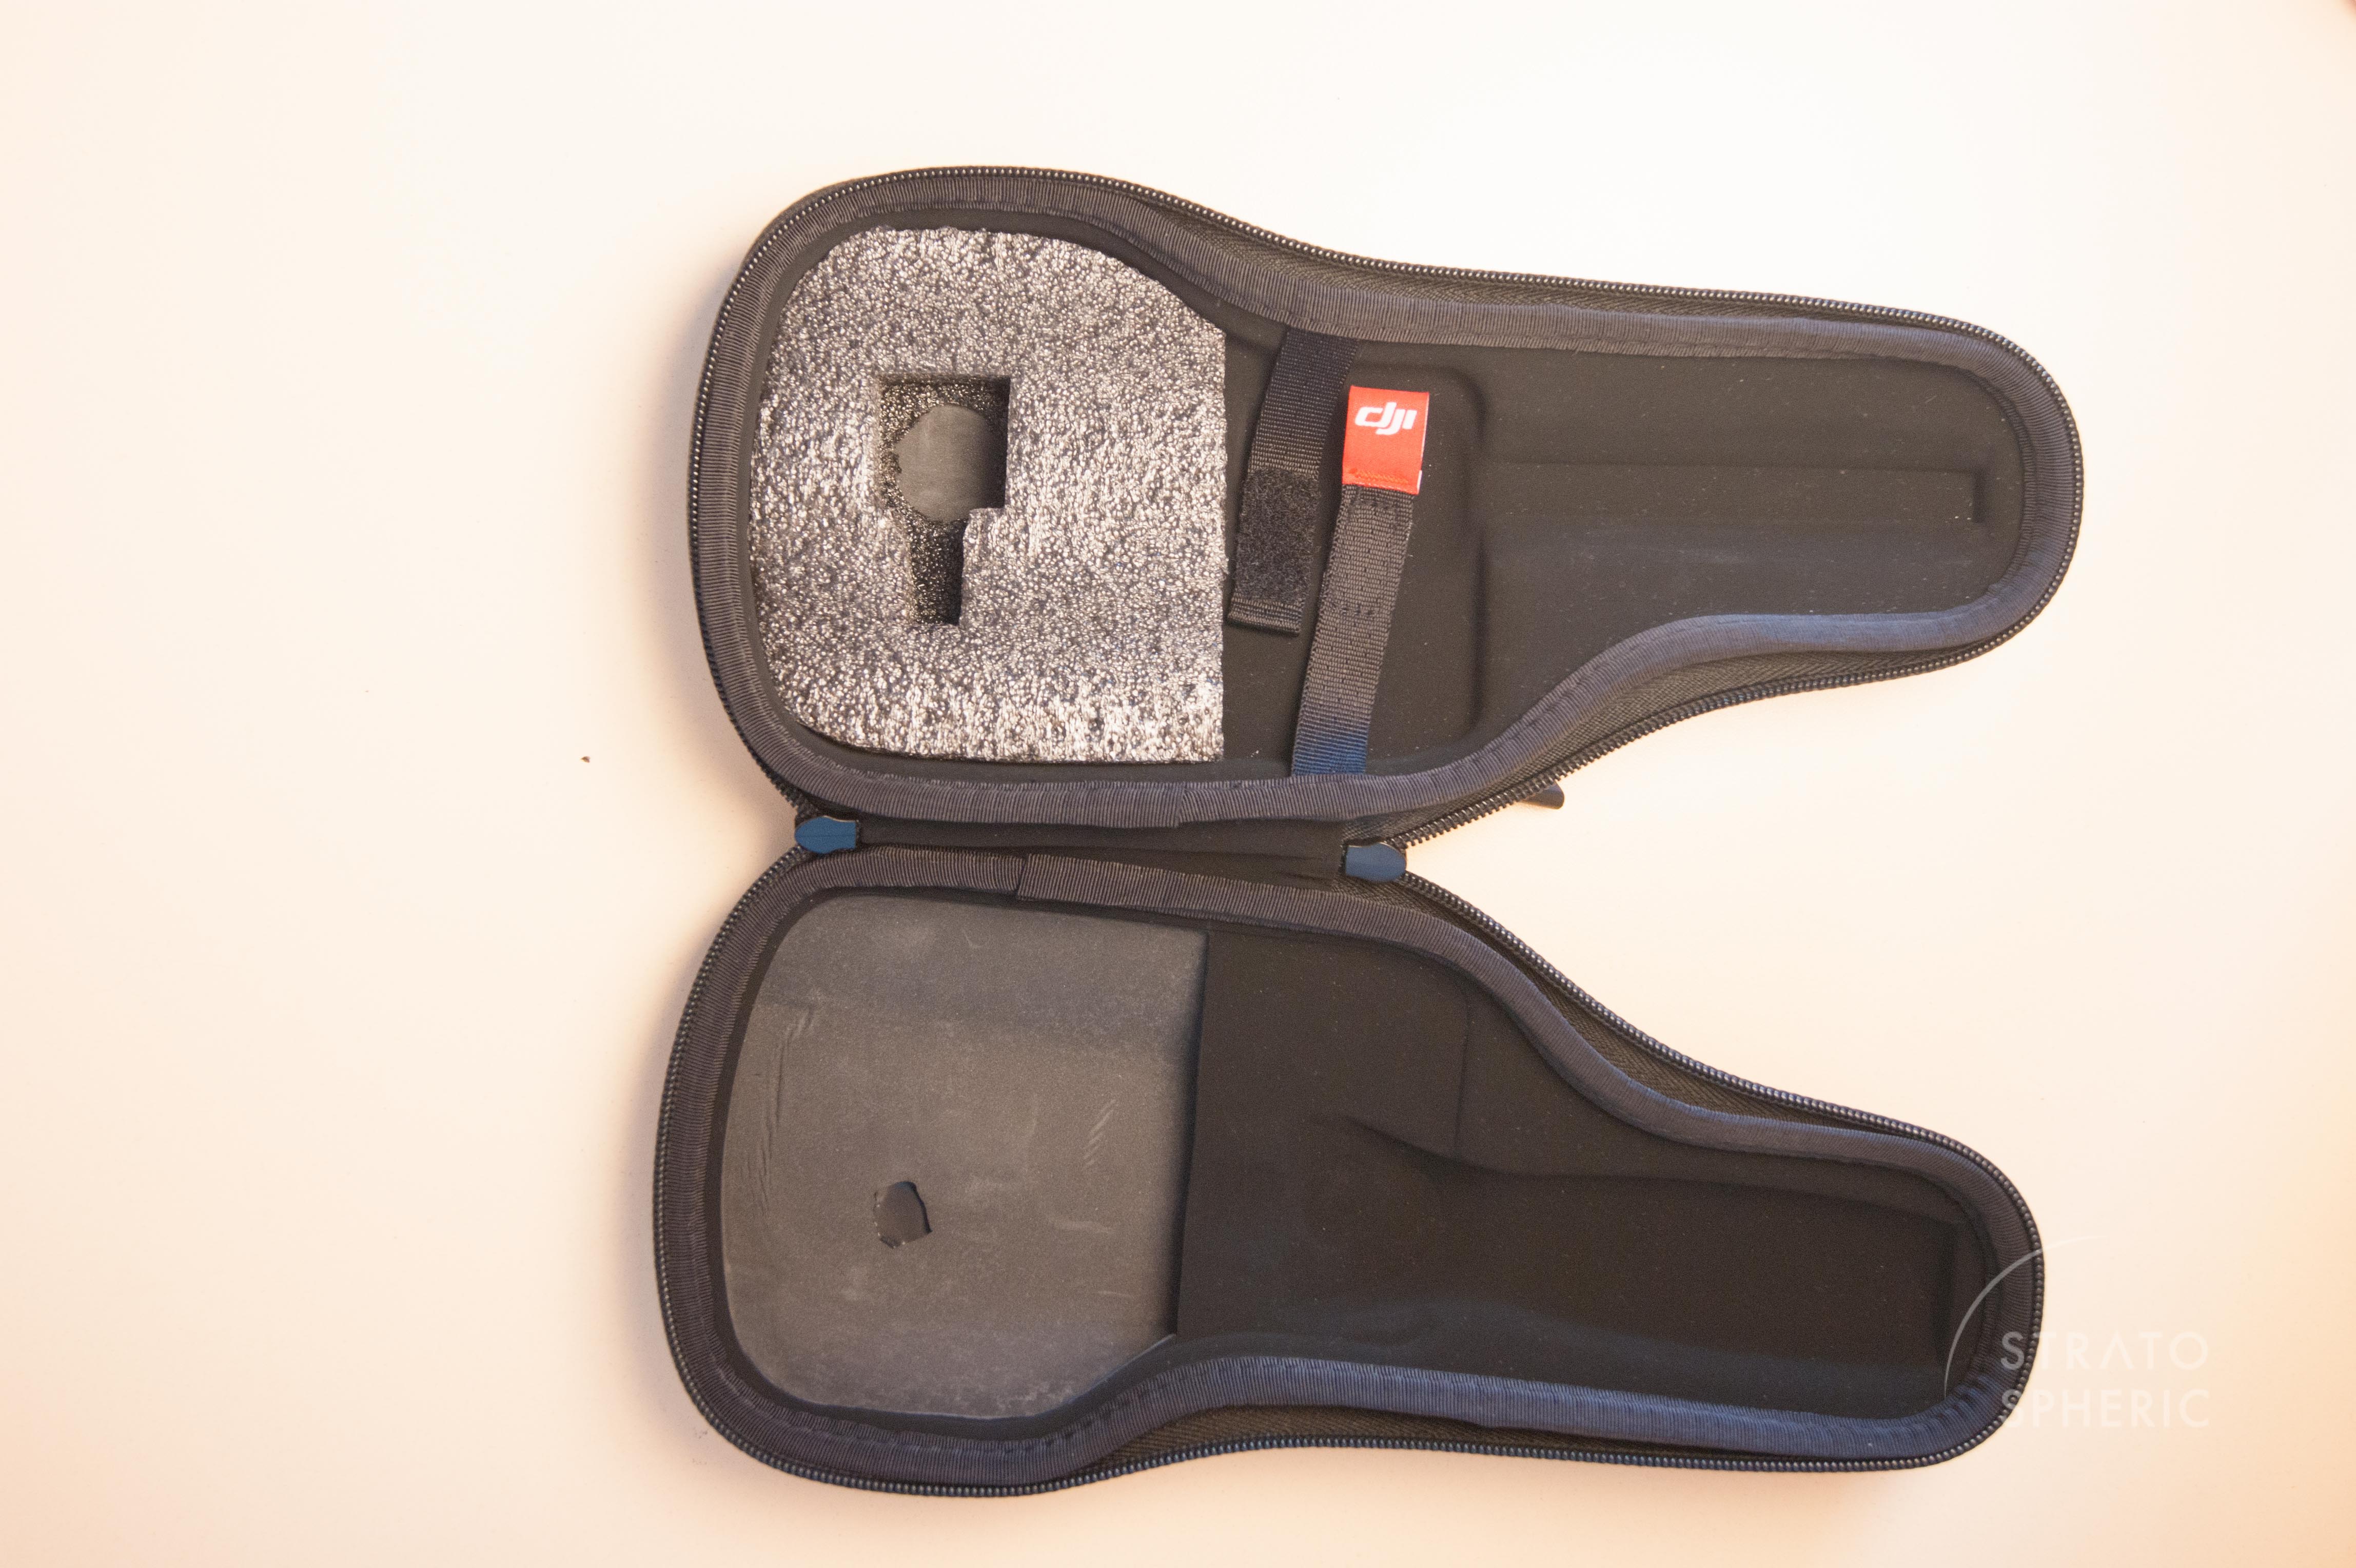
1. I used a plastic card & pencil to mark a straight line on the bottom section of the case about half a cm above the upper edge of the slot where the top end of the OSMO handle (the lock/unlock ring) usually sits.
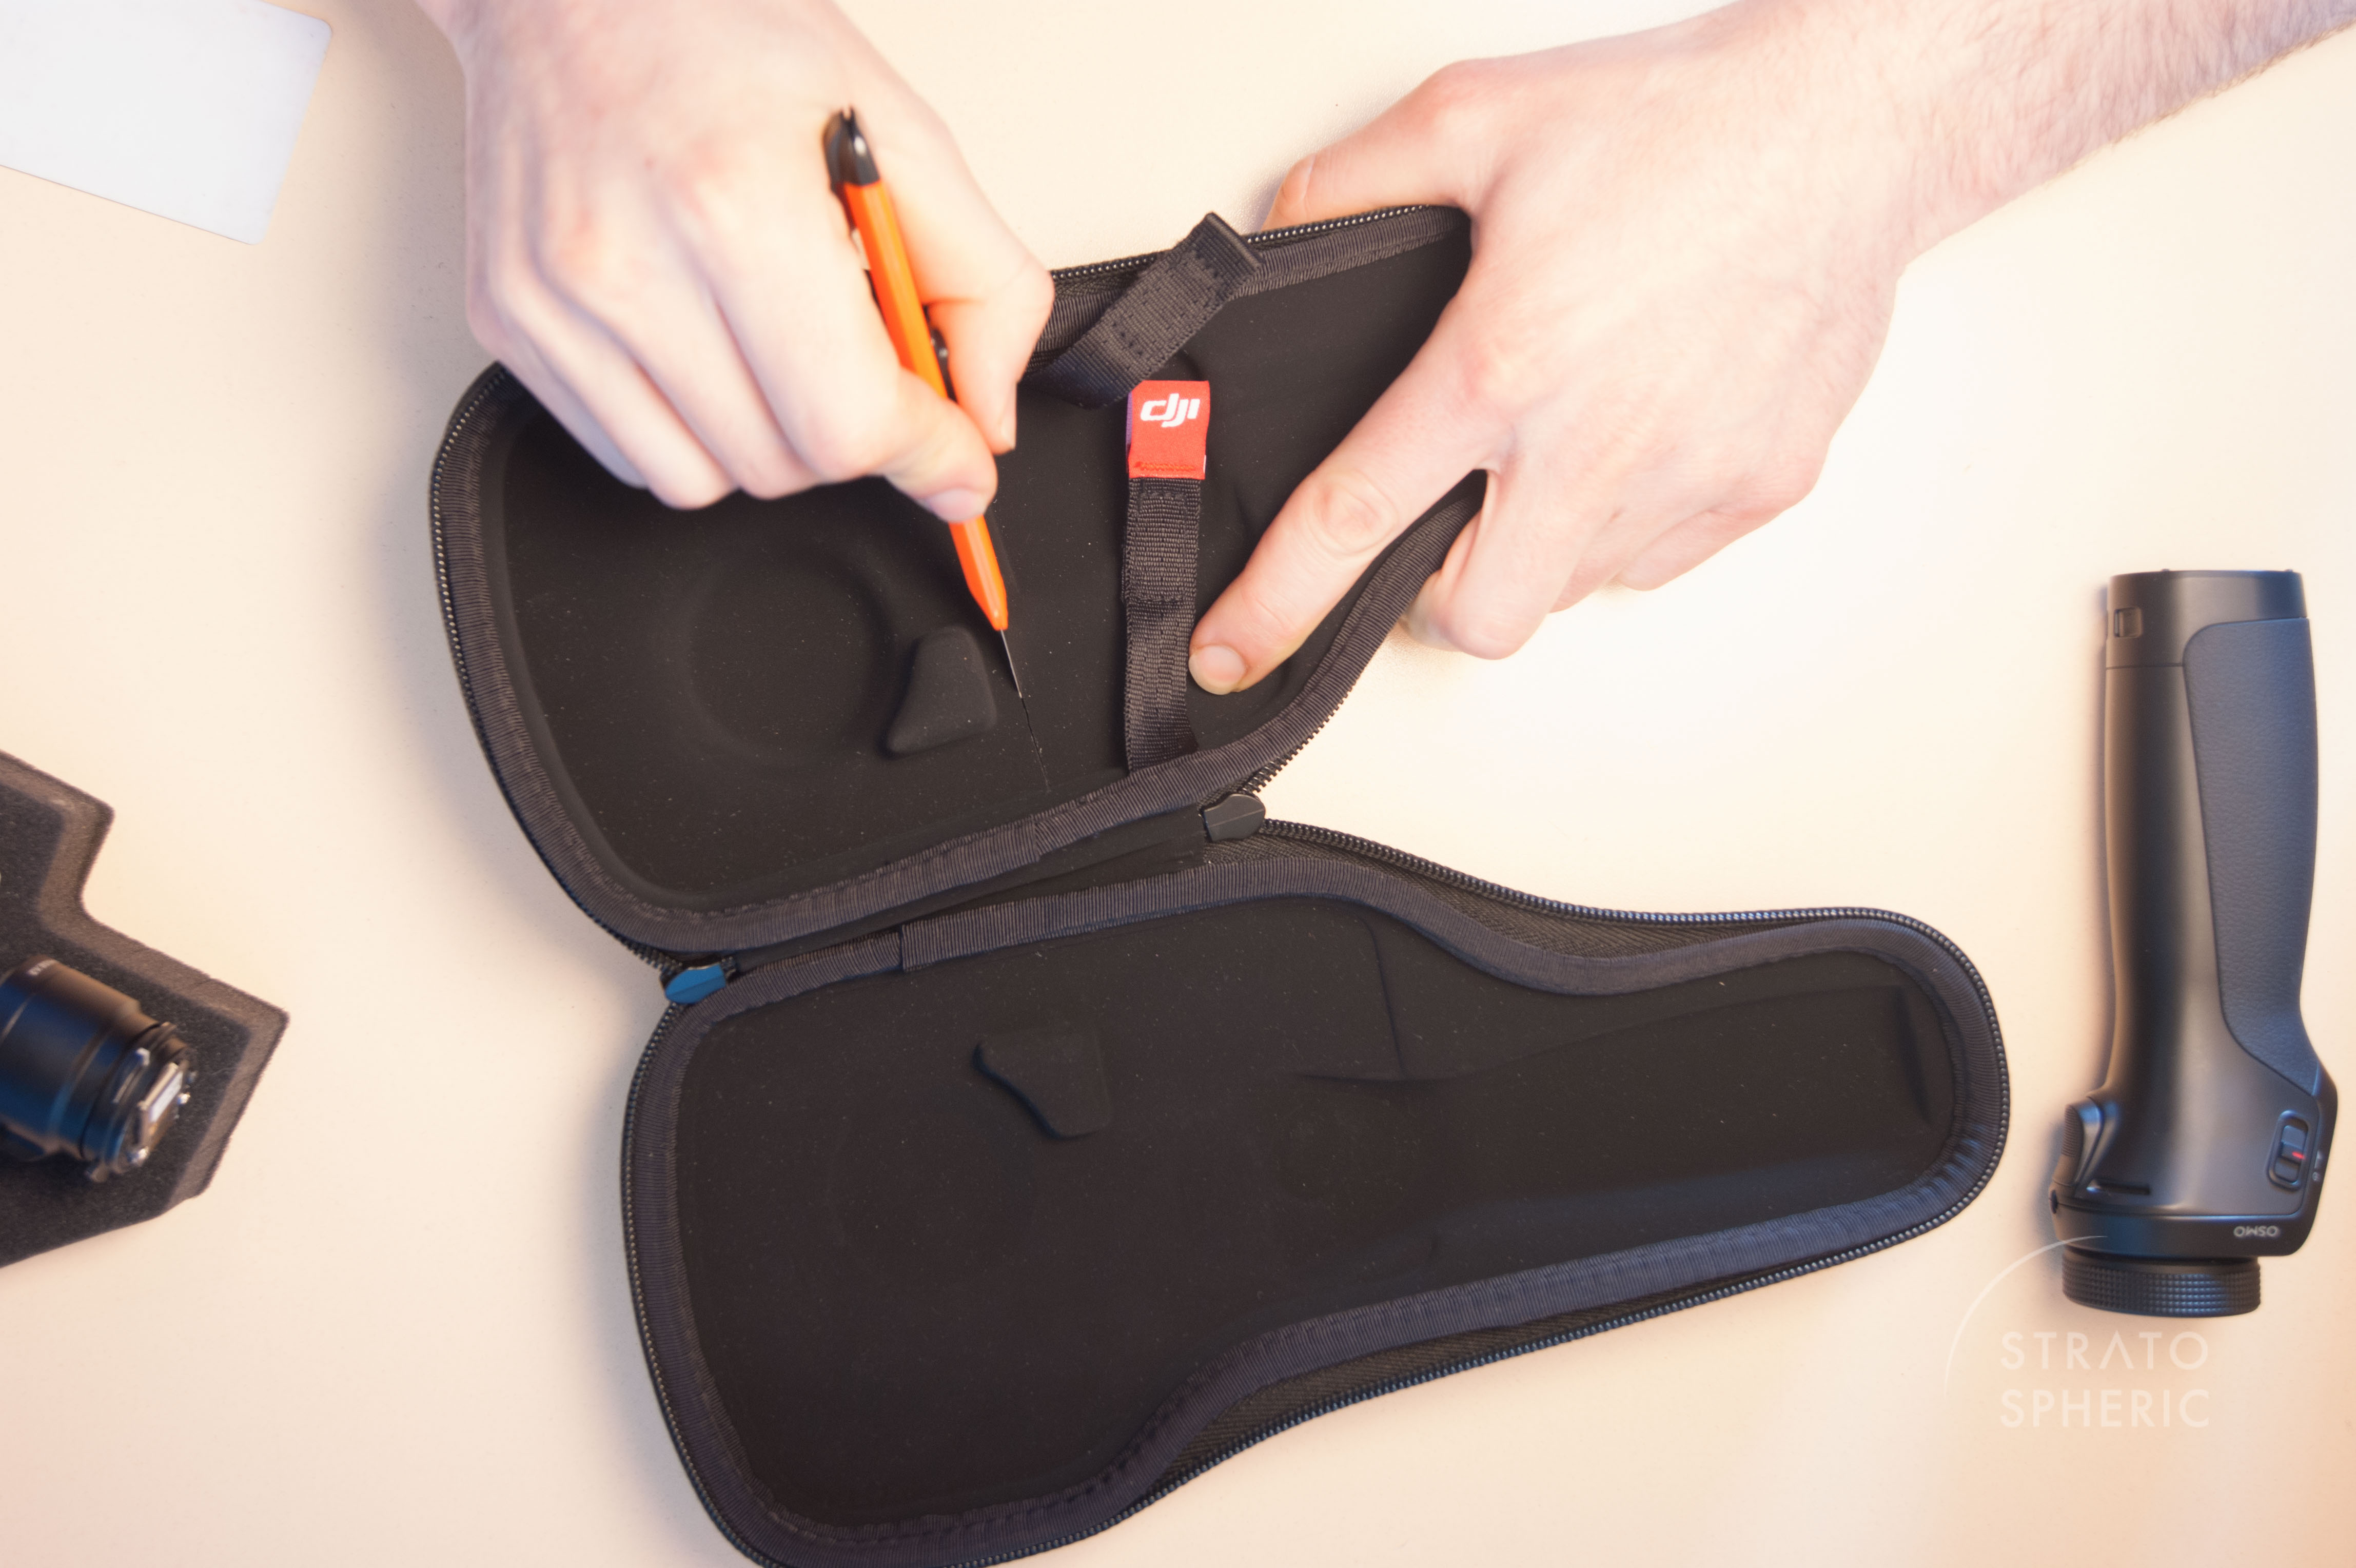
2. I used a trimming knife to carefully cut the inner lining along the straight line and around the lower edges of the part of the inner lining where the OSMO gimbal usually sits. Remove the piece you cut out.
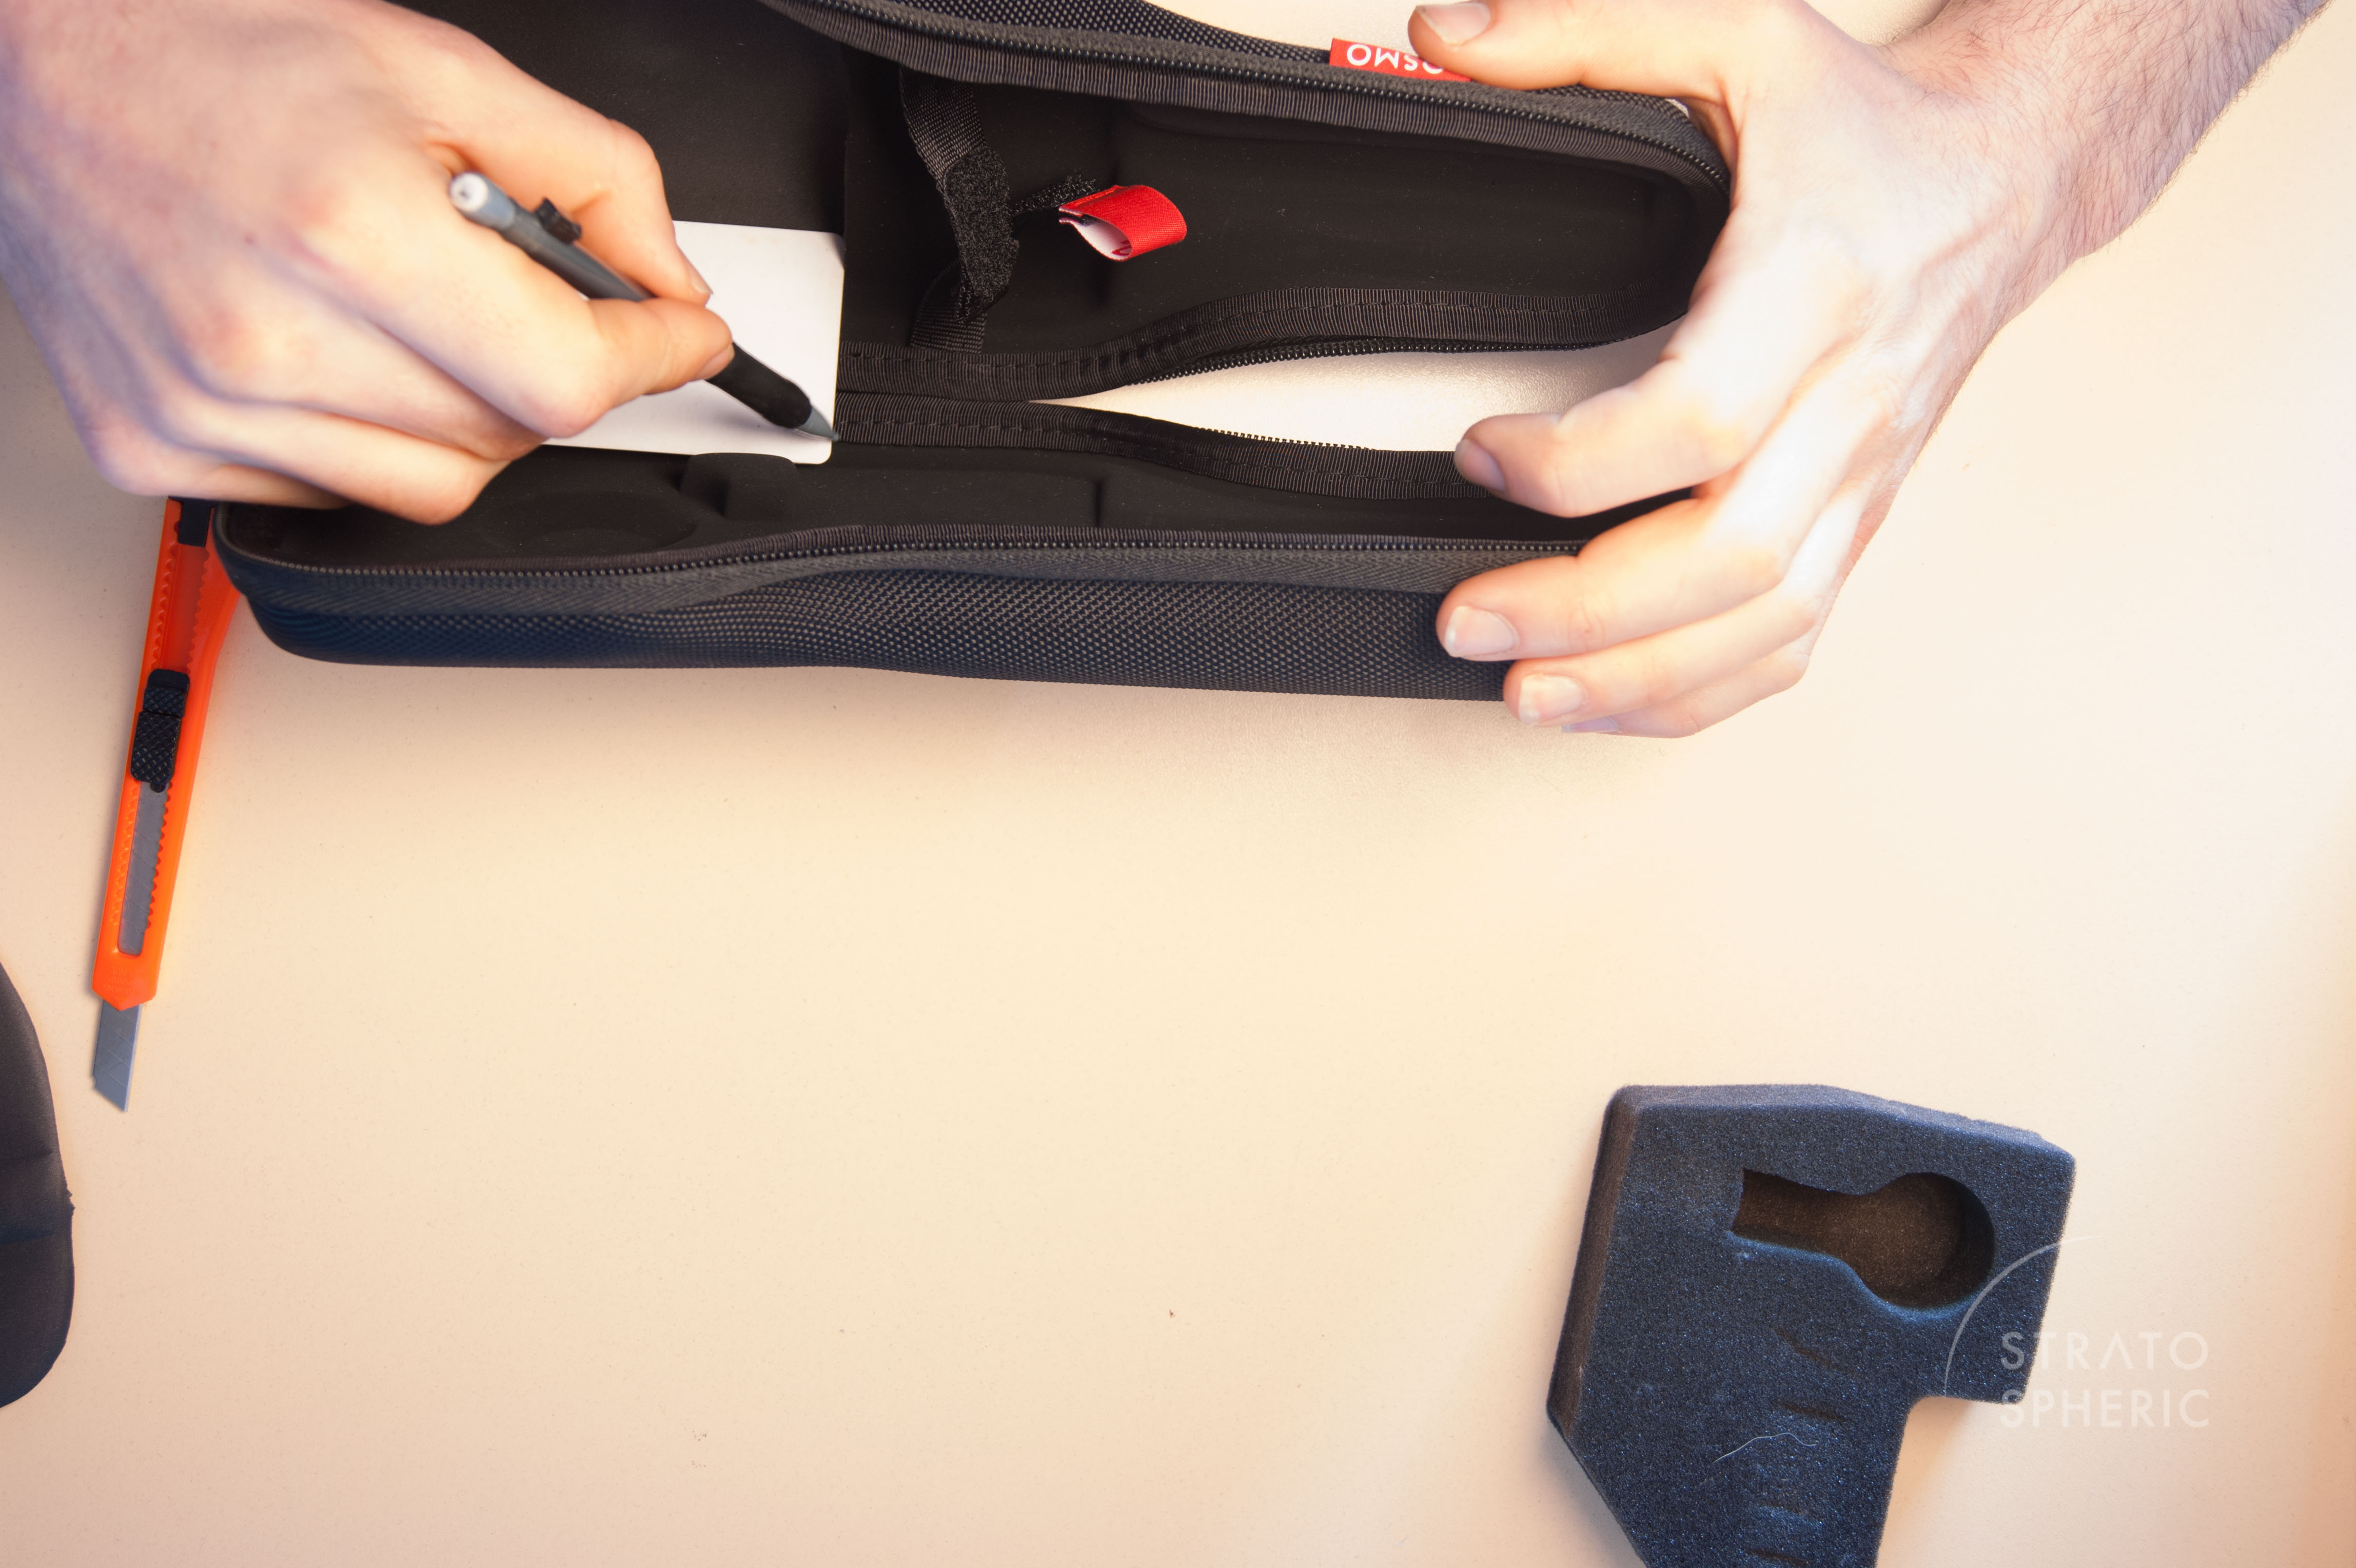
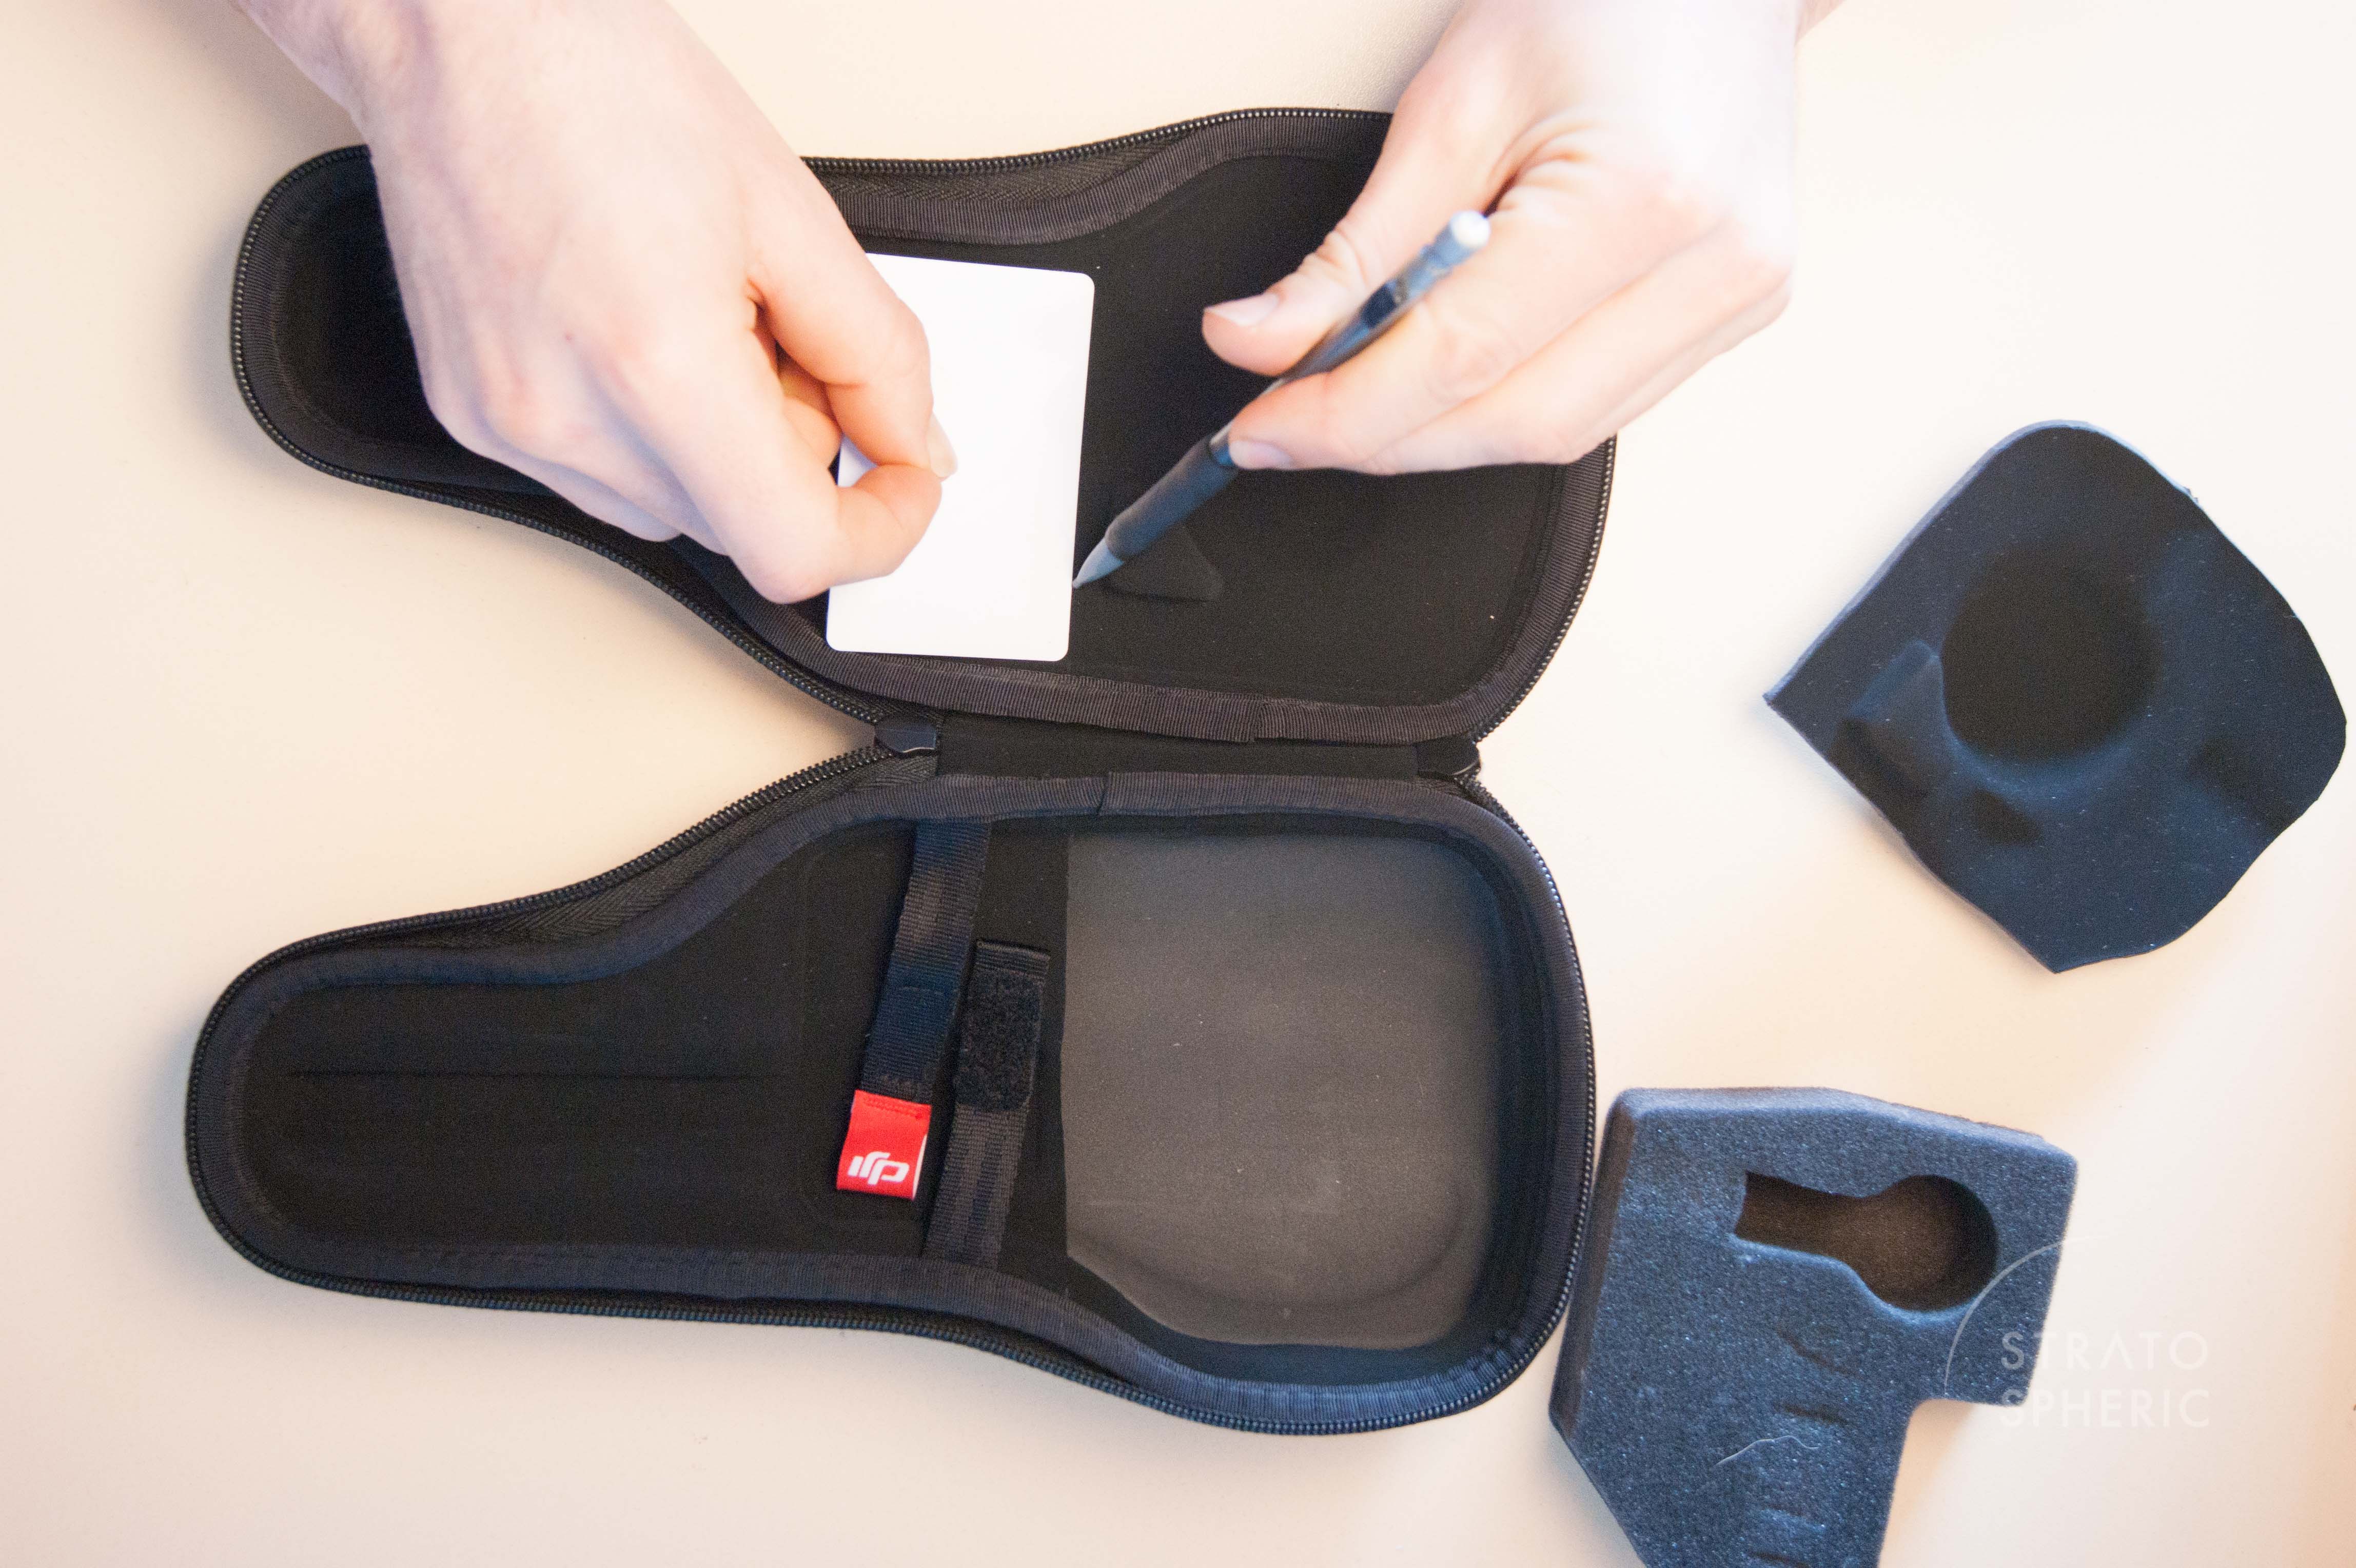
3. I used the card to mark as accurately as possible where the straight line cut should be made on the top section of the case (having the inner lining cut at approximately the same place on both the top & bottom section of the case looks better)
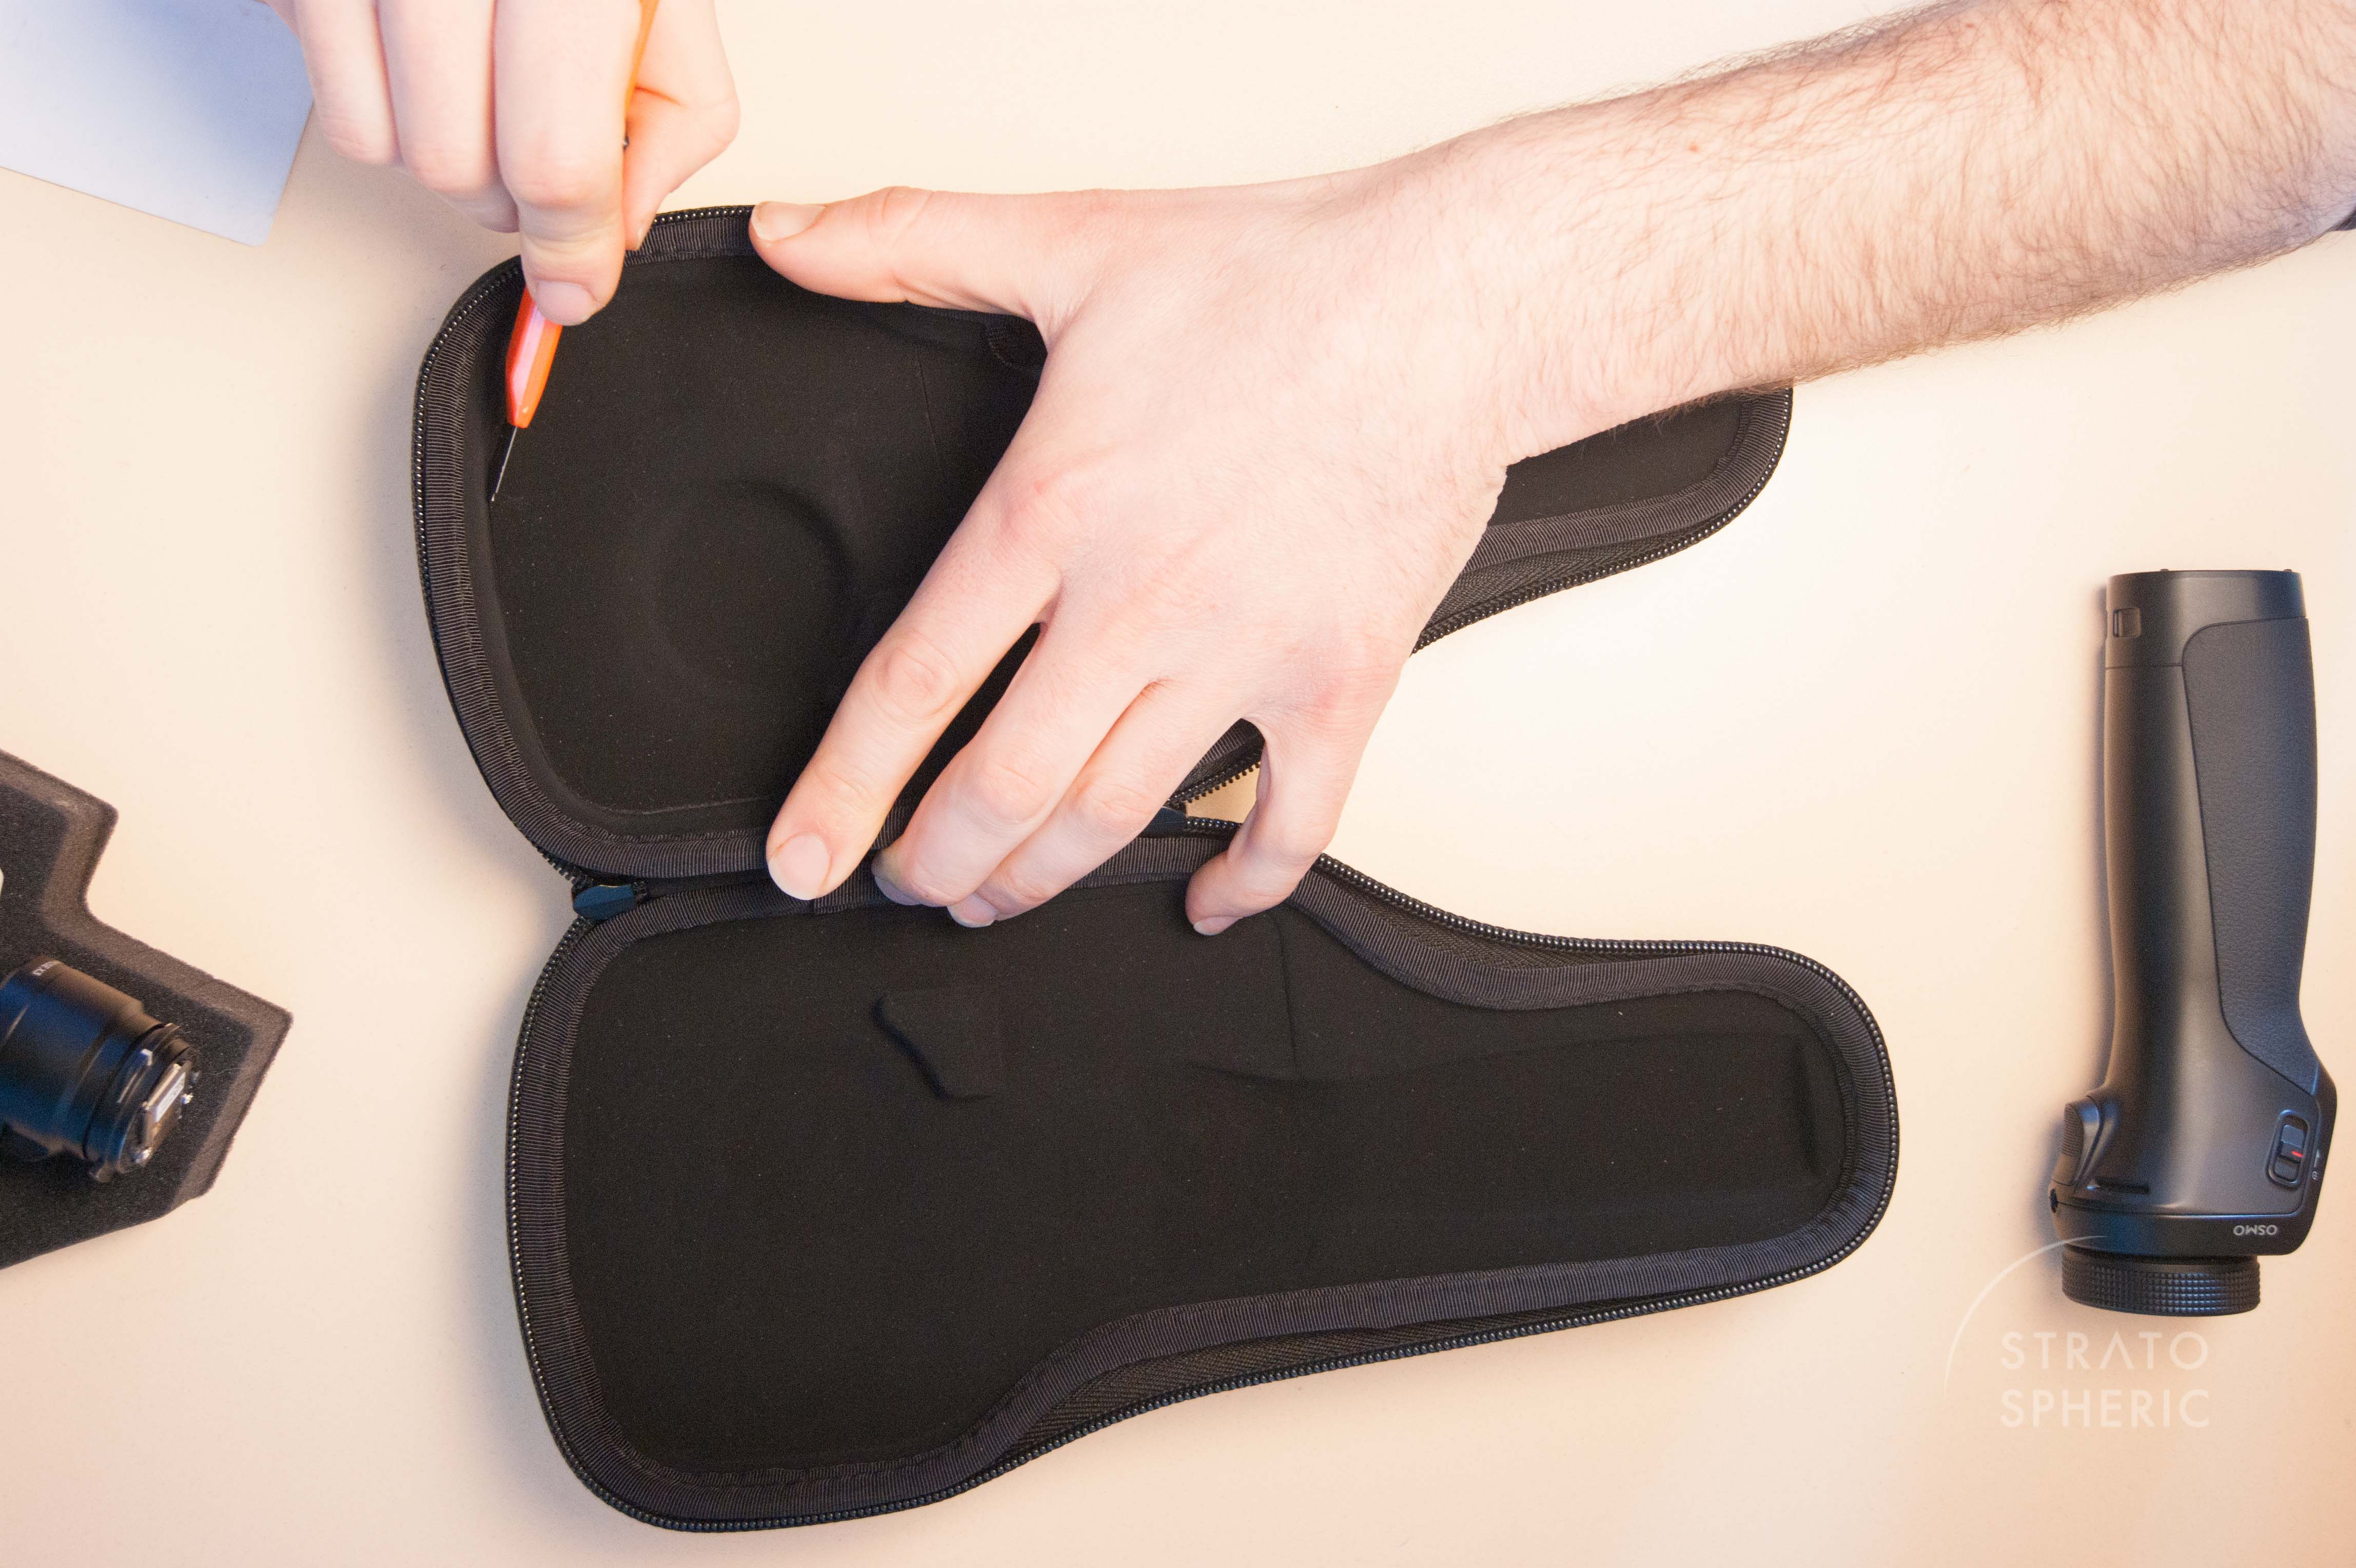
4. I carefully cut the inner lining along the straight line & along the lower edges of the top section of the case (where the gimbal usually sits) and removed the piece you cut out.
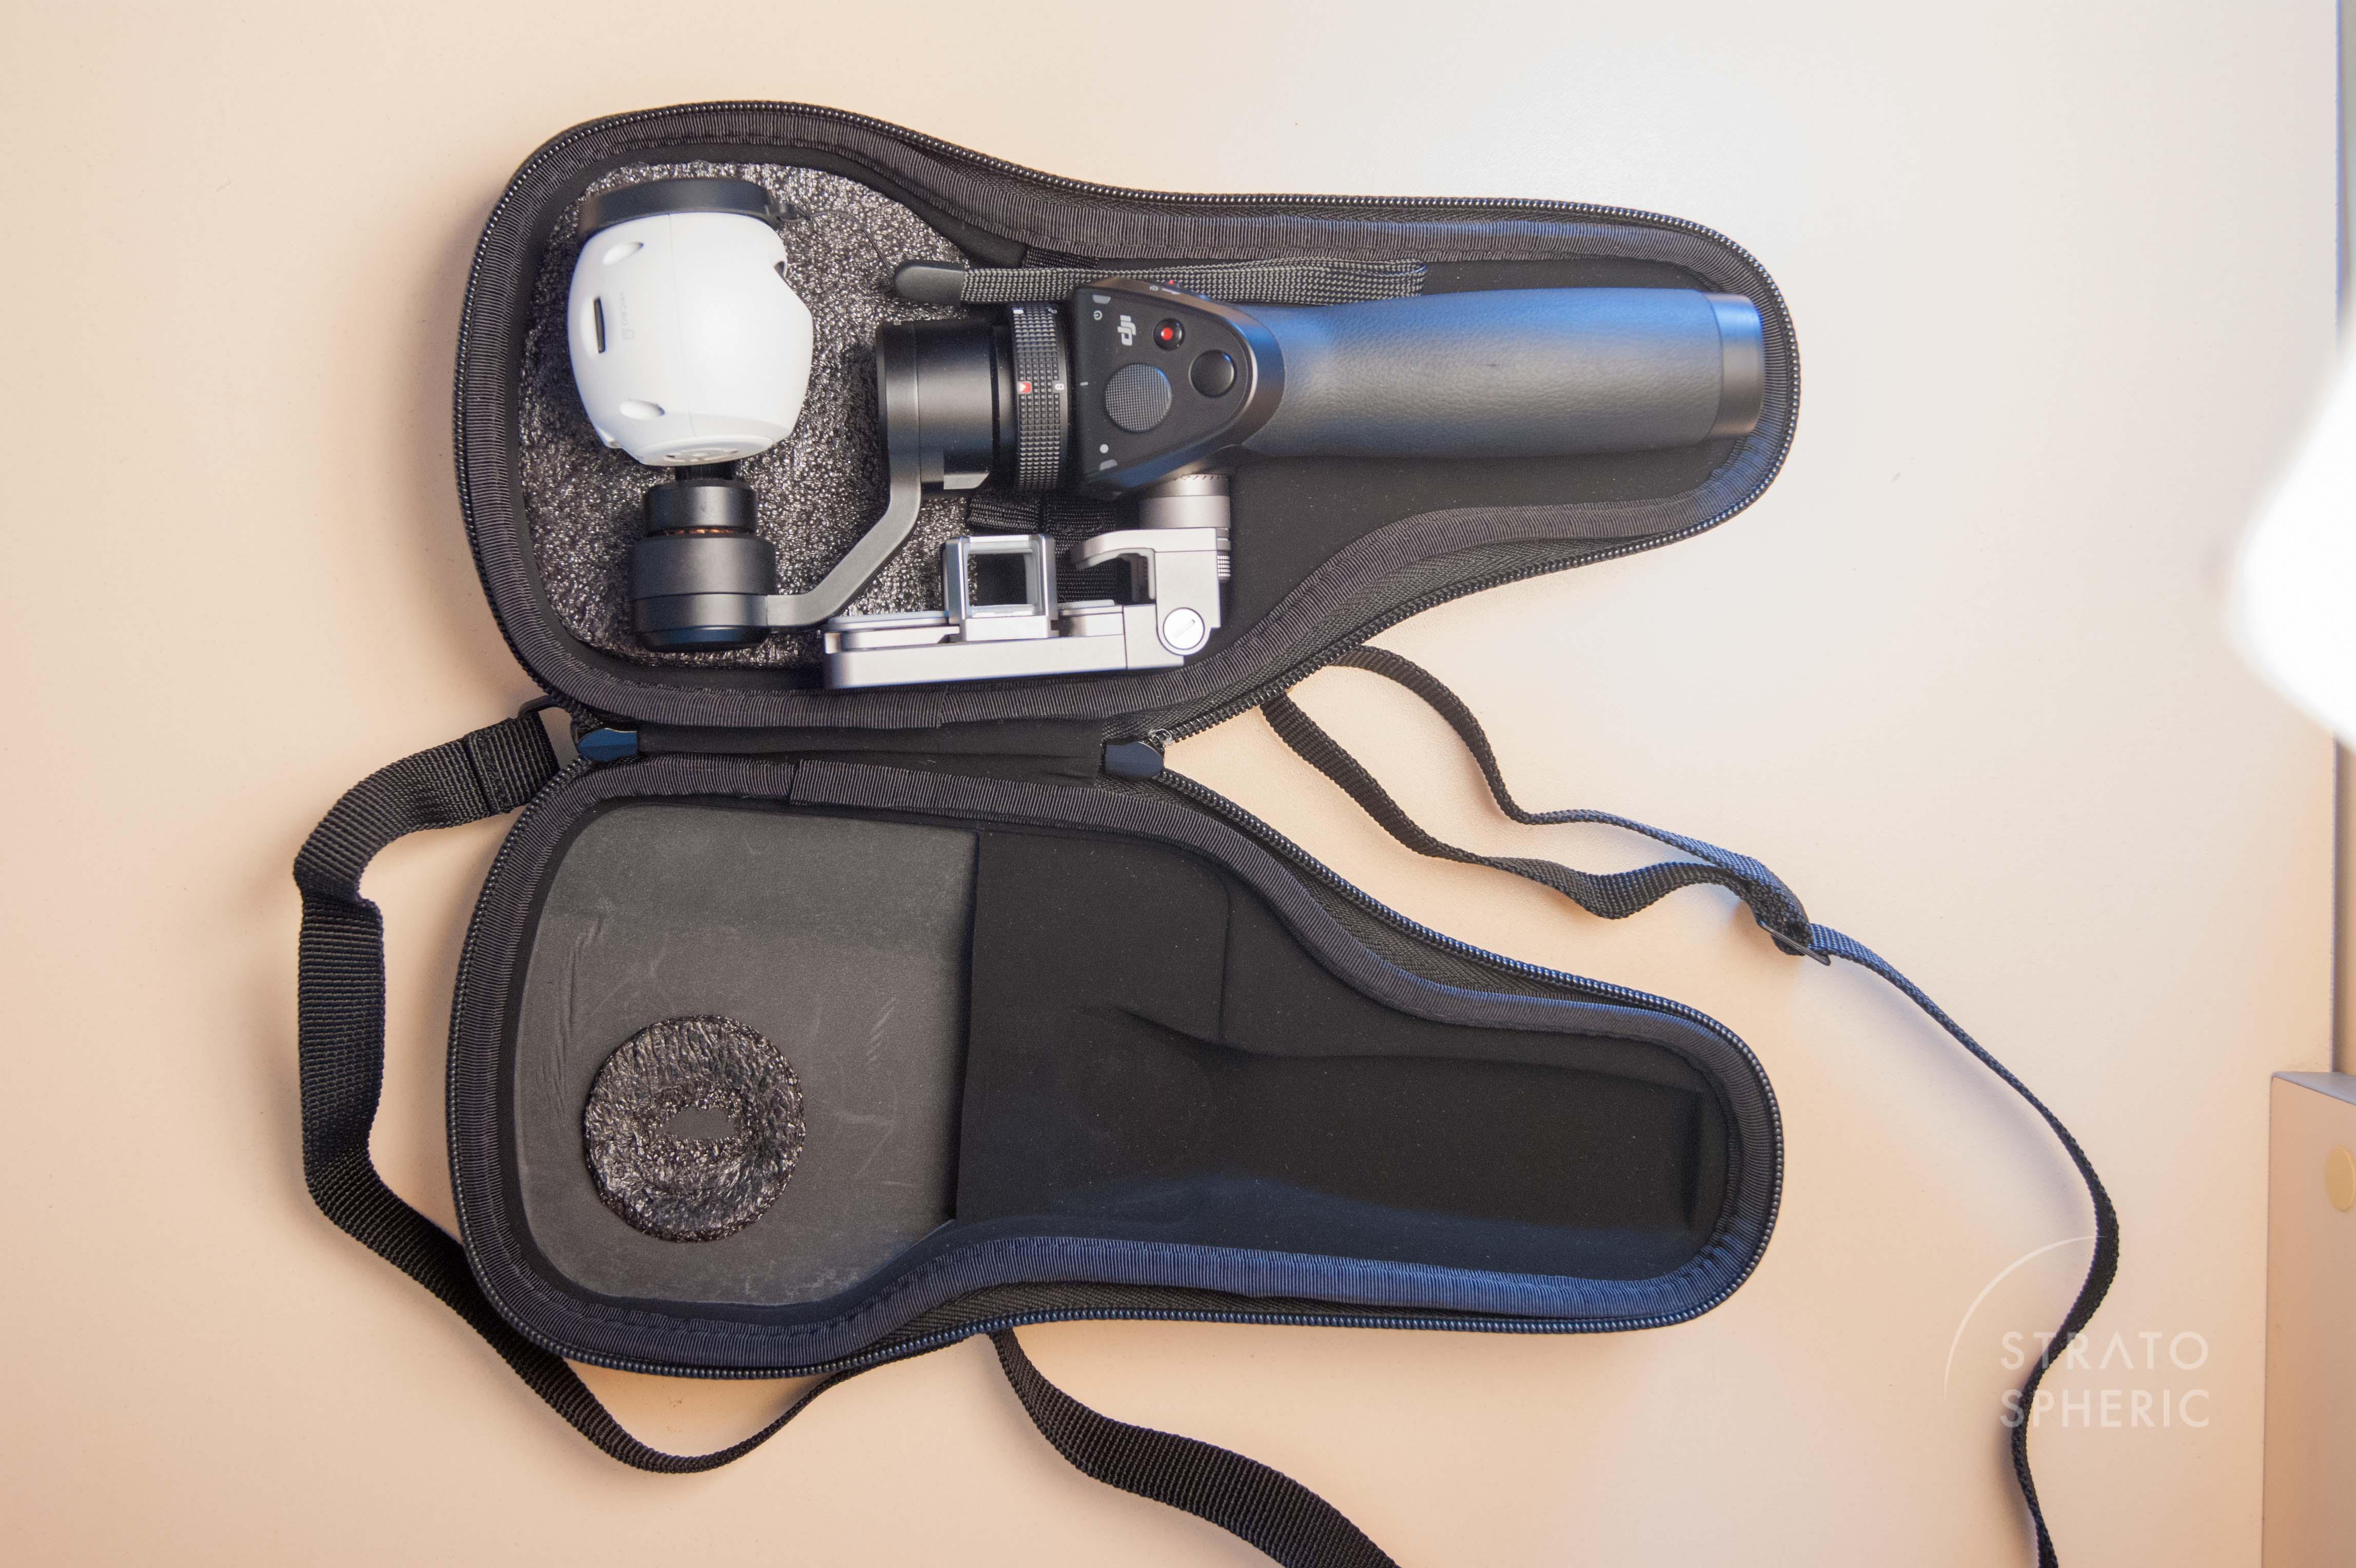
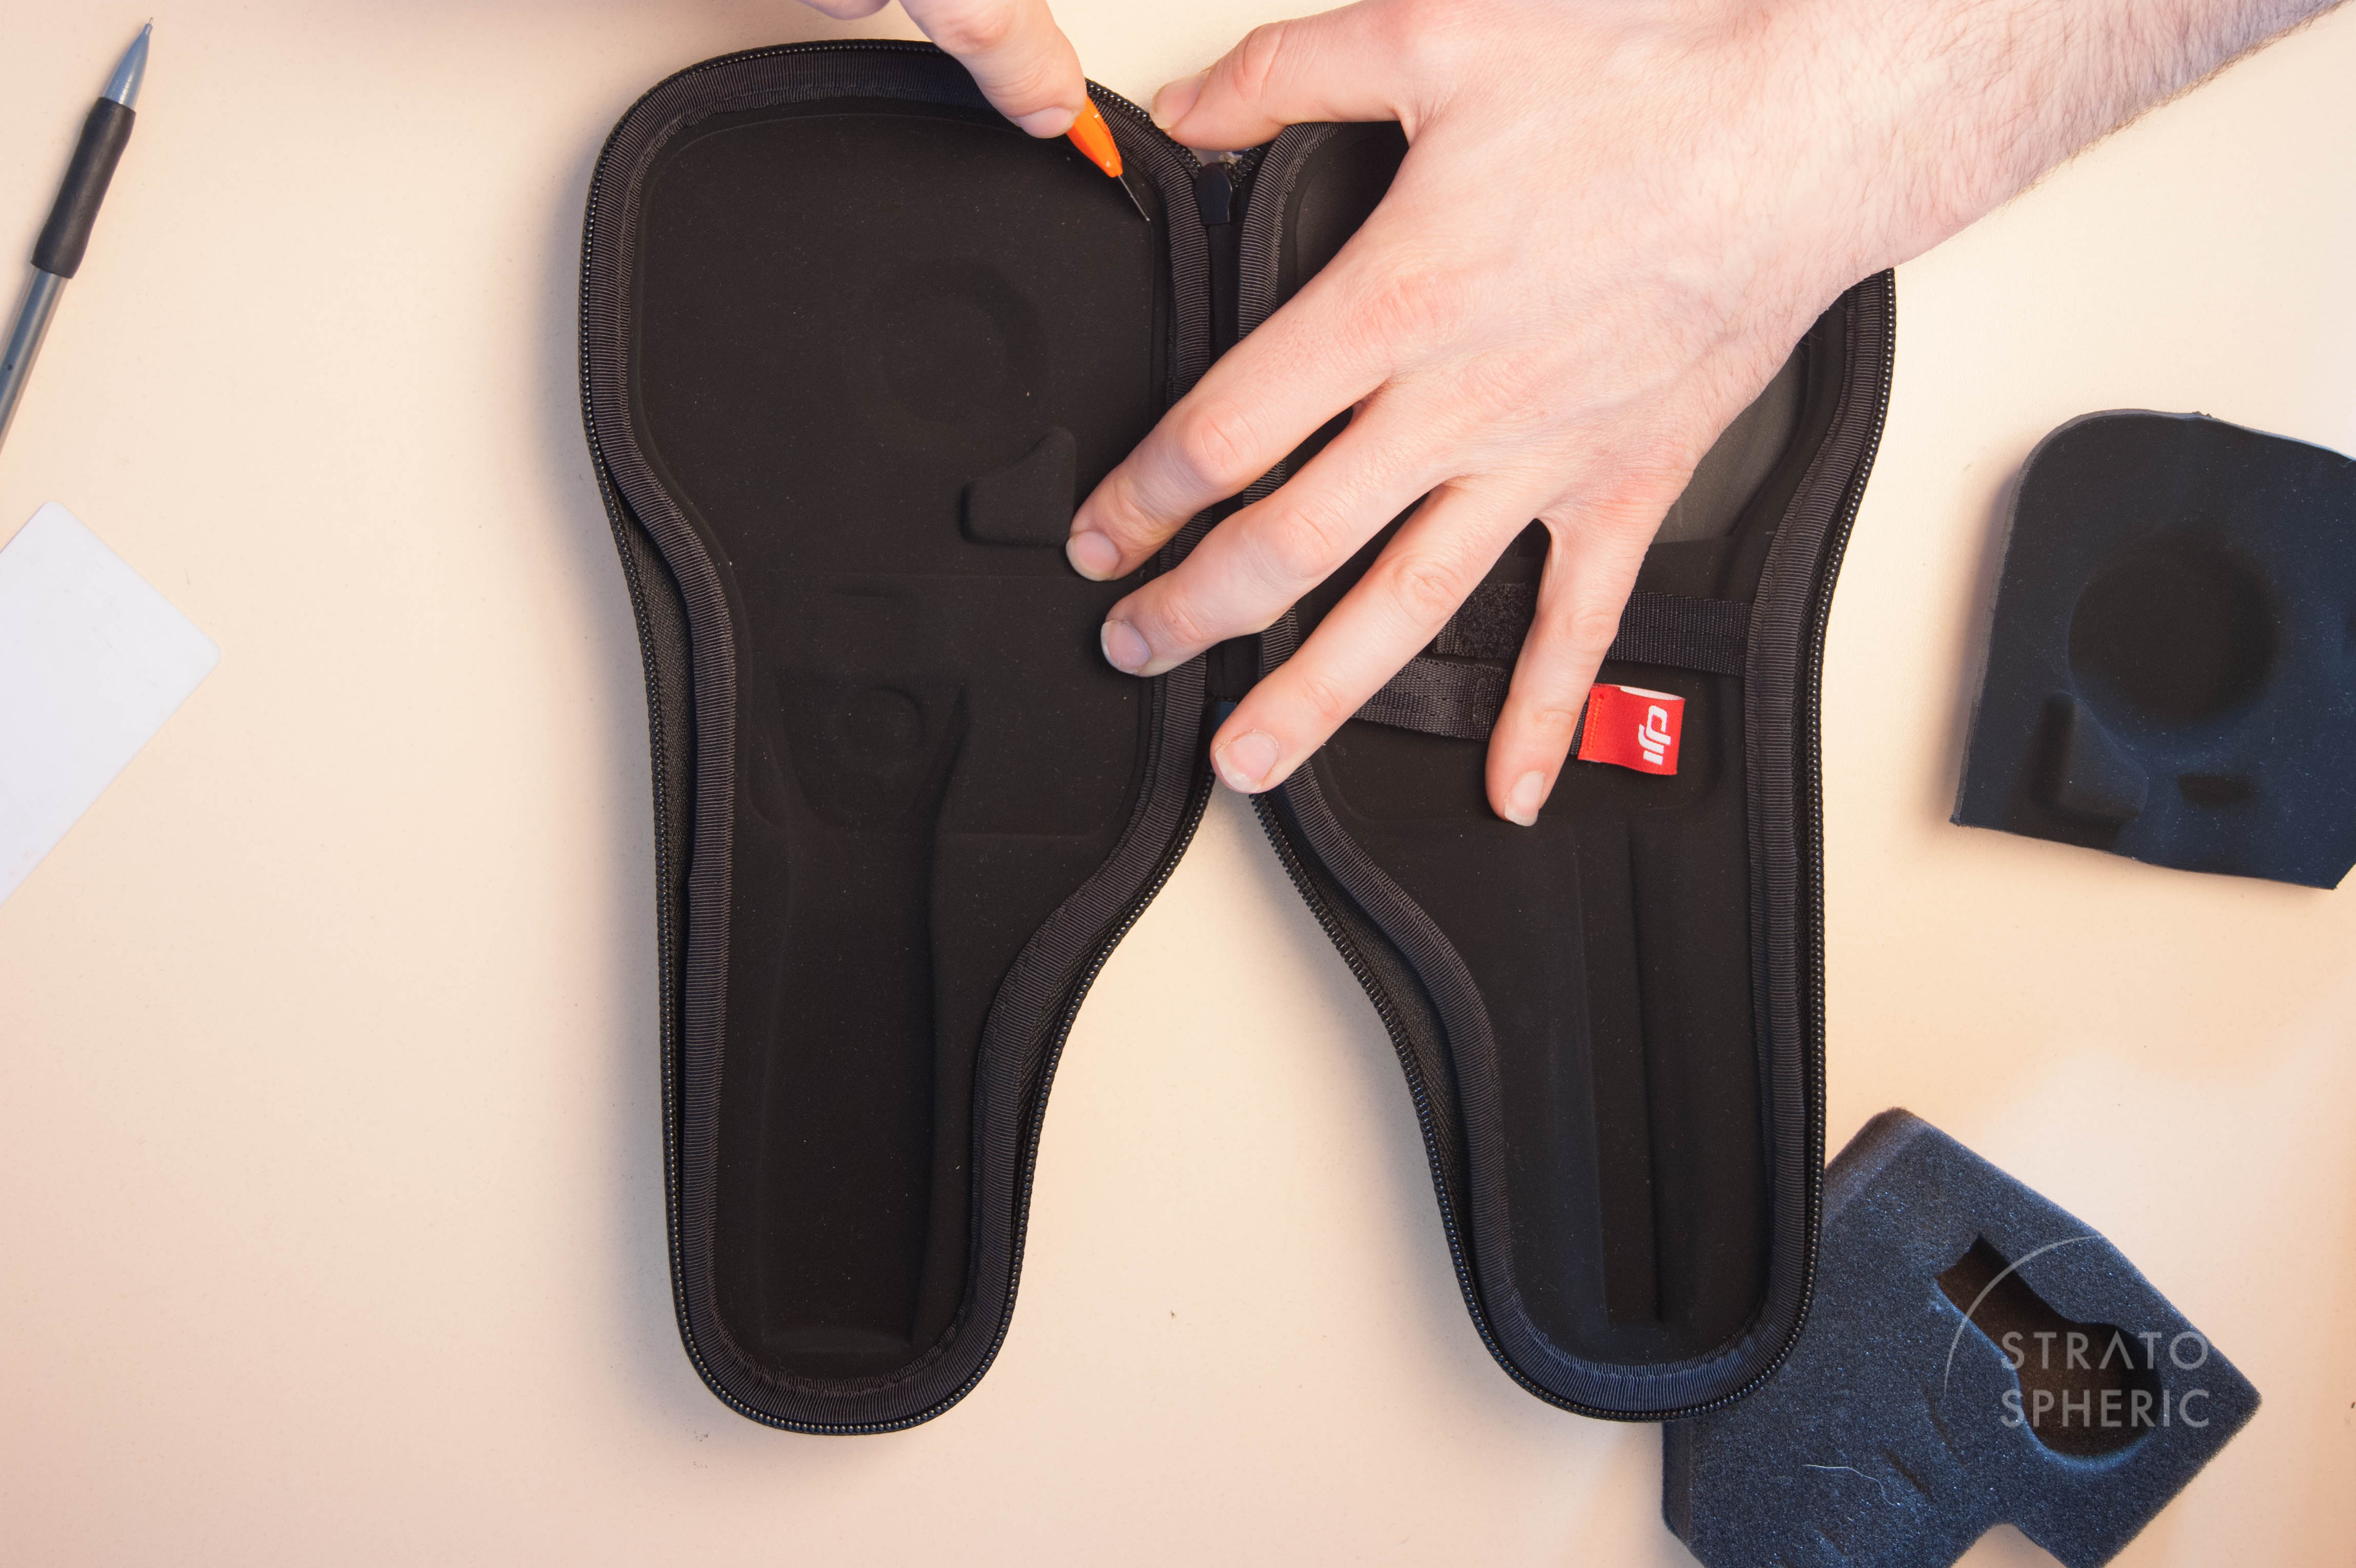
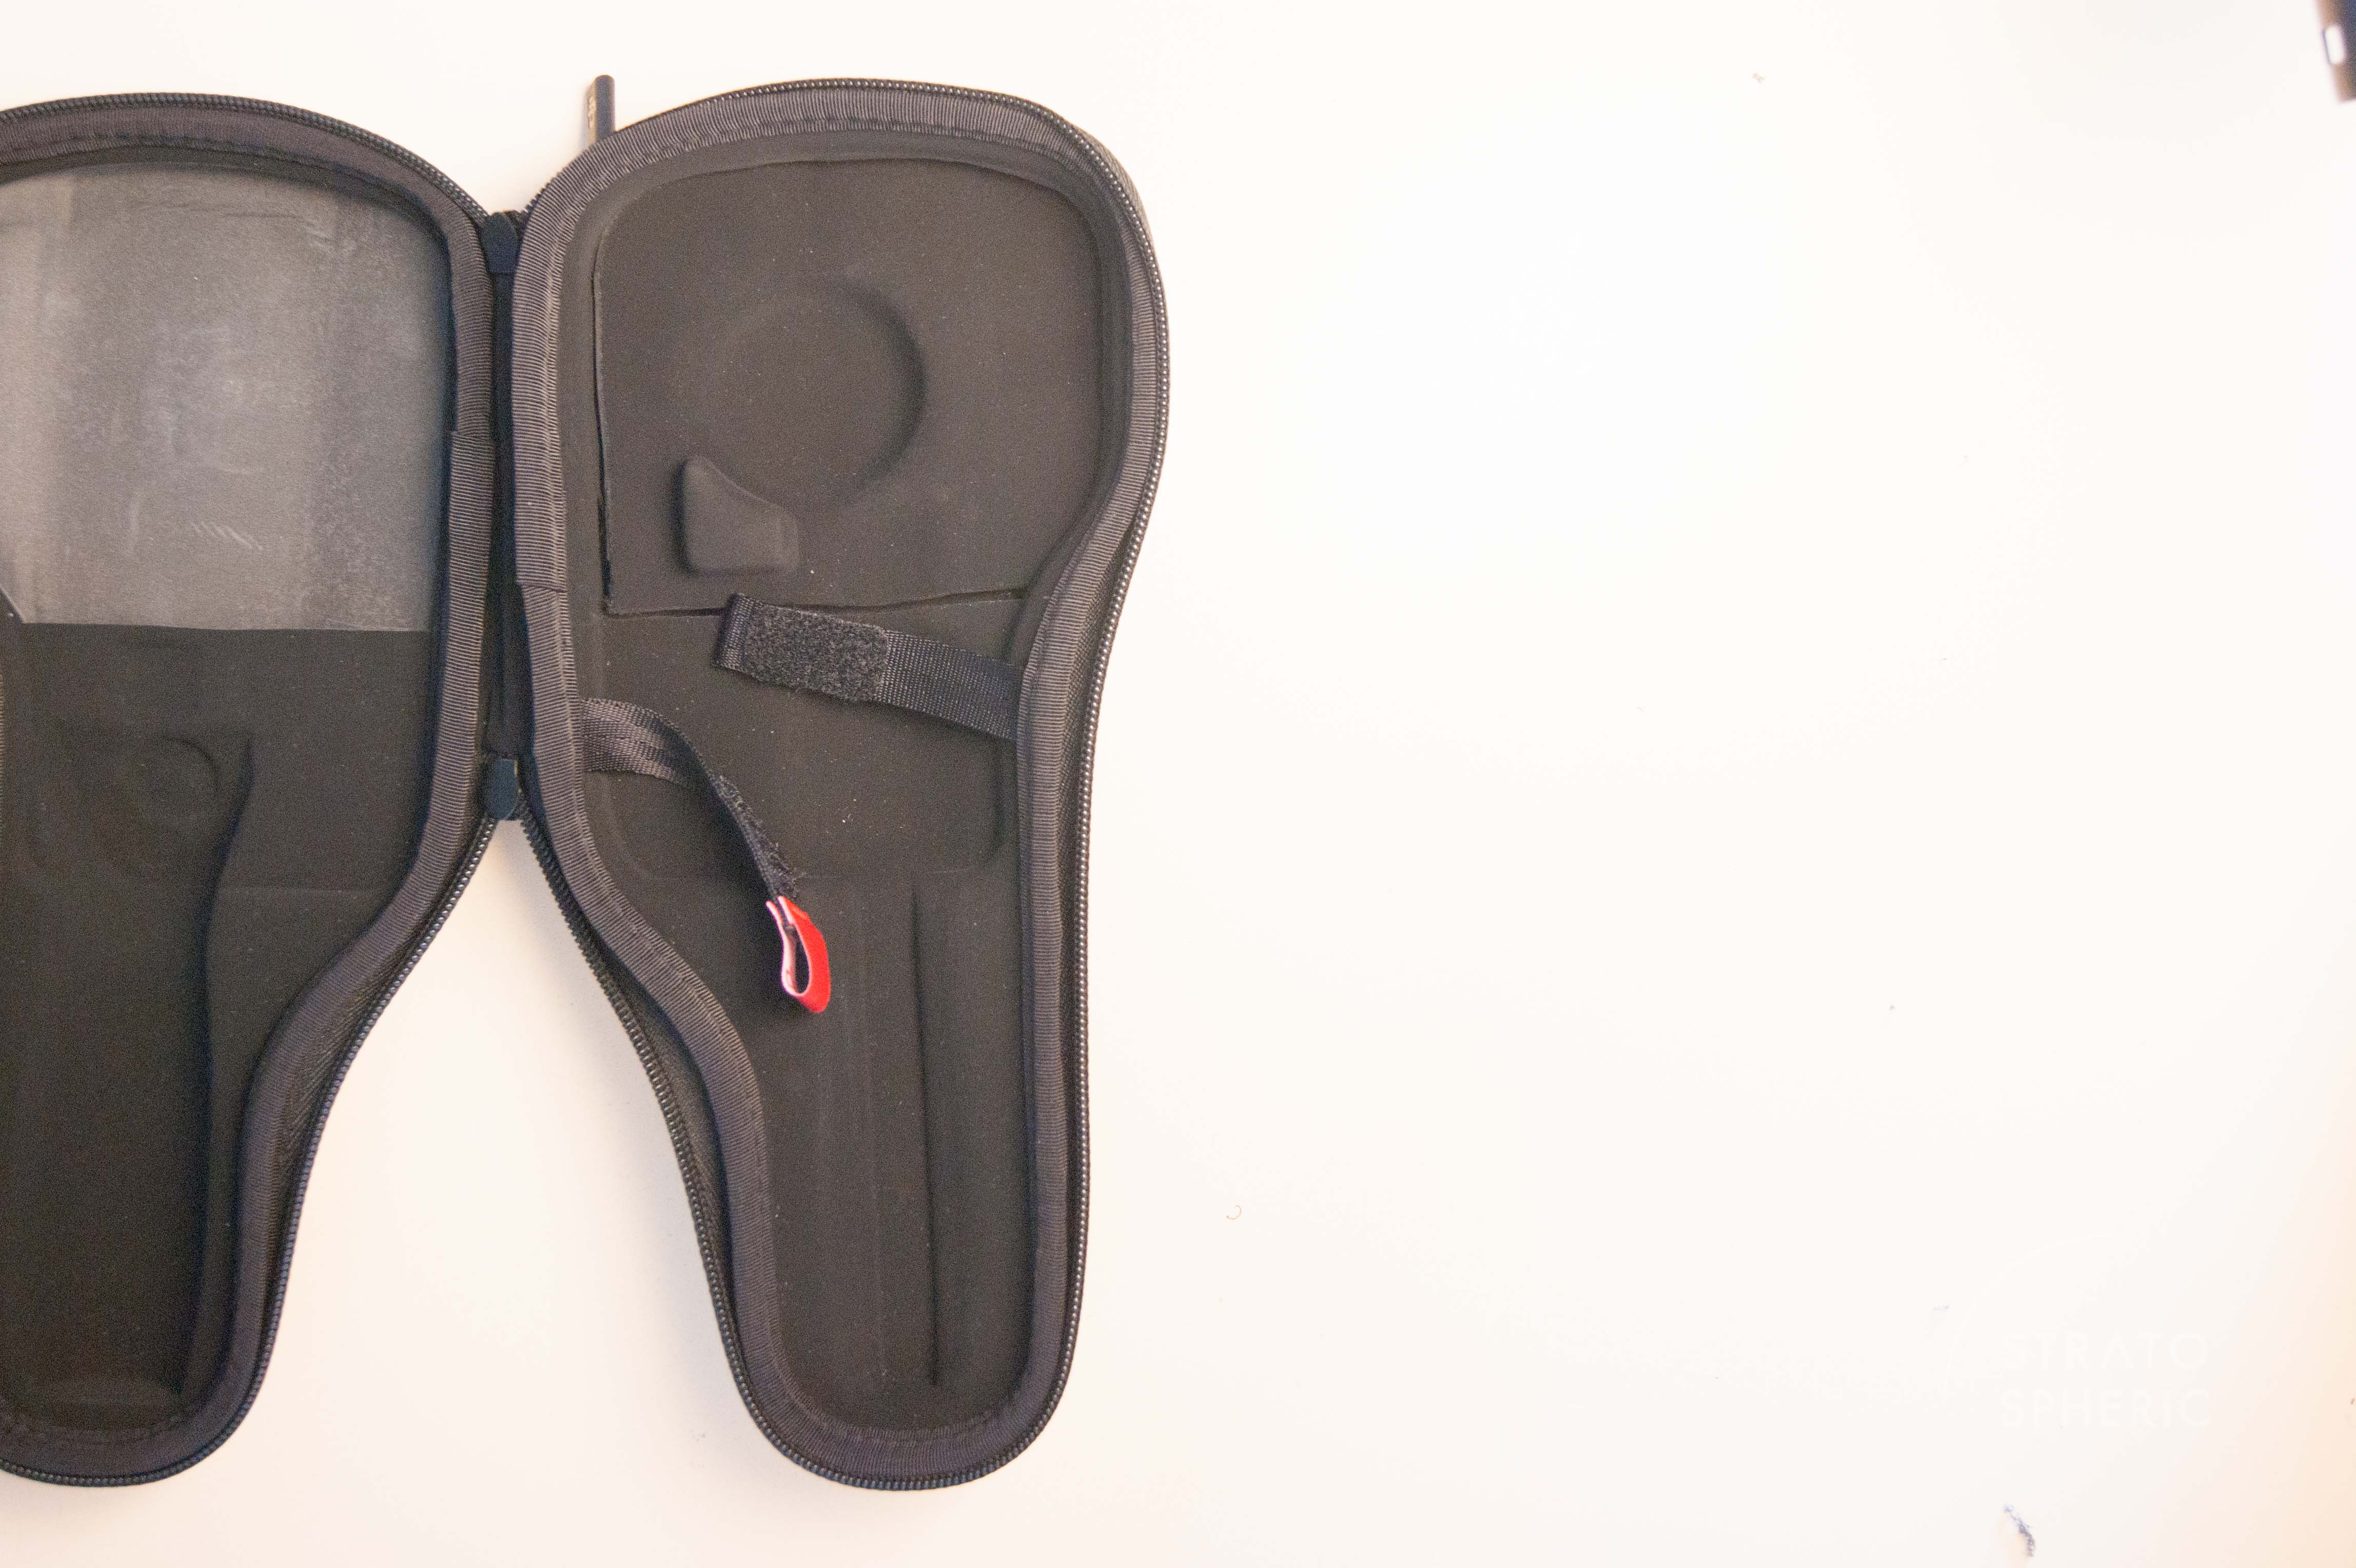
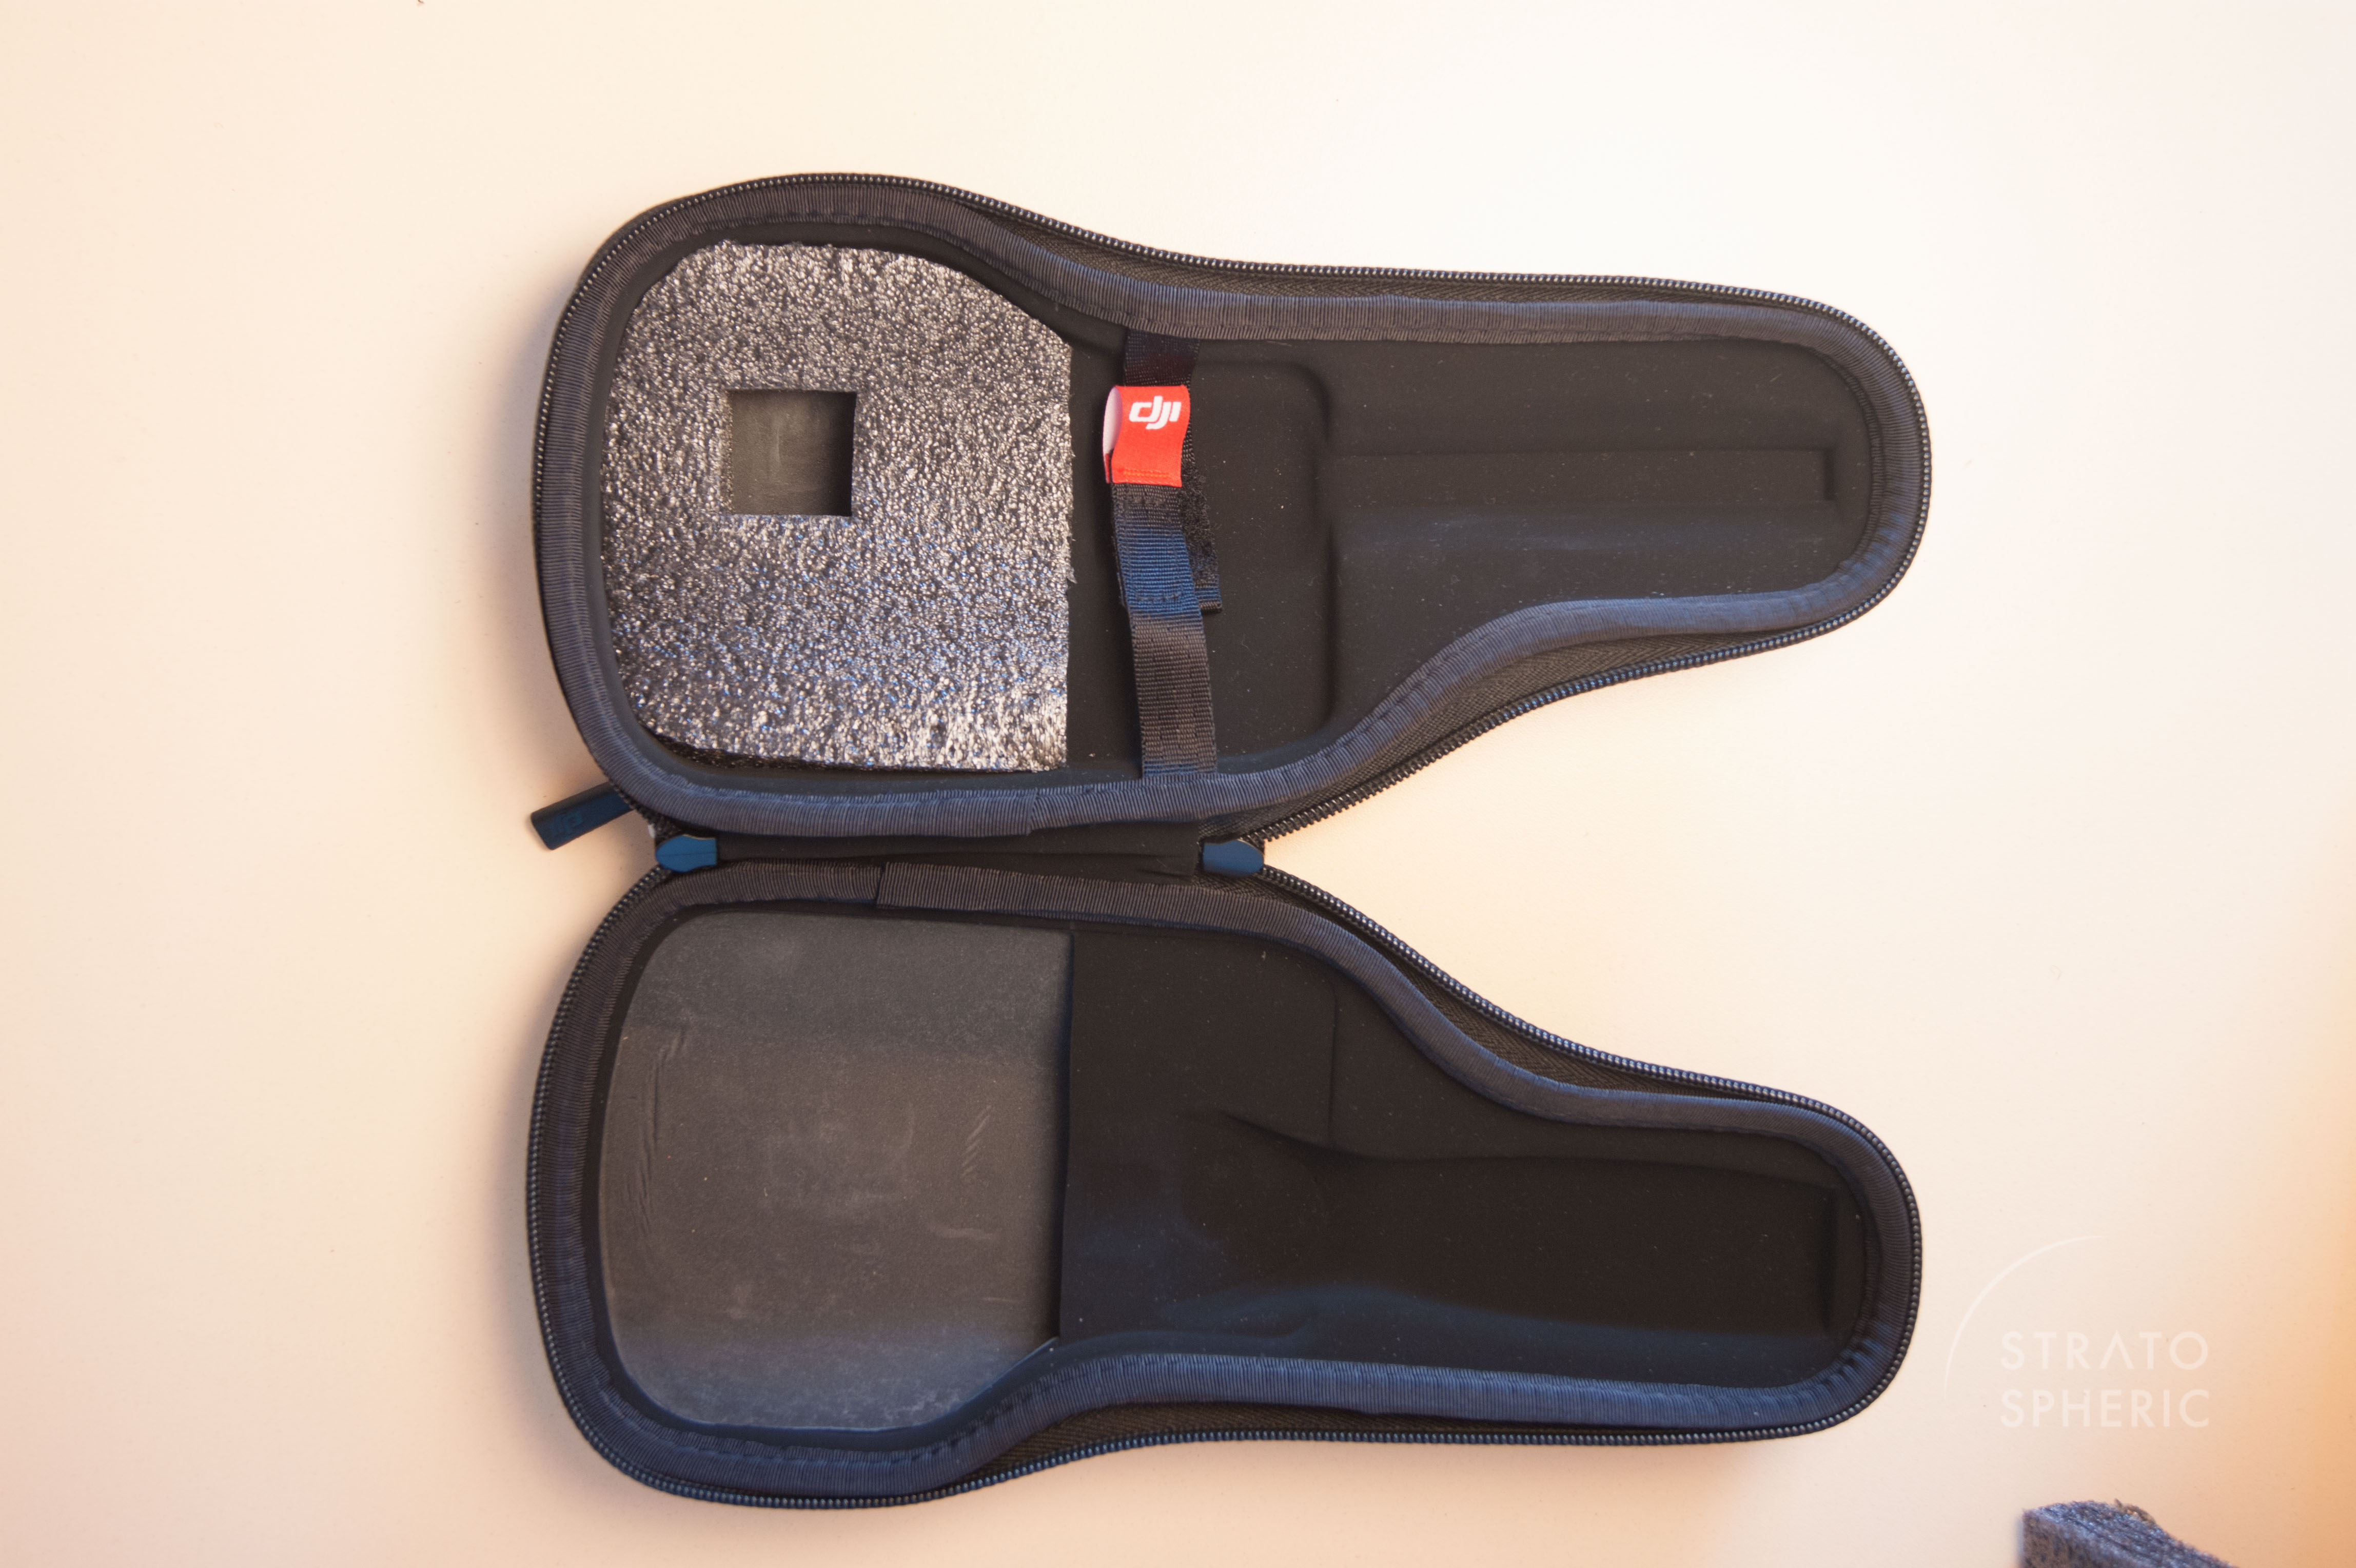
The OSMO with the I1 X3 could now fit nicely and the case could close fully without exerting any pressure.
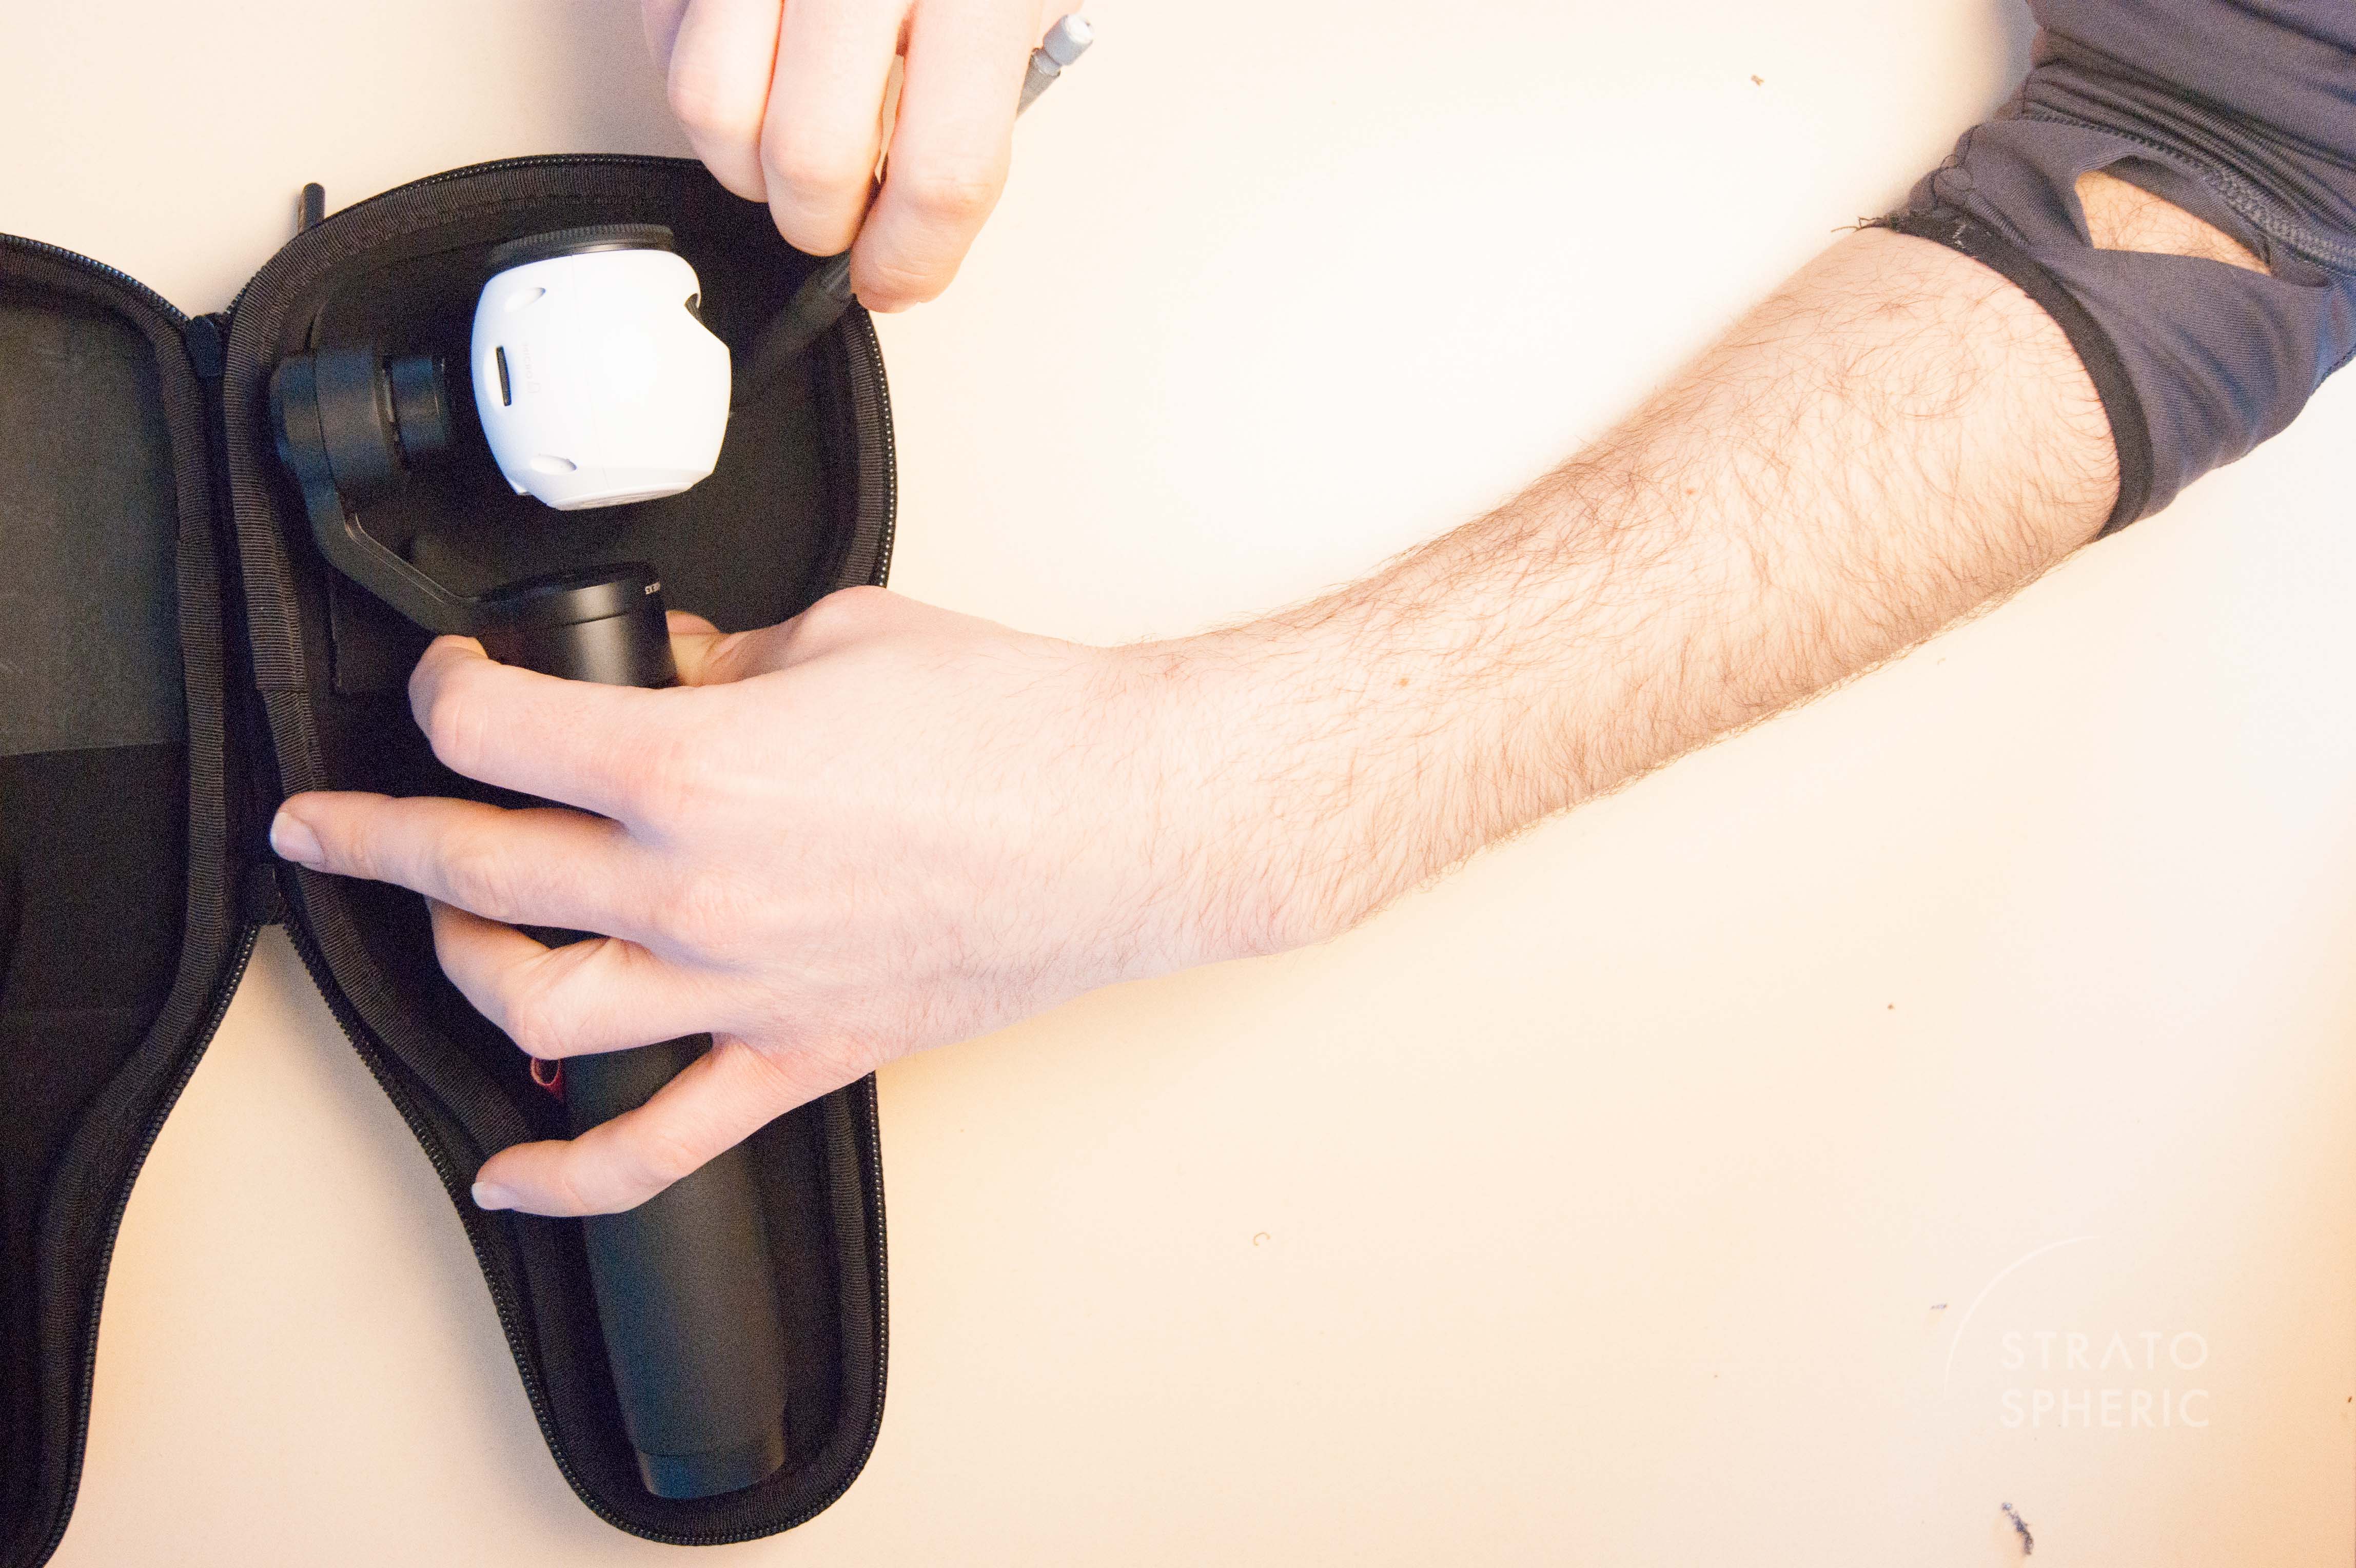
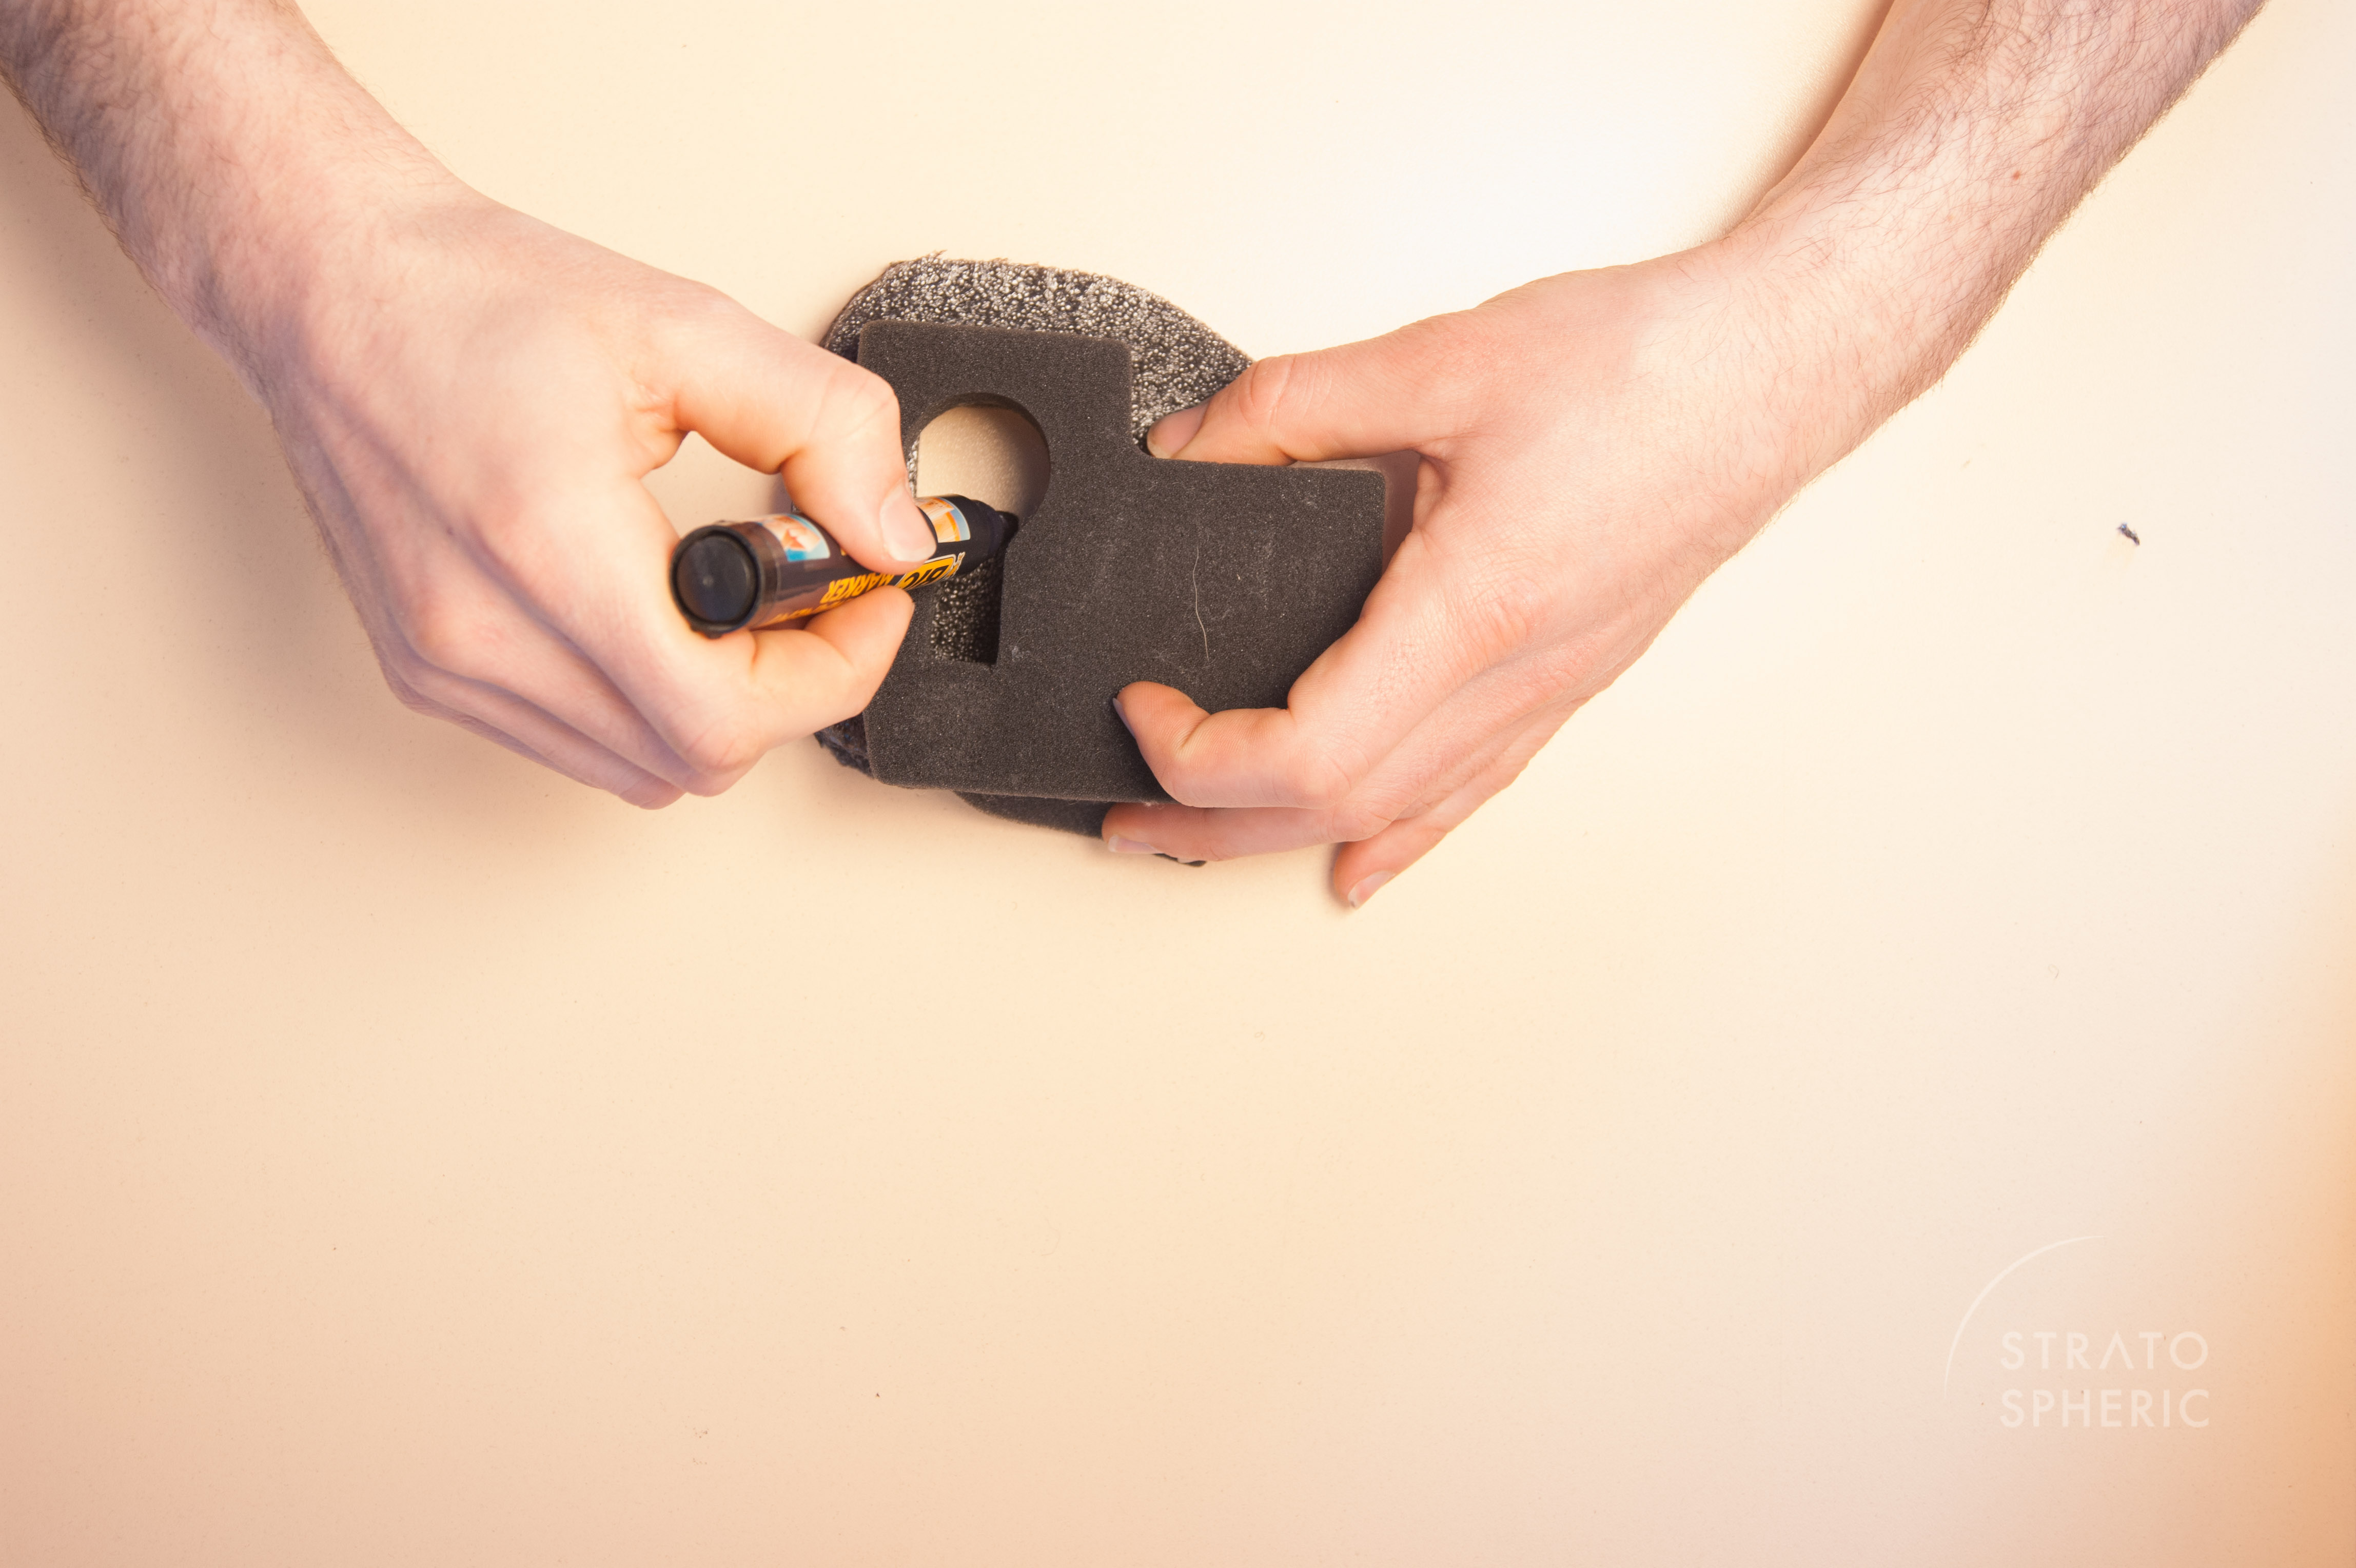
5. I put piece I cut out from the lower section bain into the case. I placed the OSMO handle with the I1 X3 and marked where the hole for the pitch arm should be (the gimbal should be orientated the same way as when you place it inside the X3's hard case that comes with the I1).
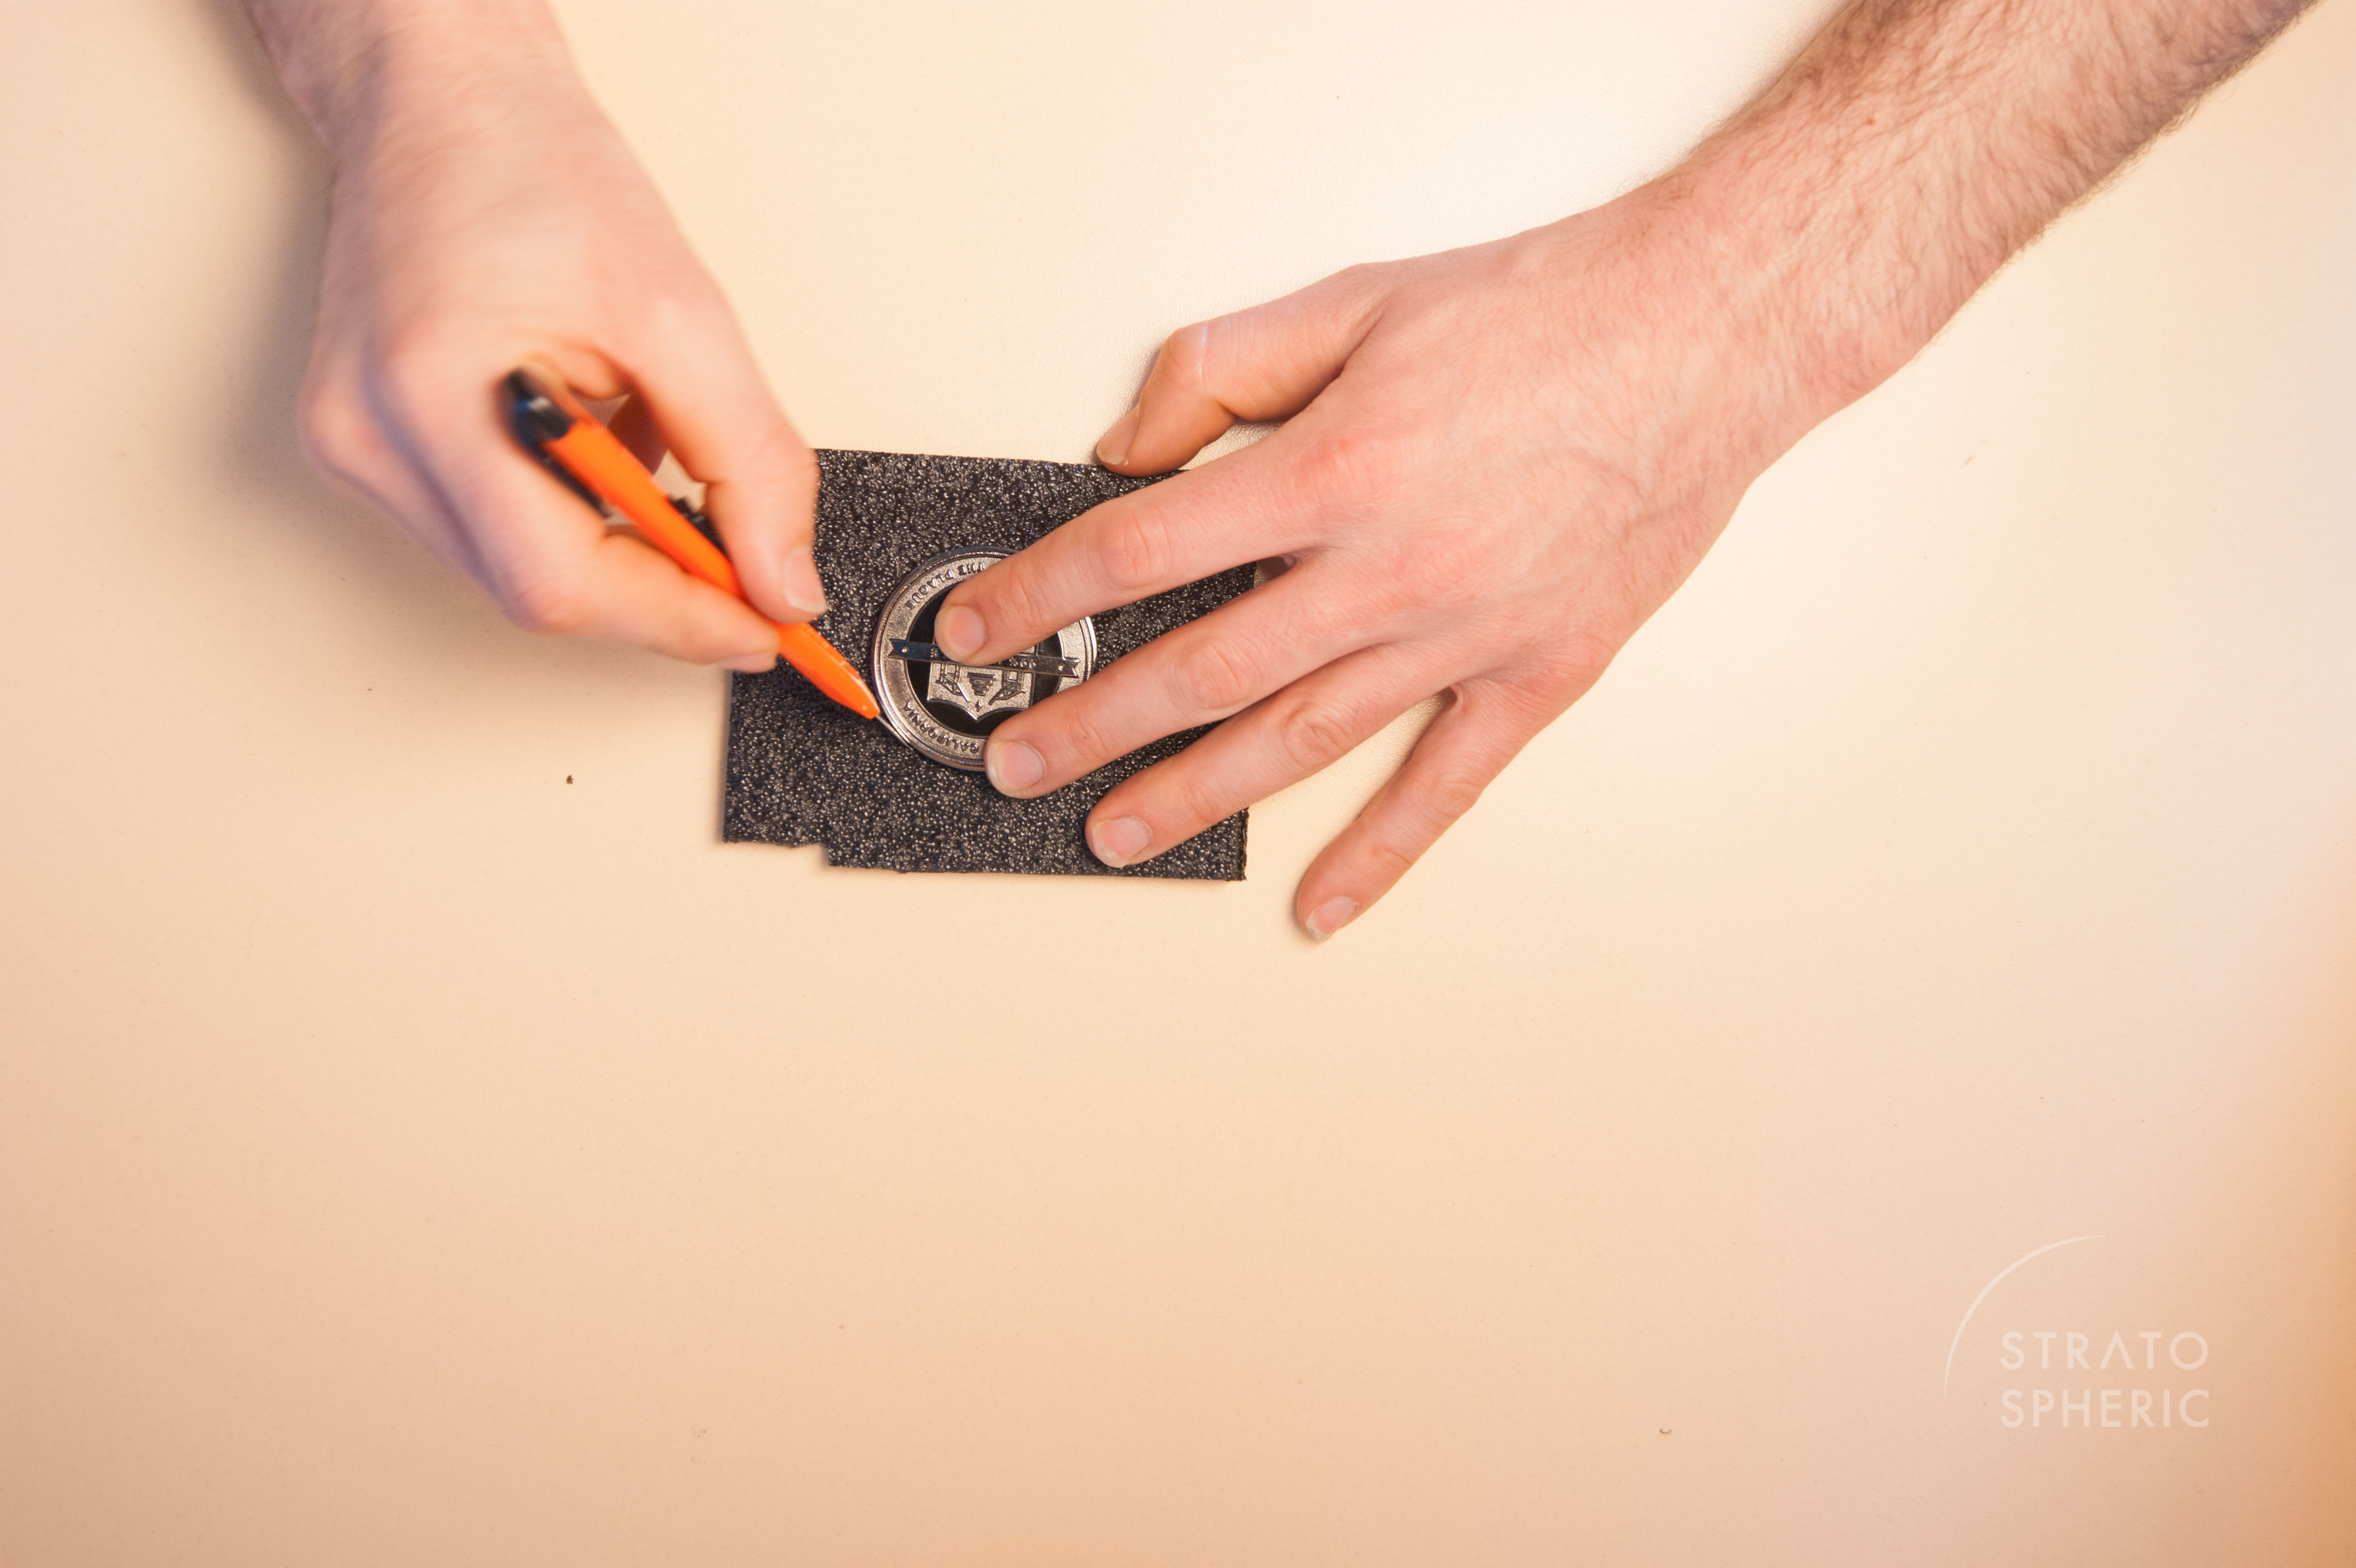
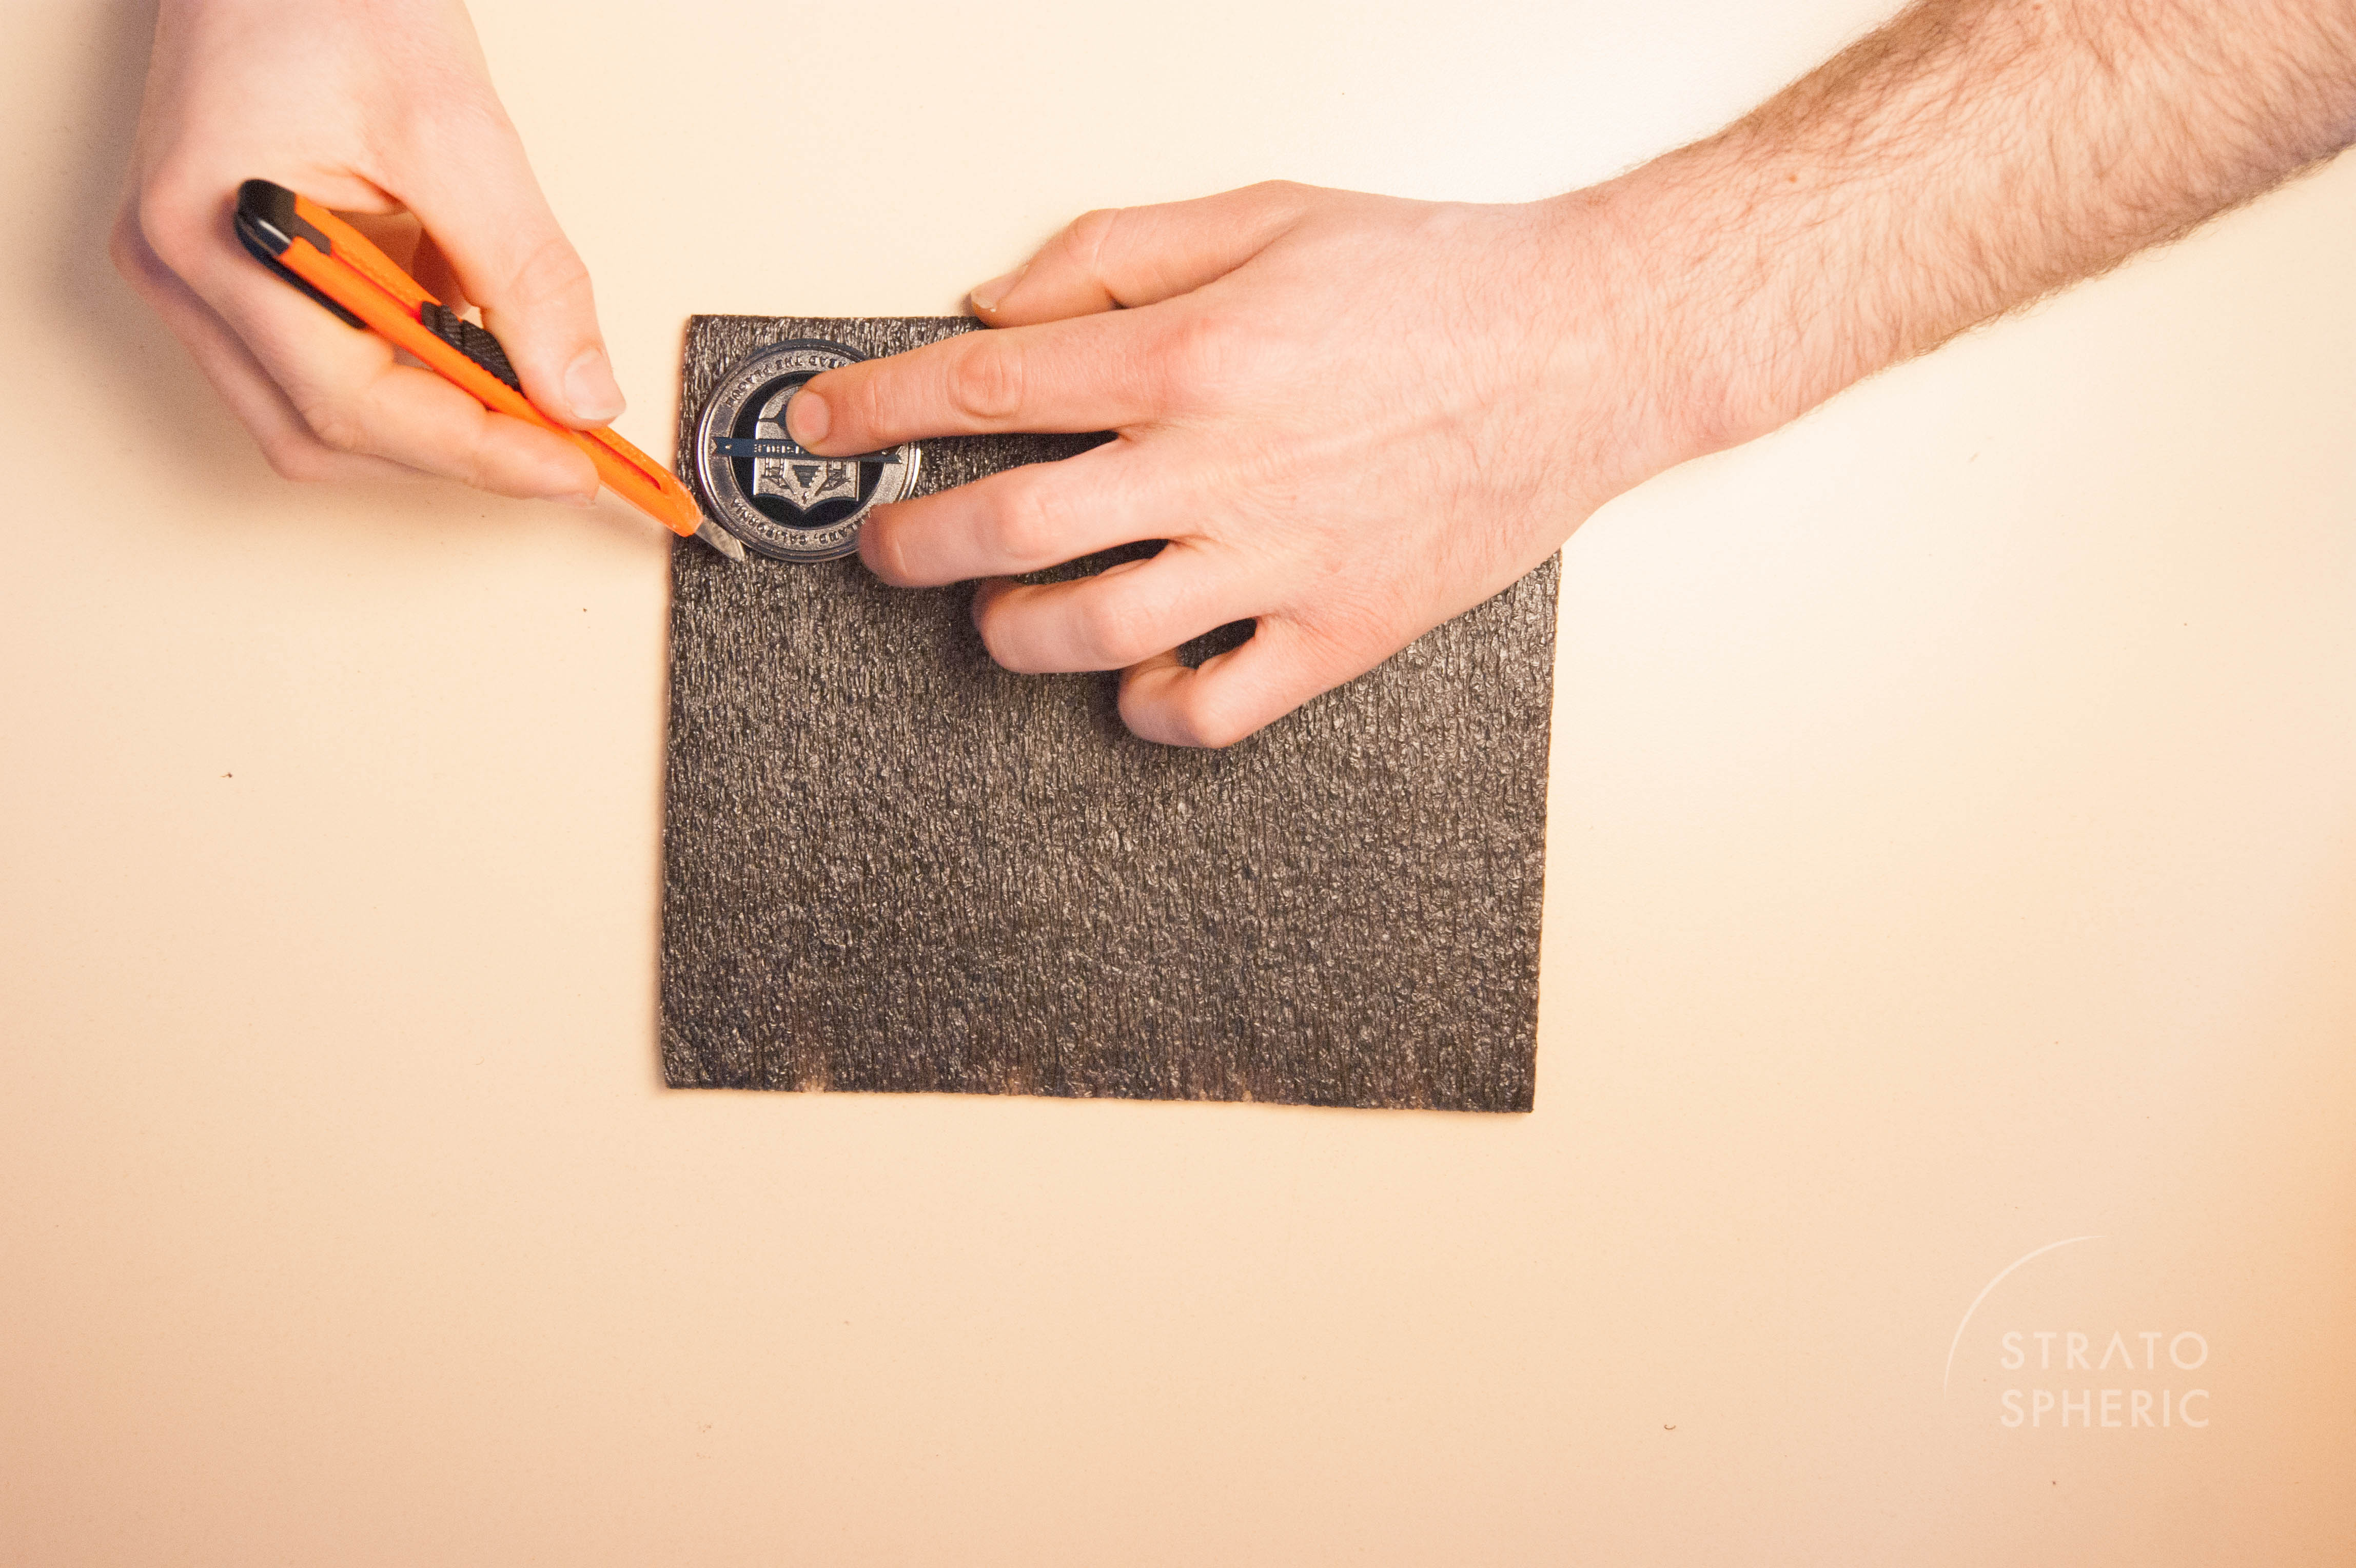
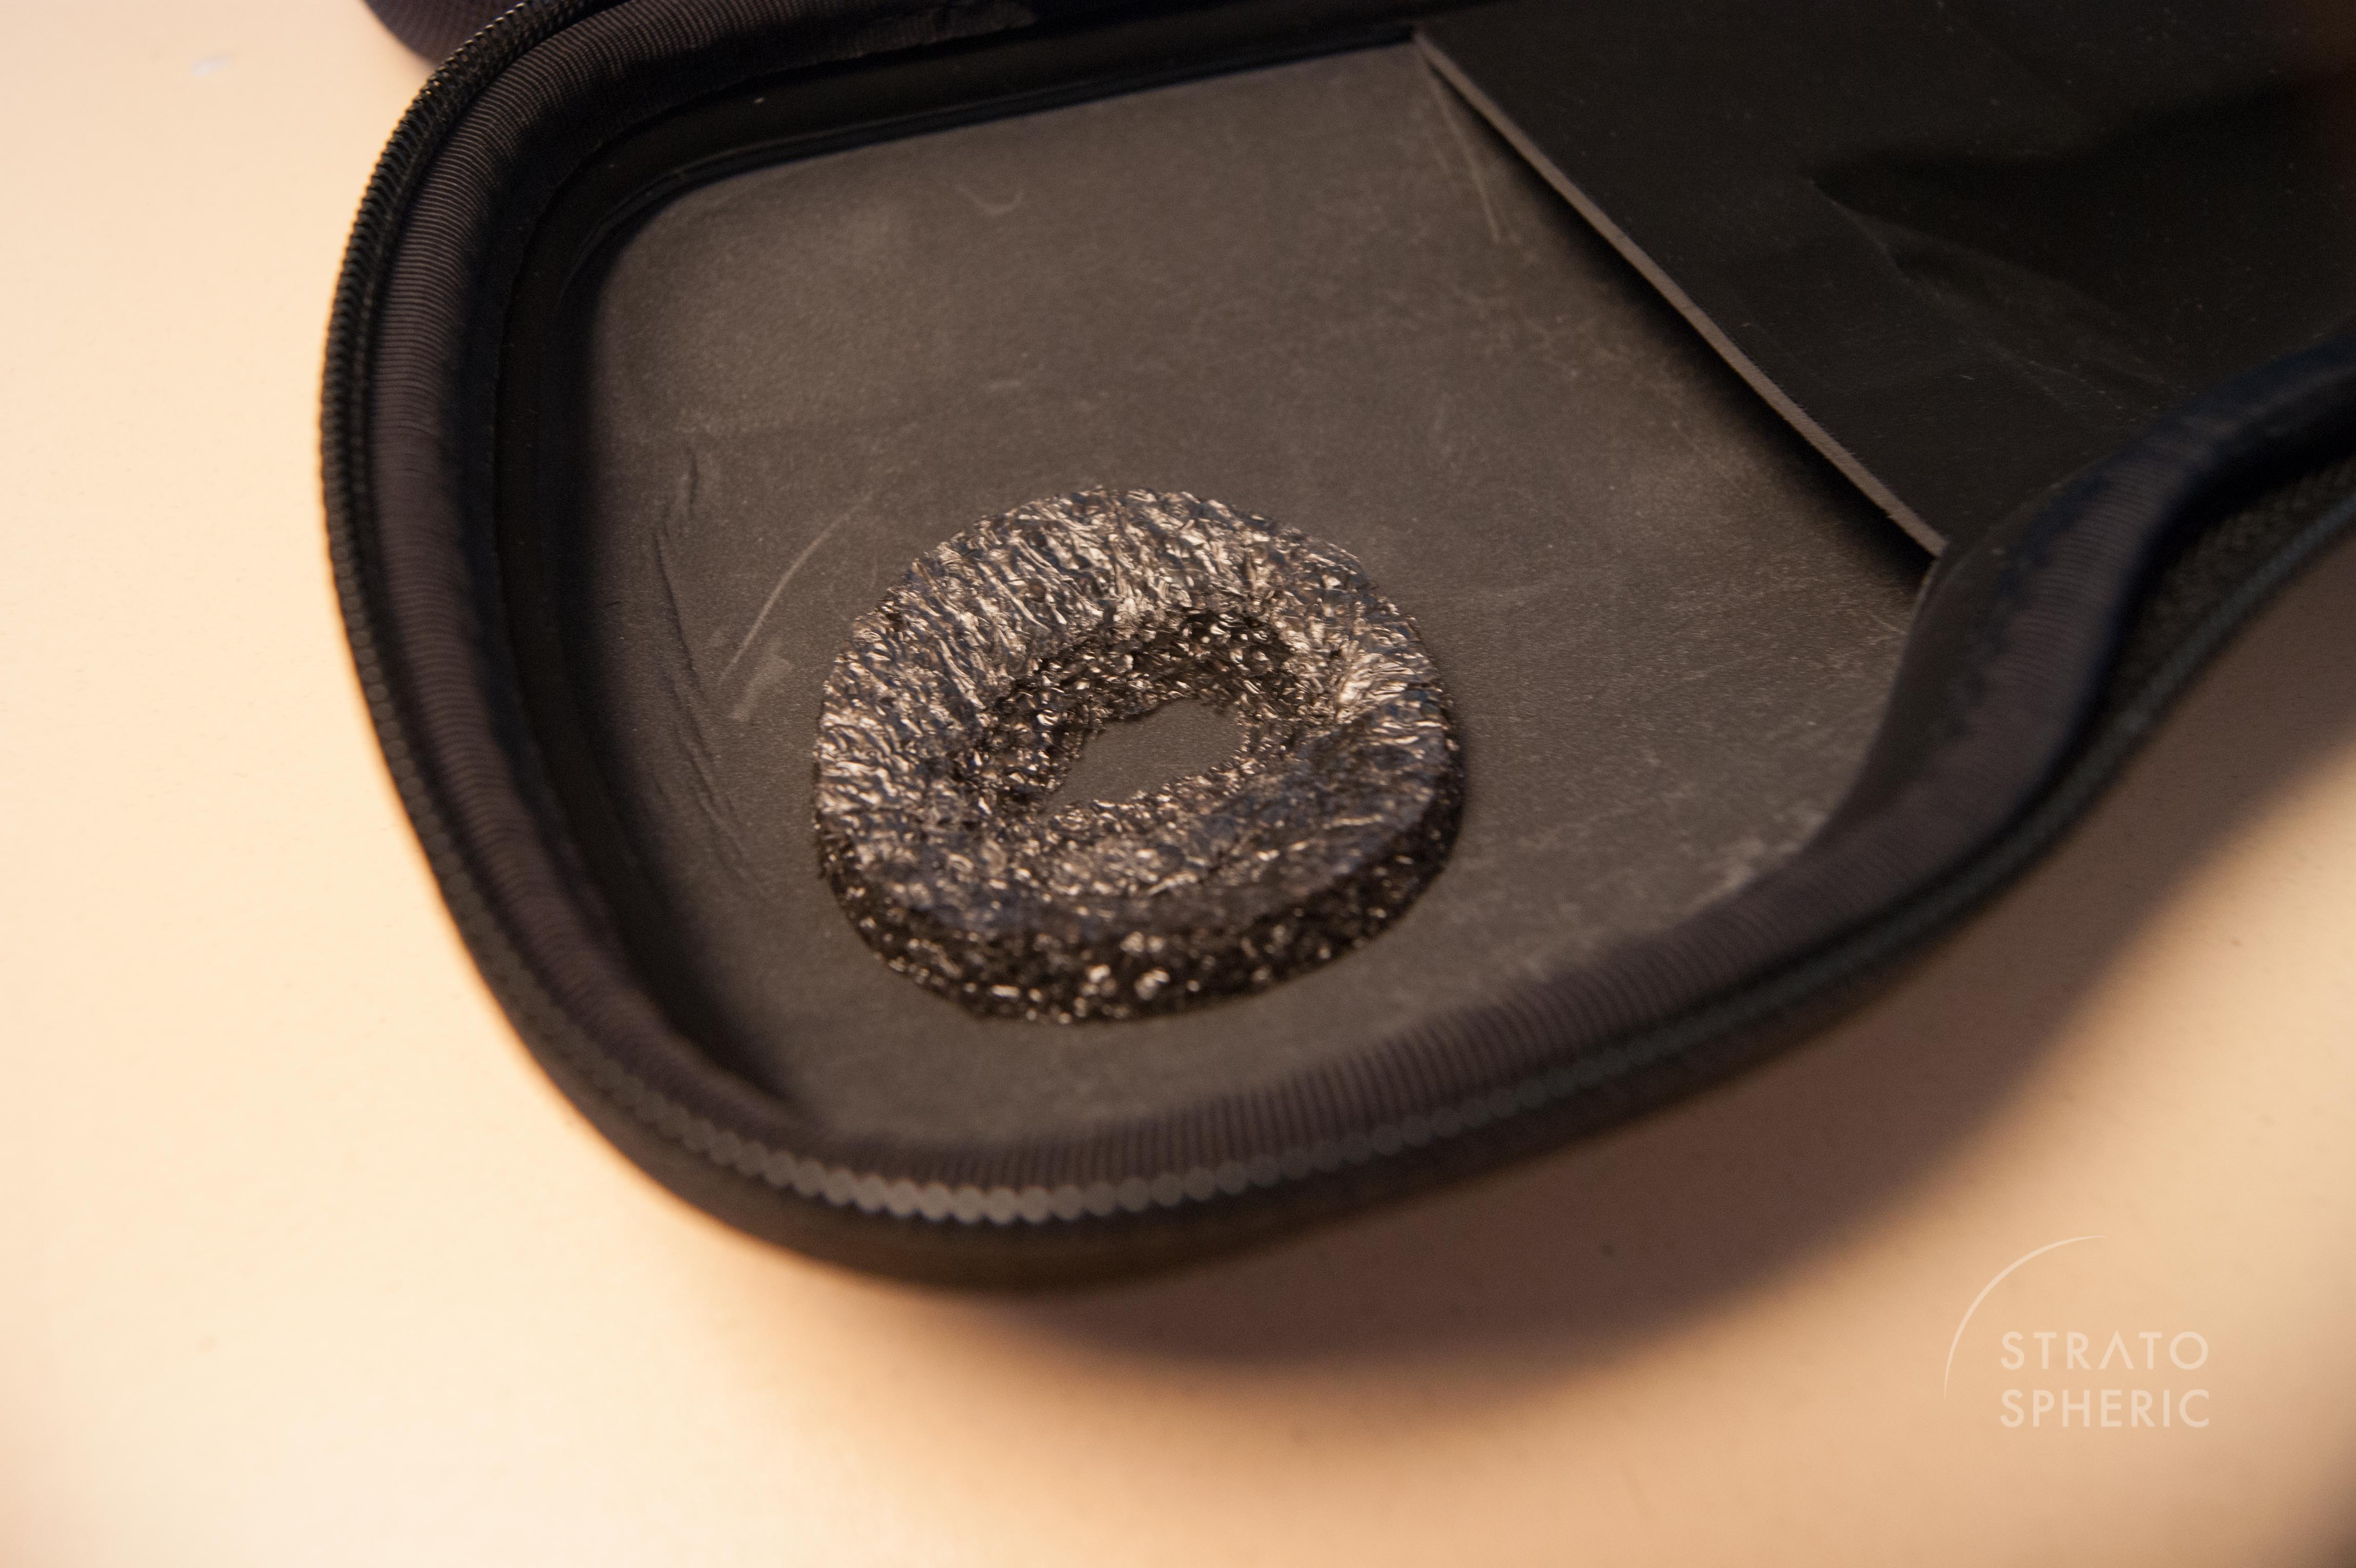
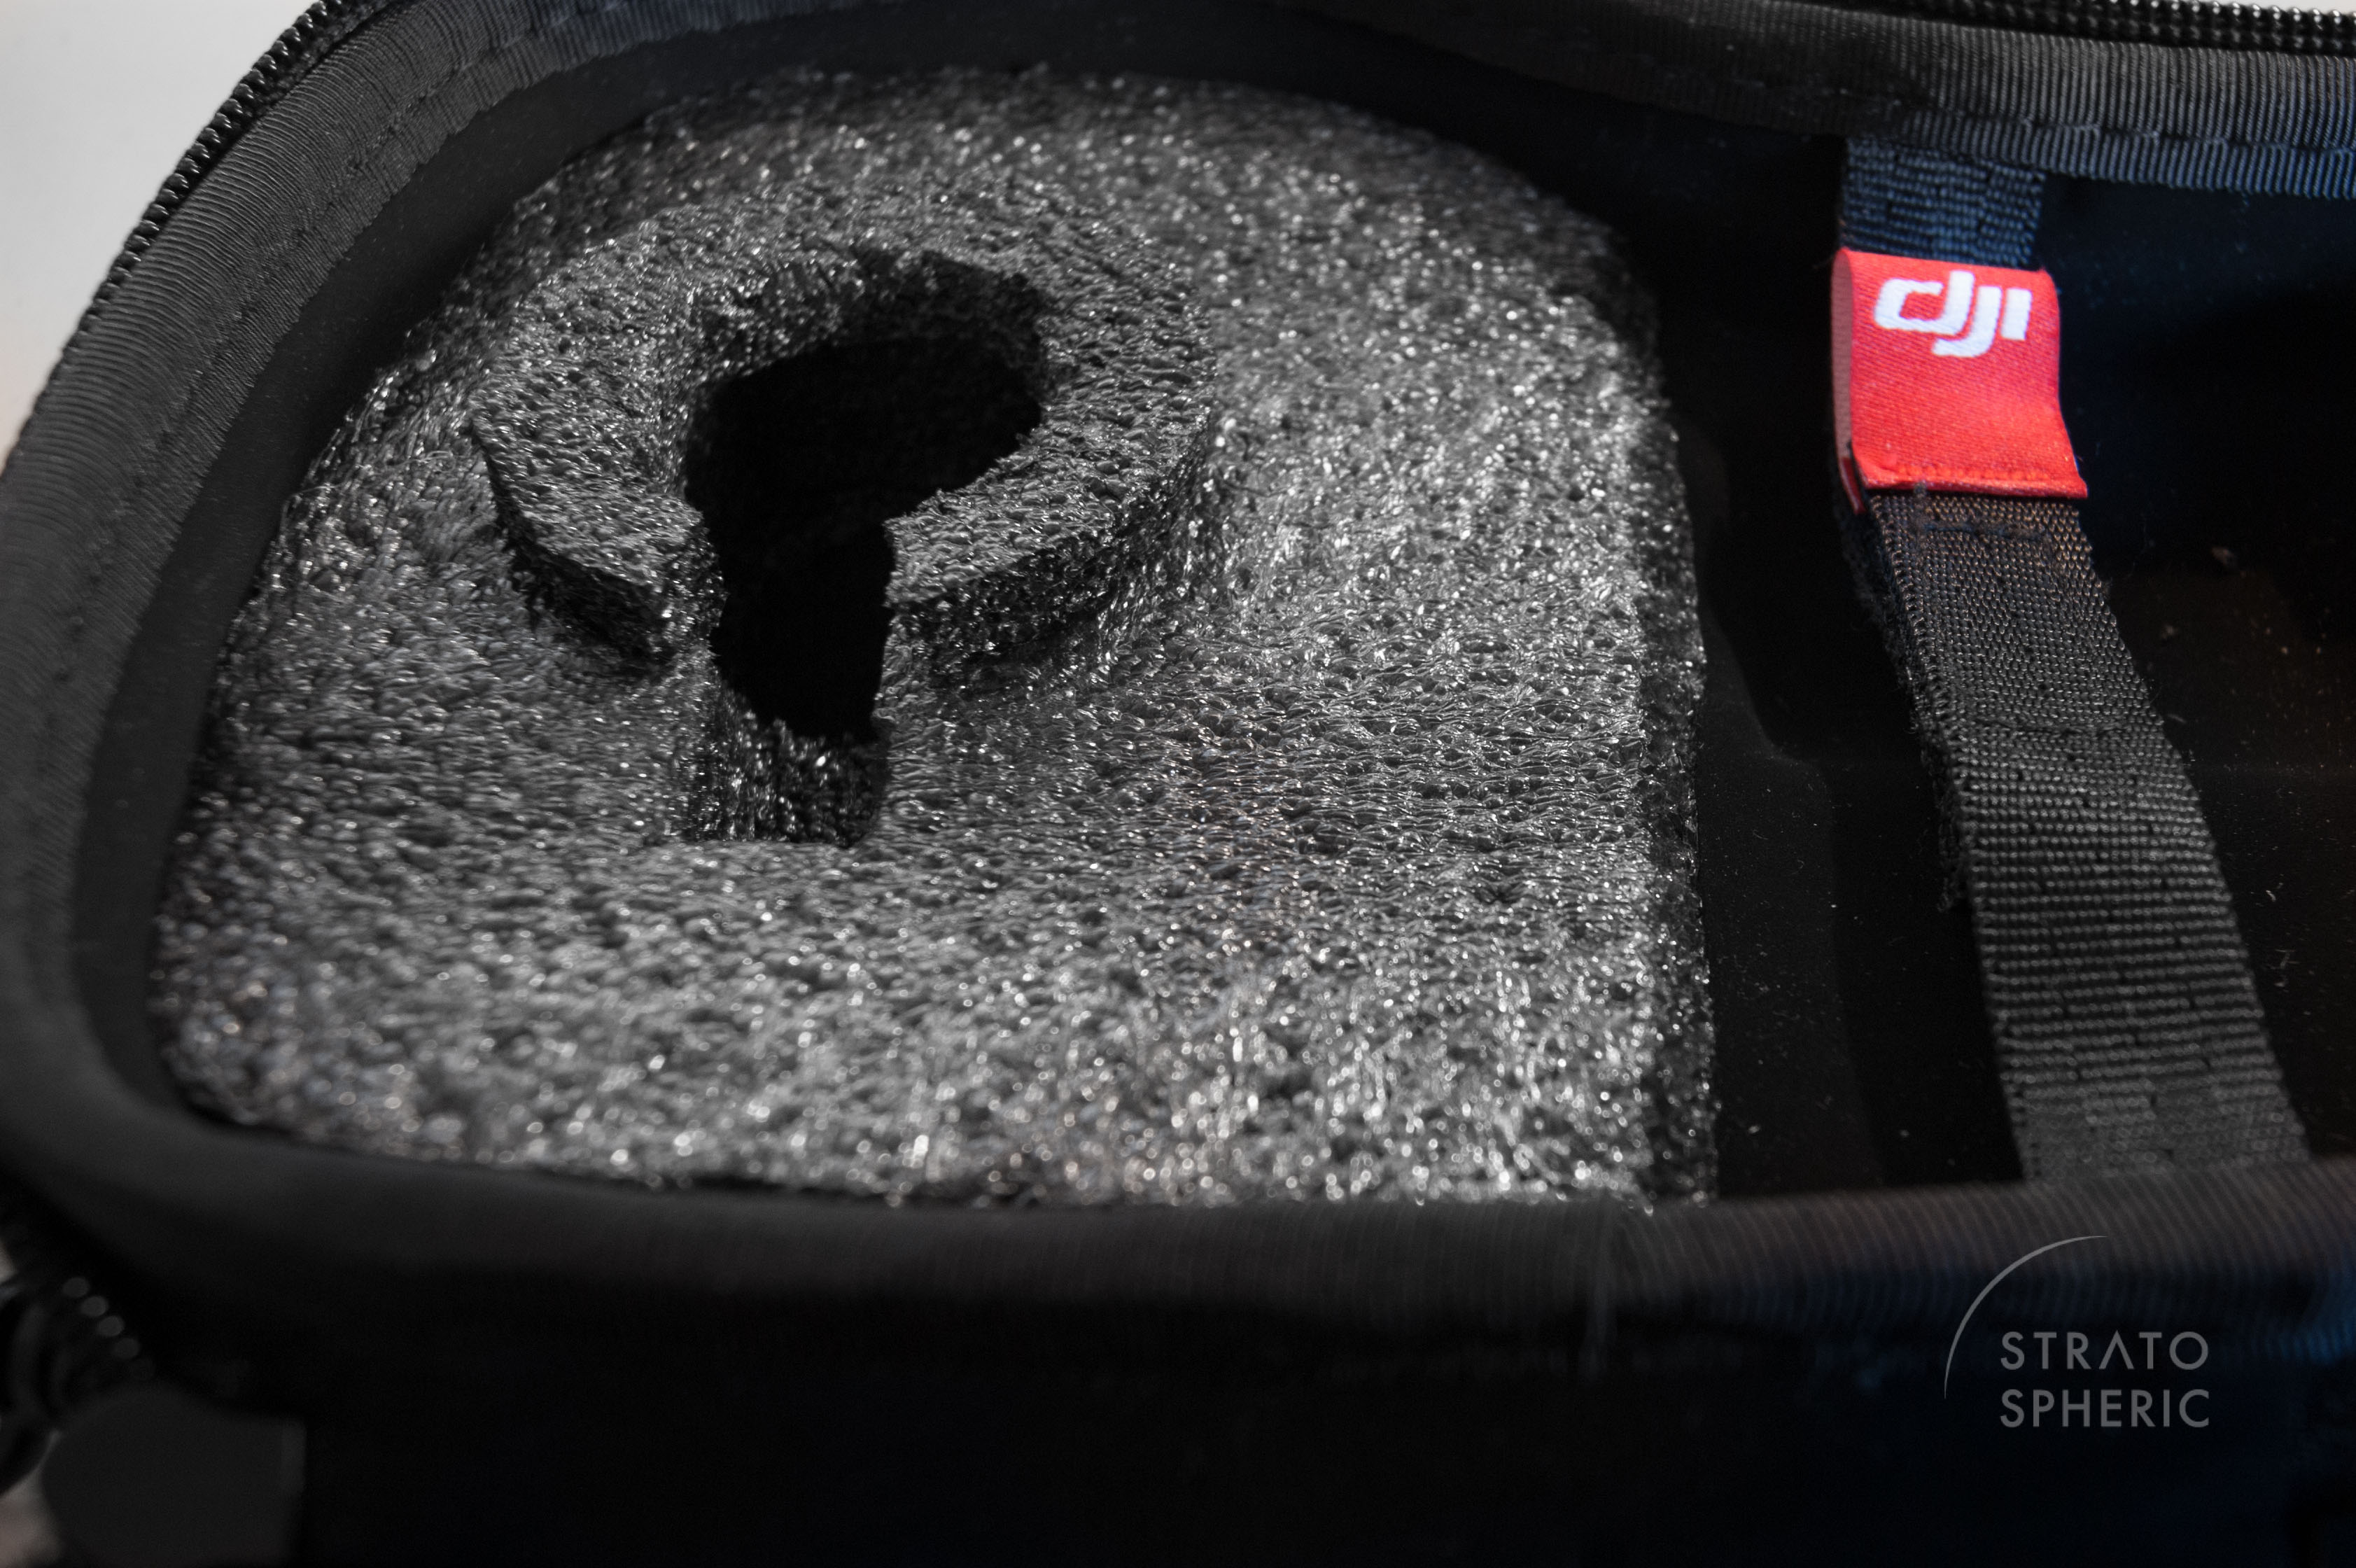
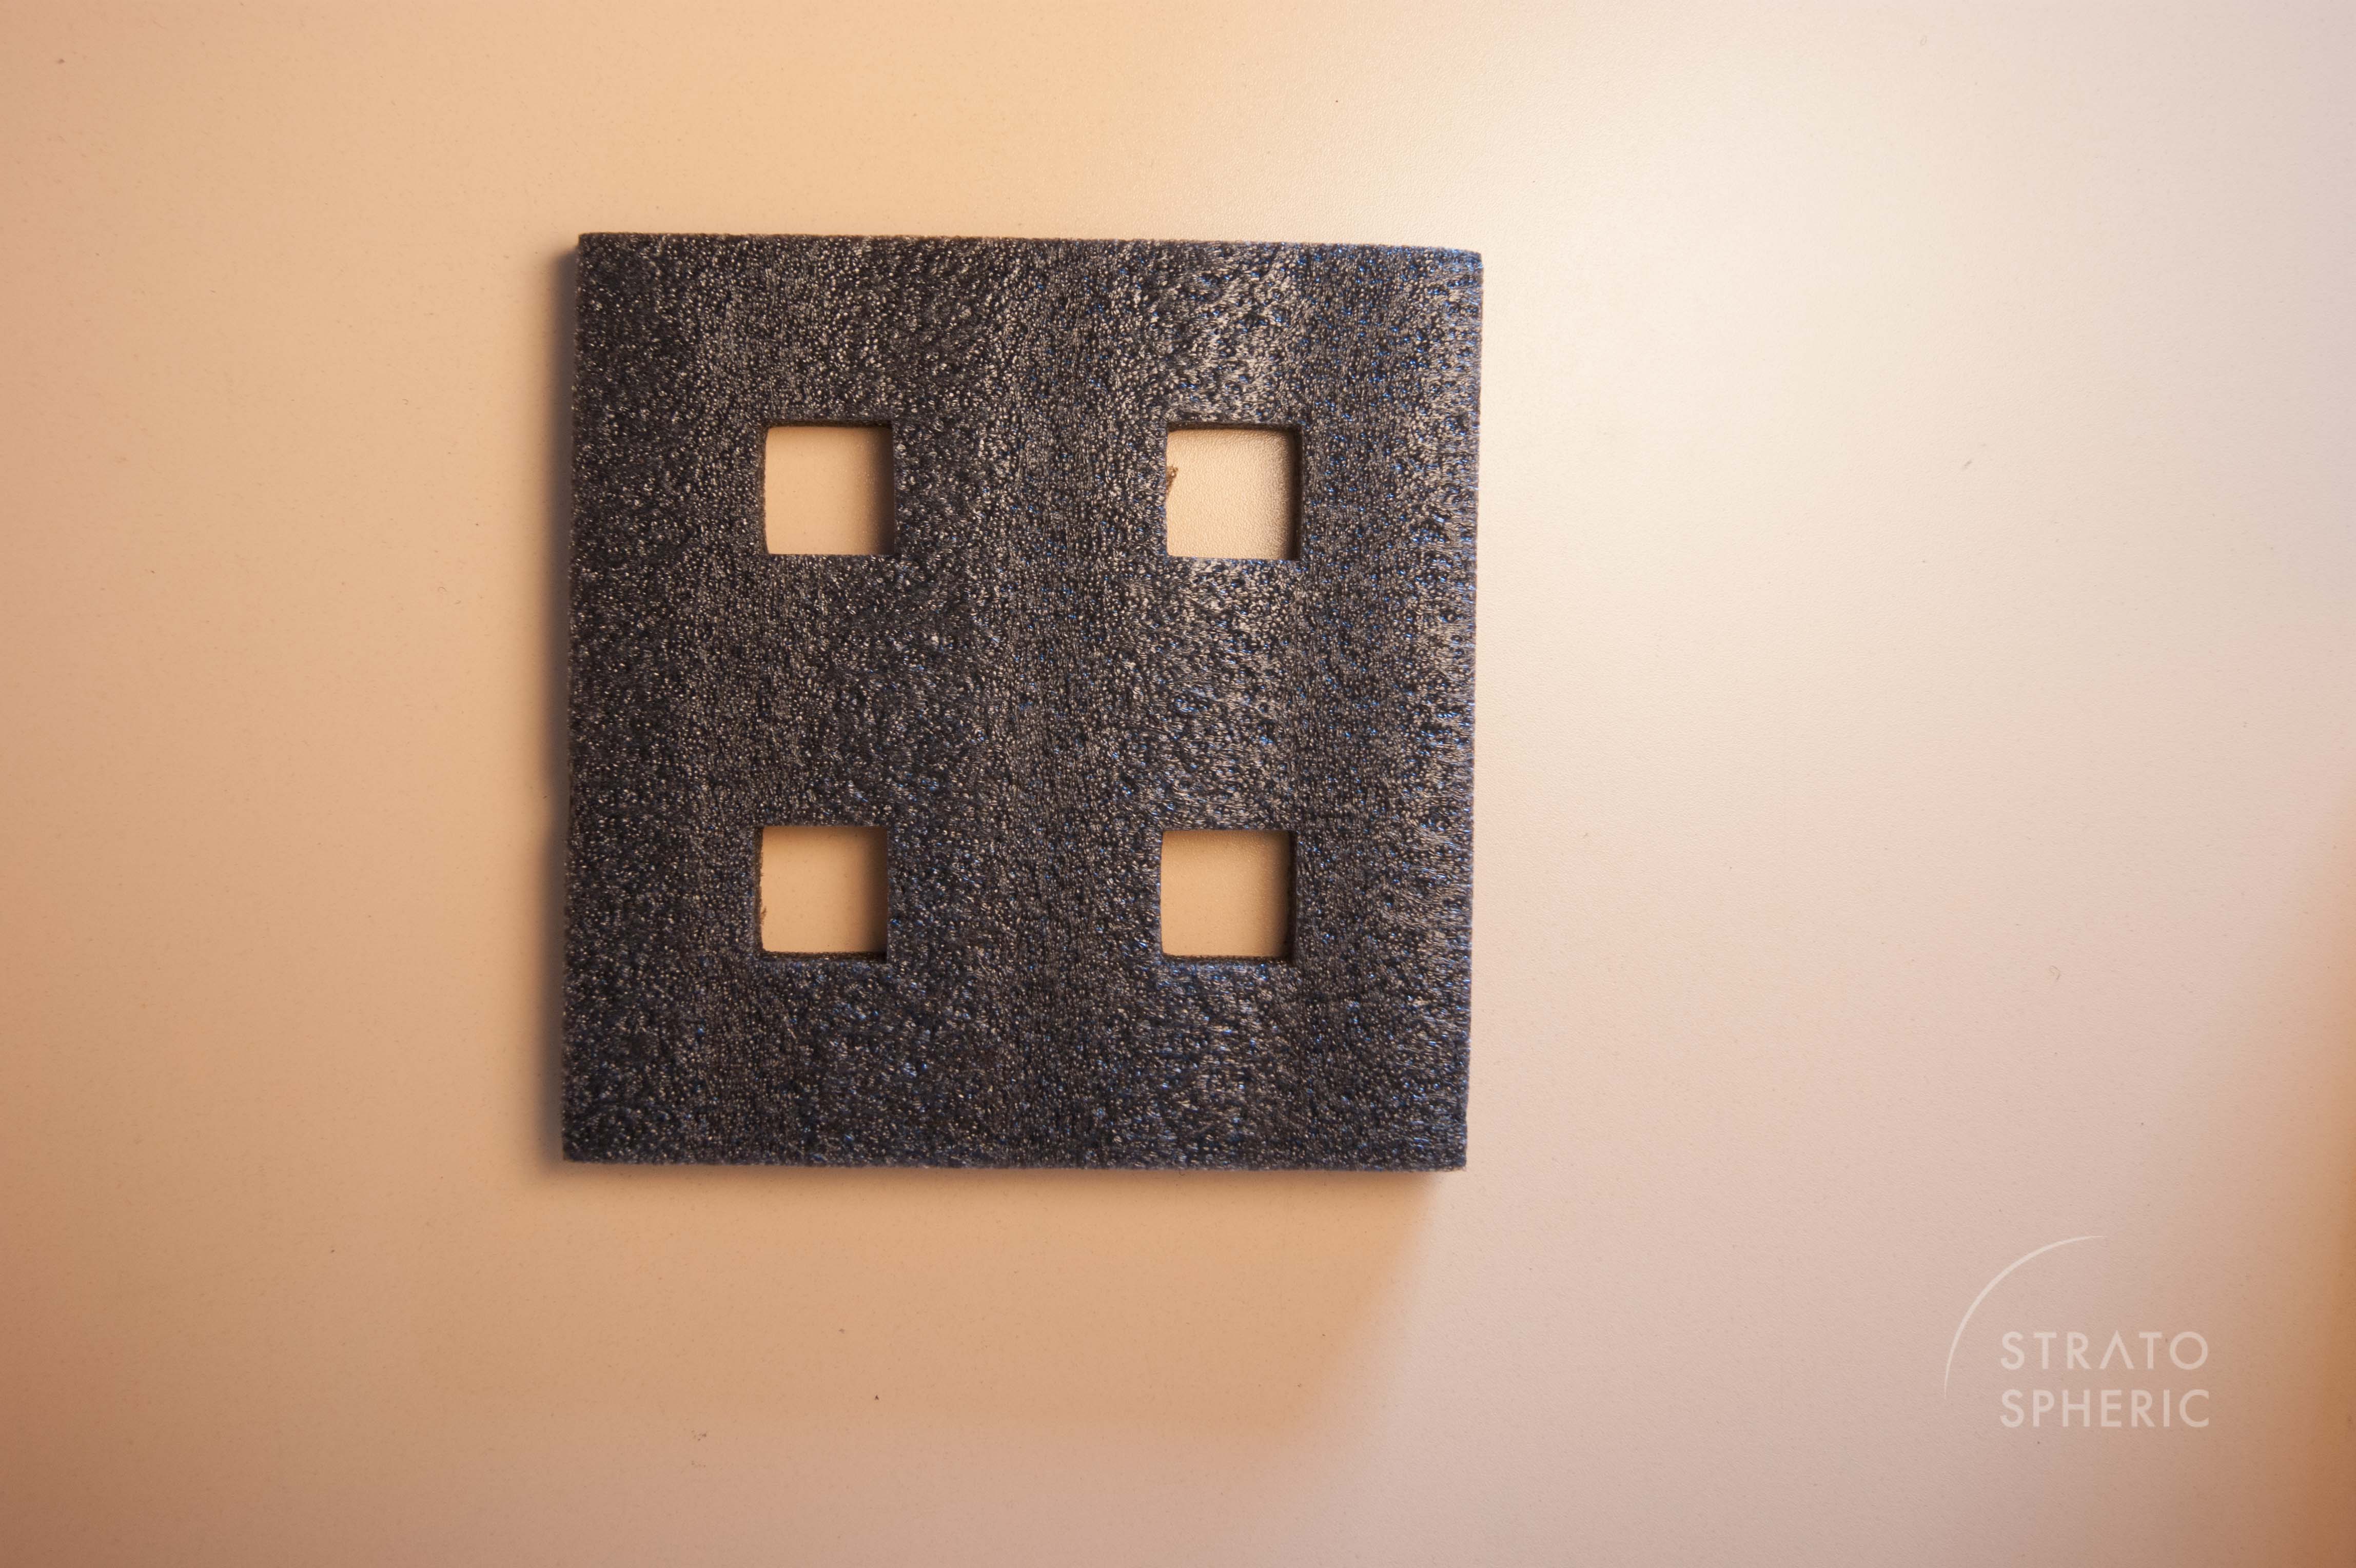
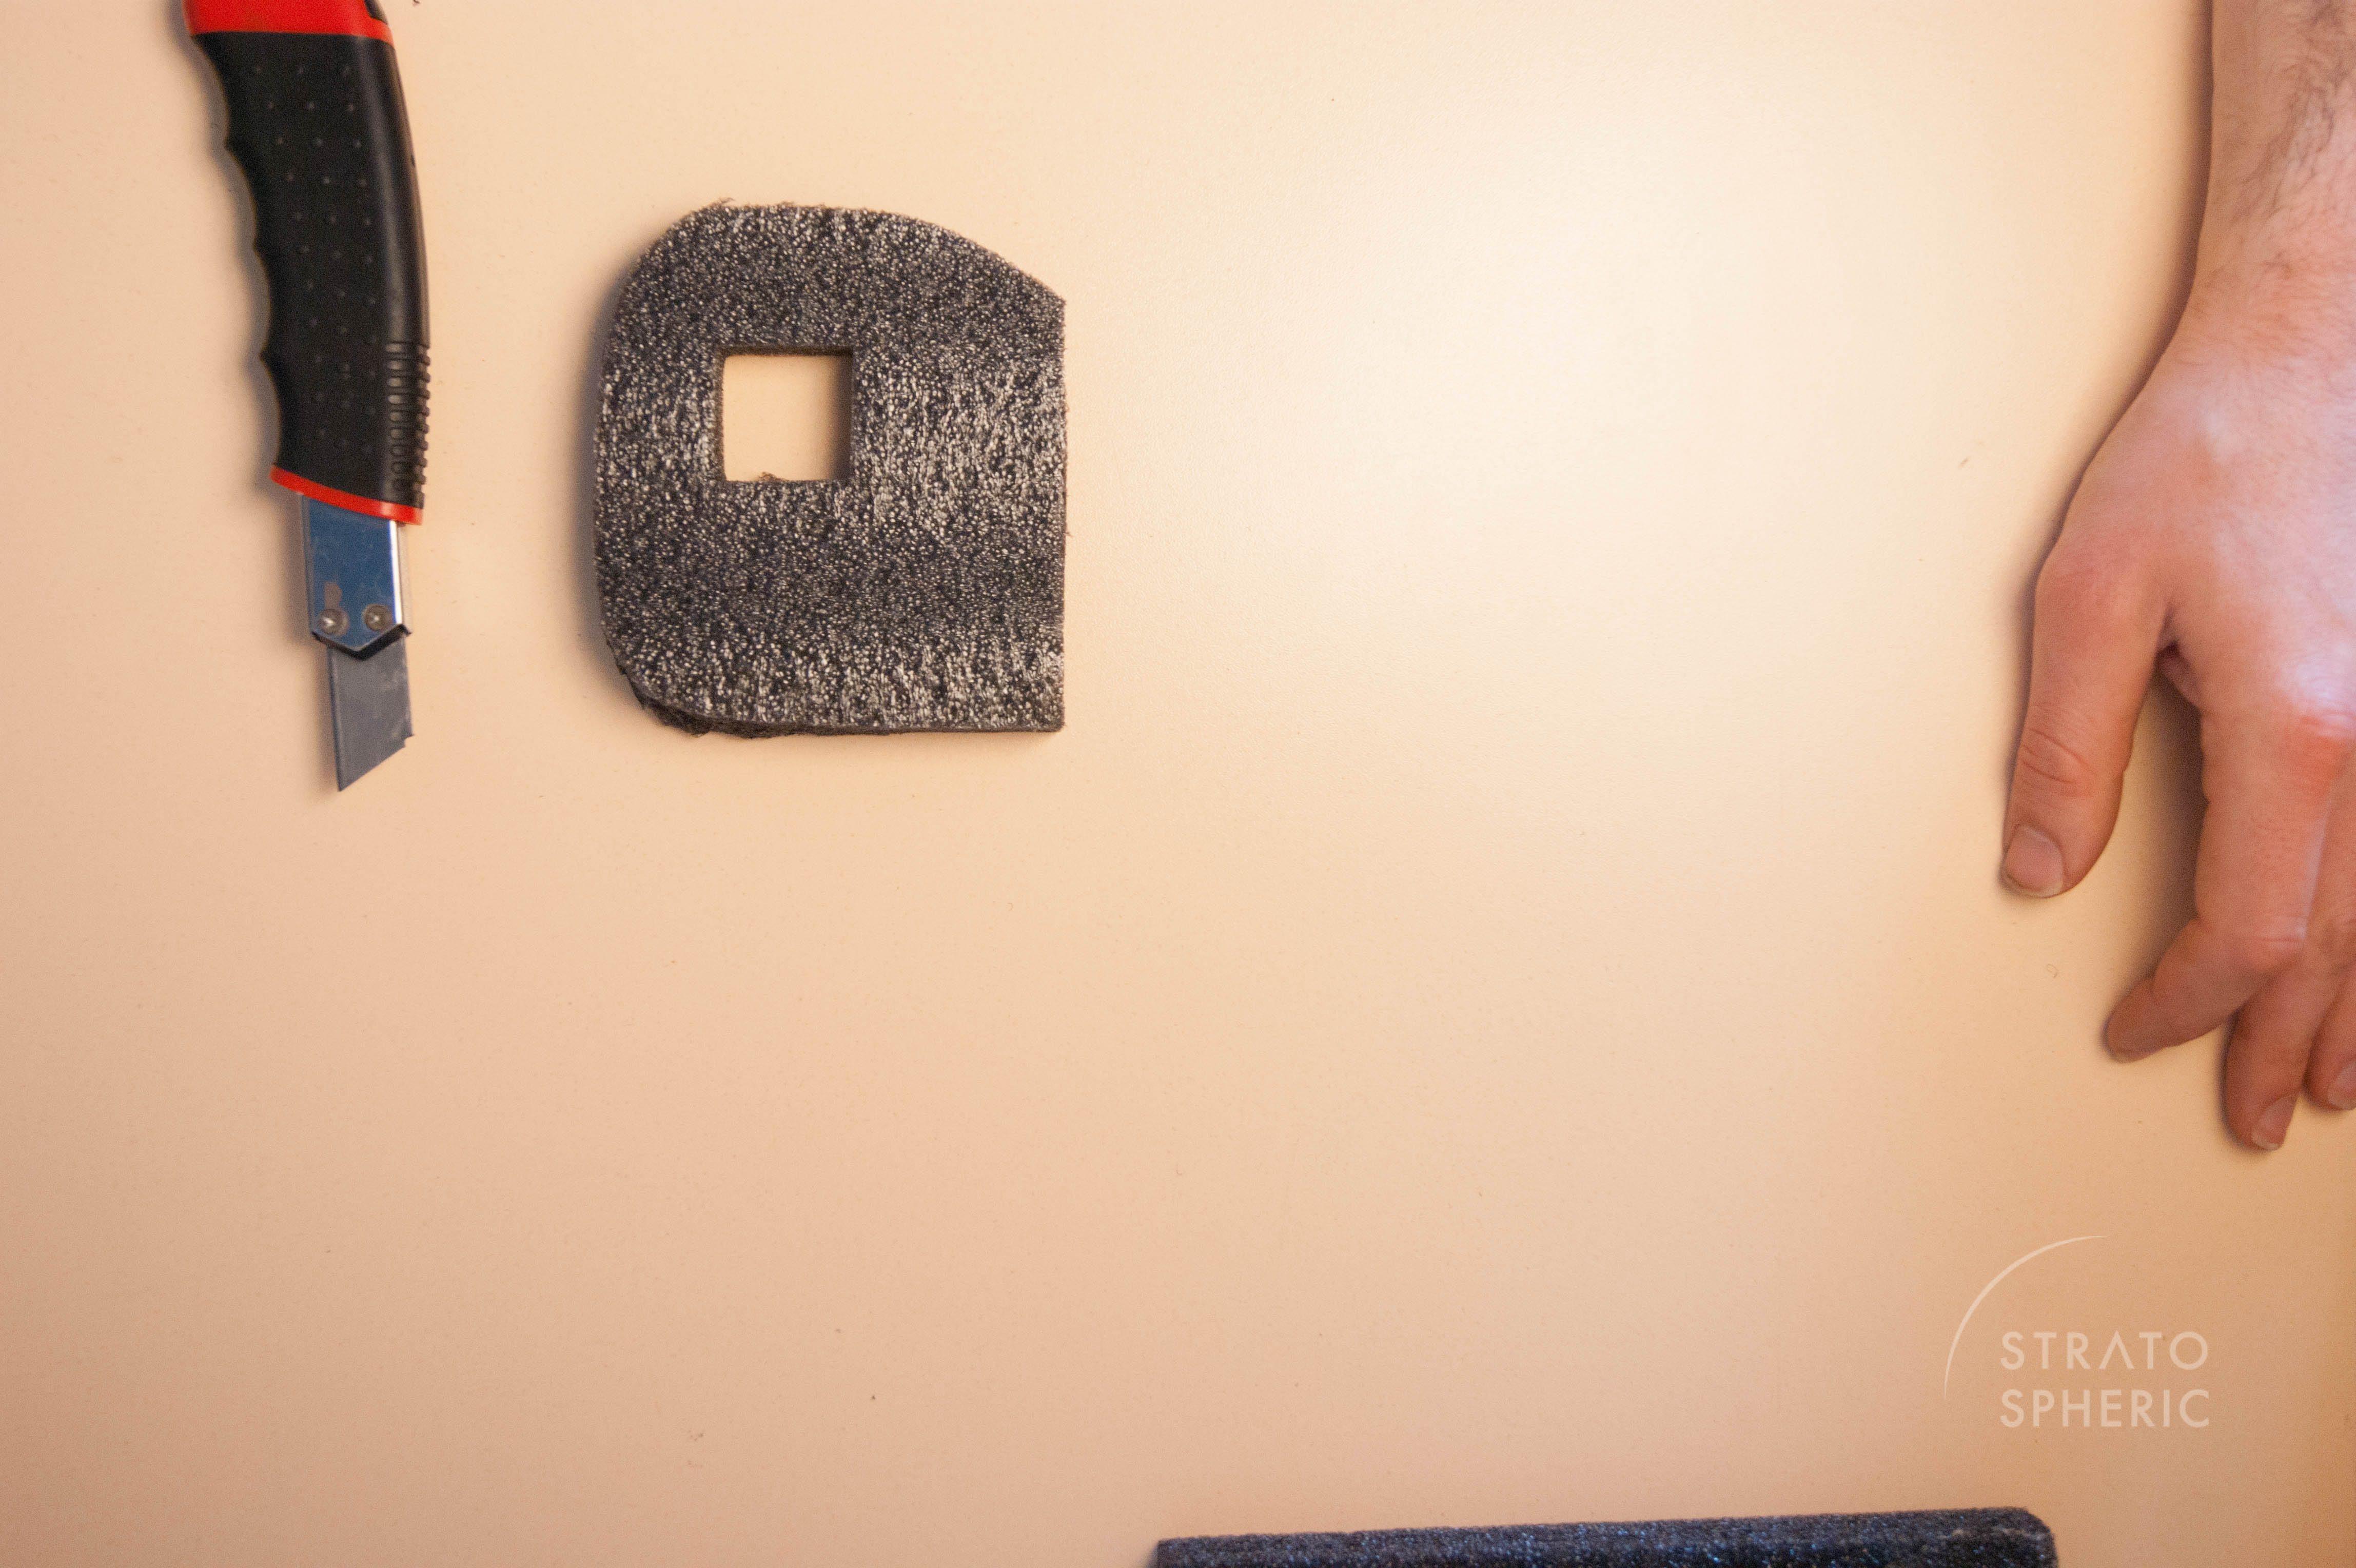
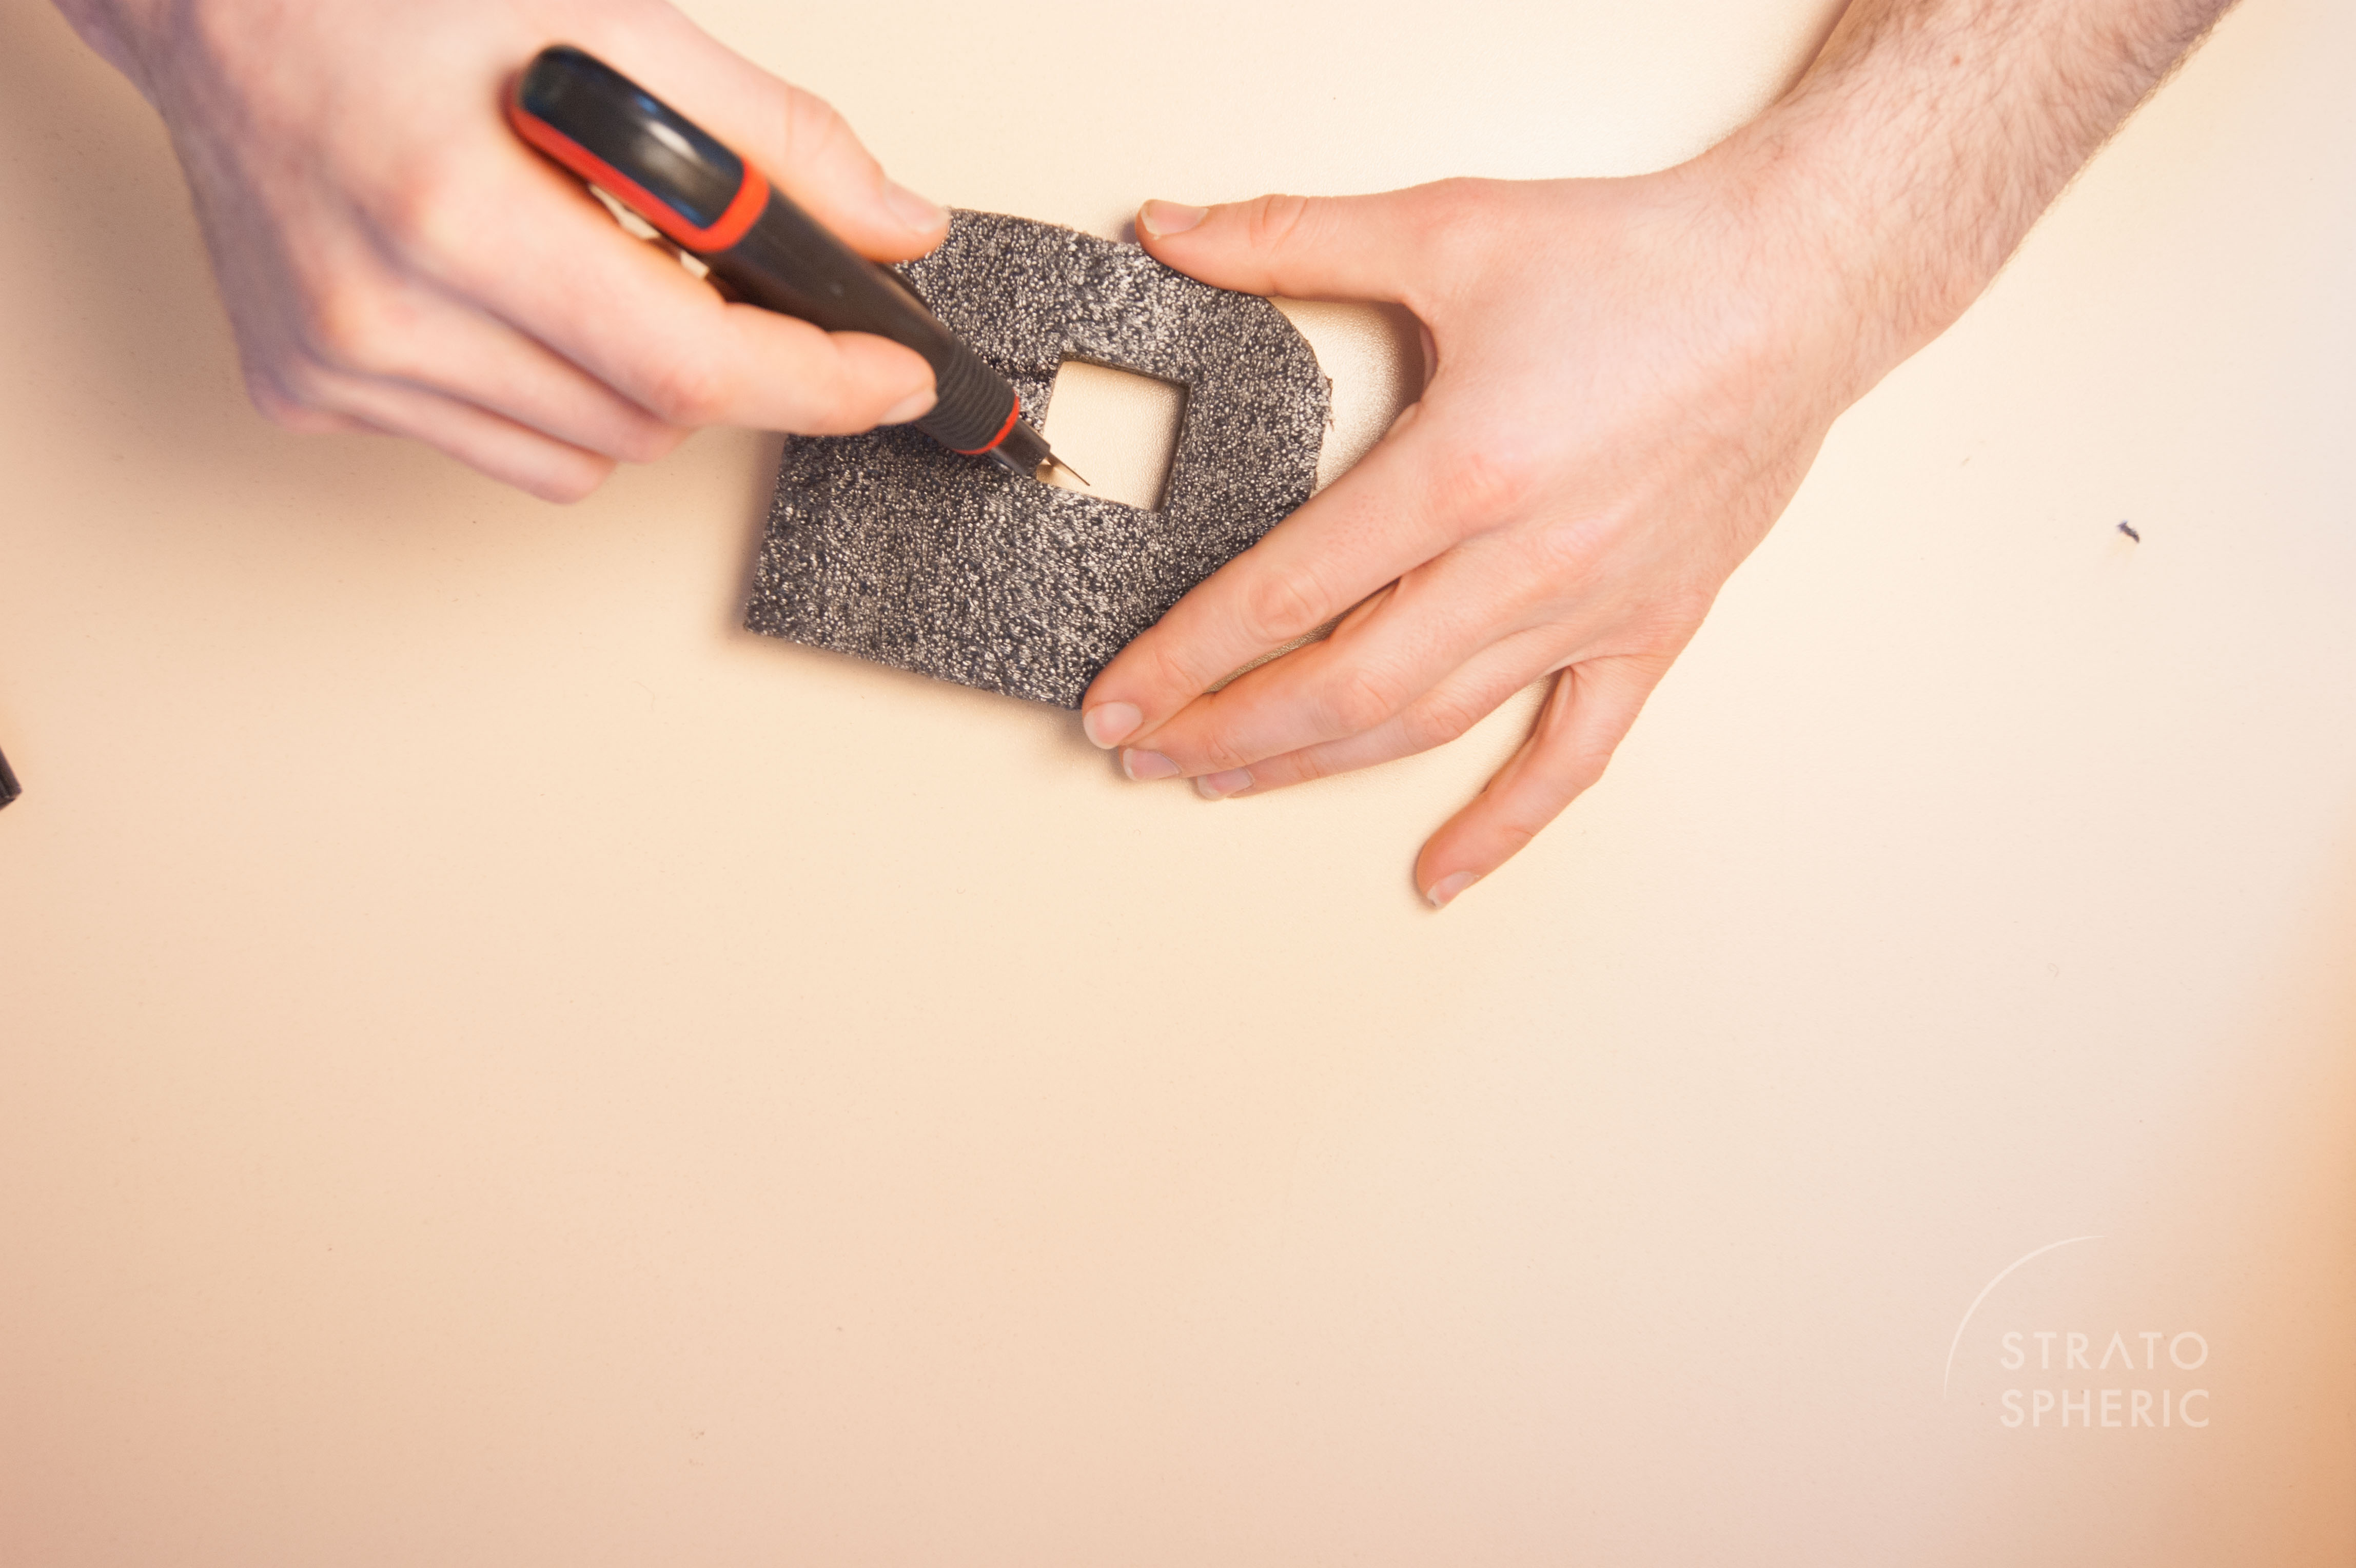
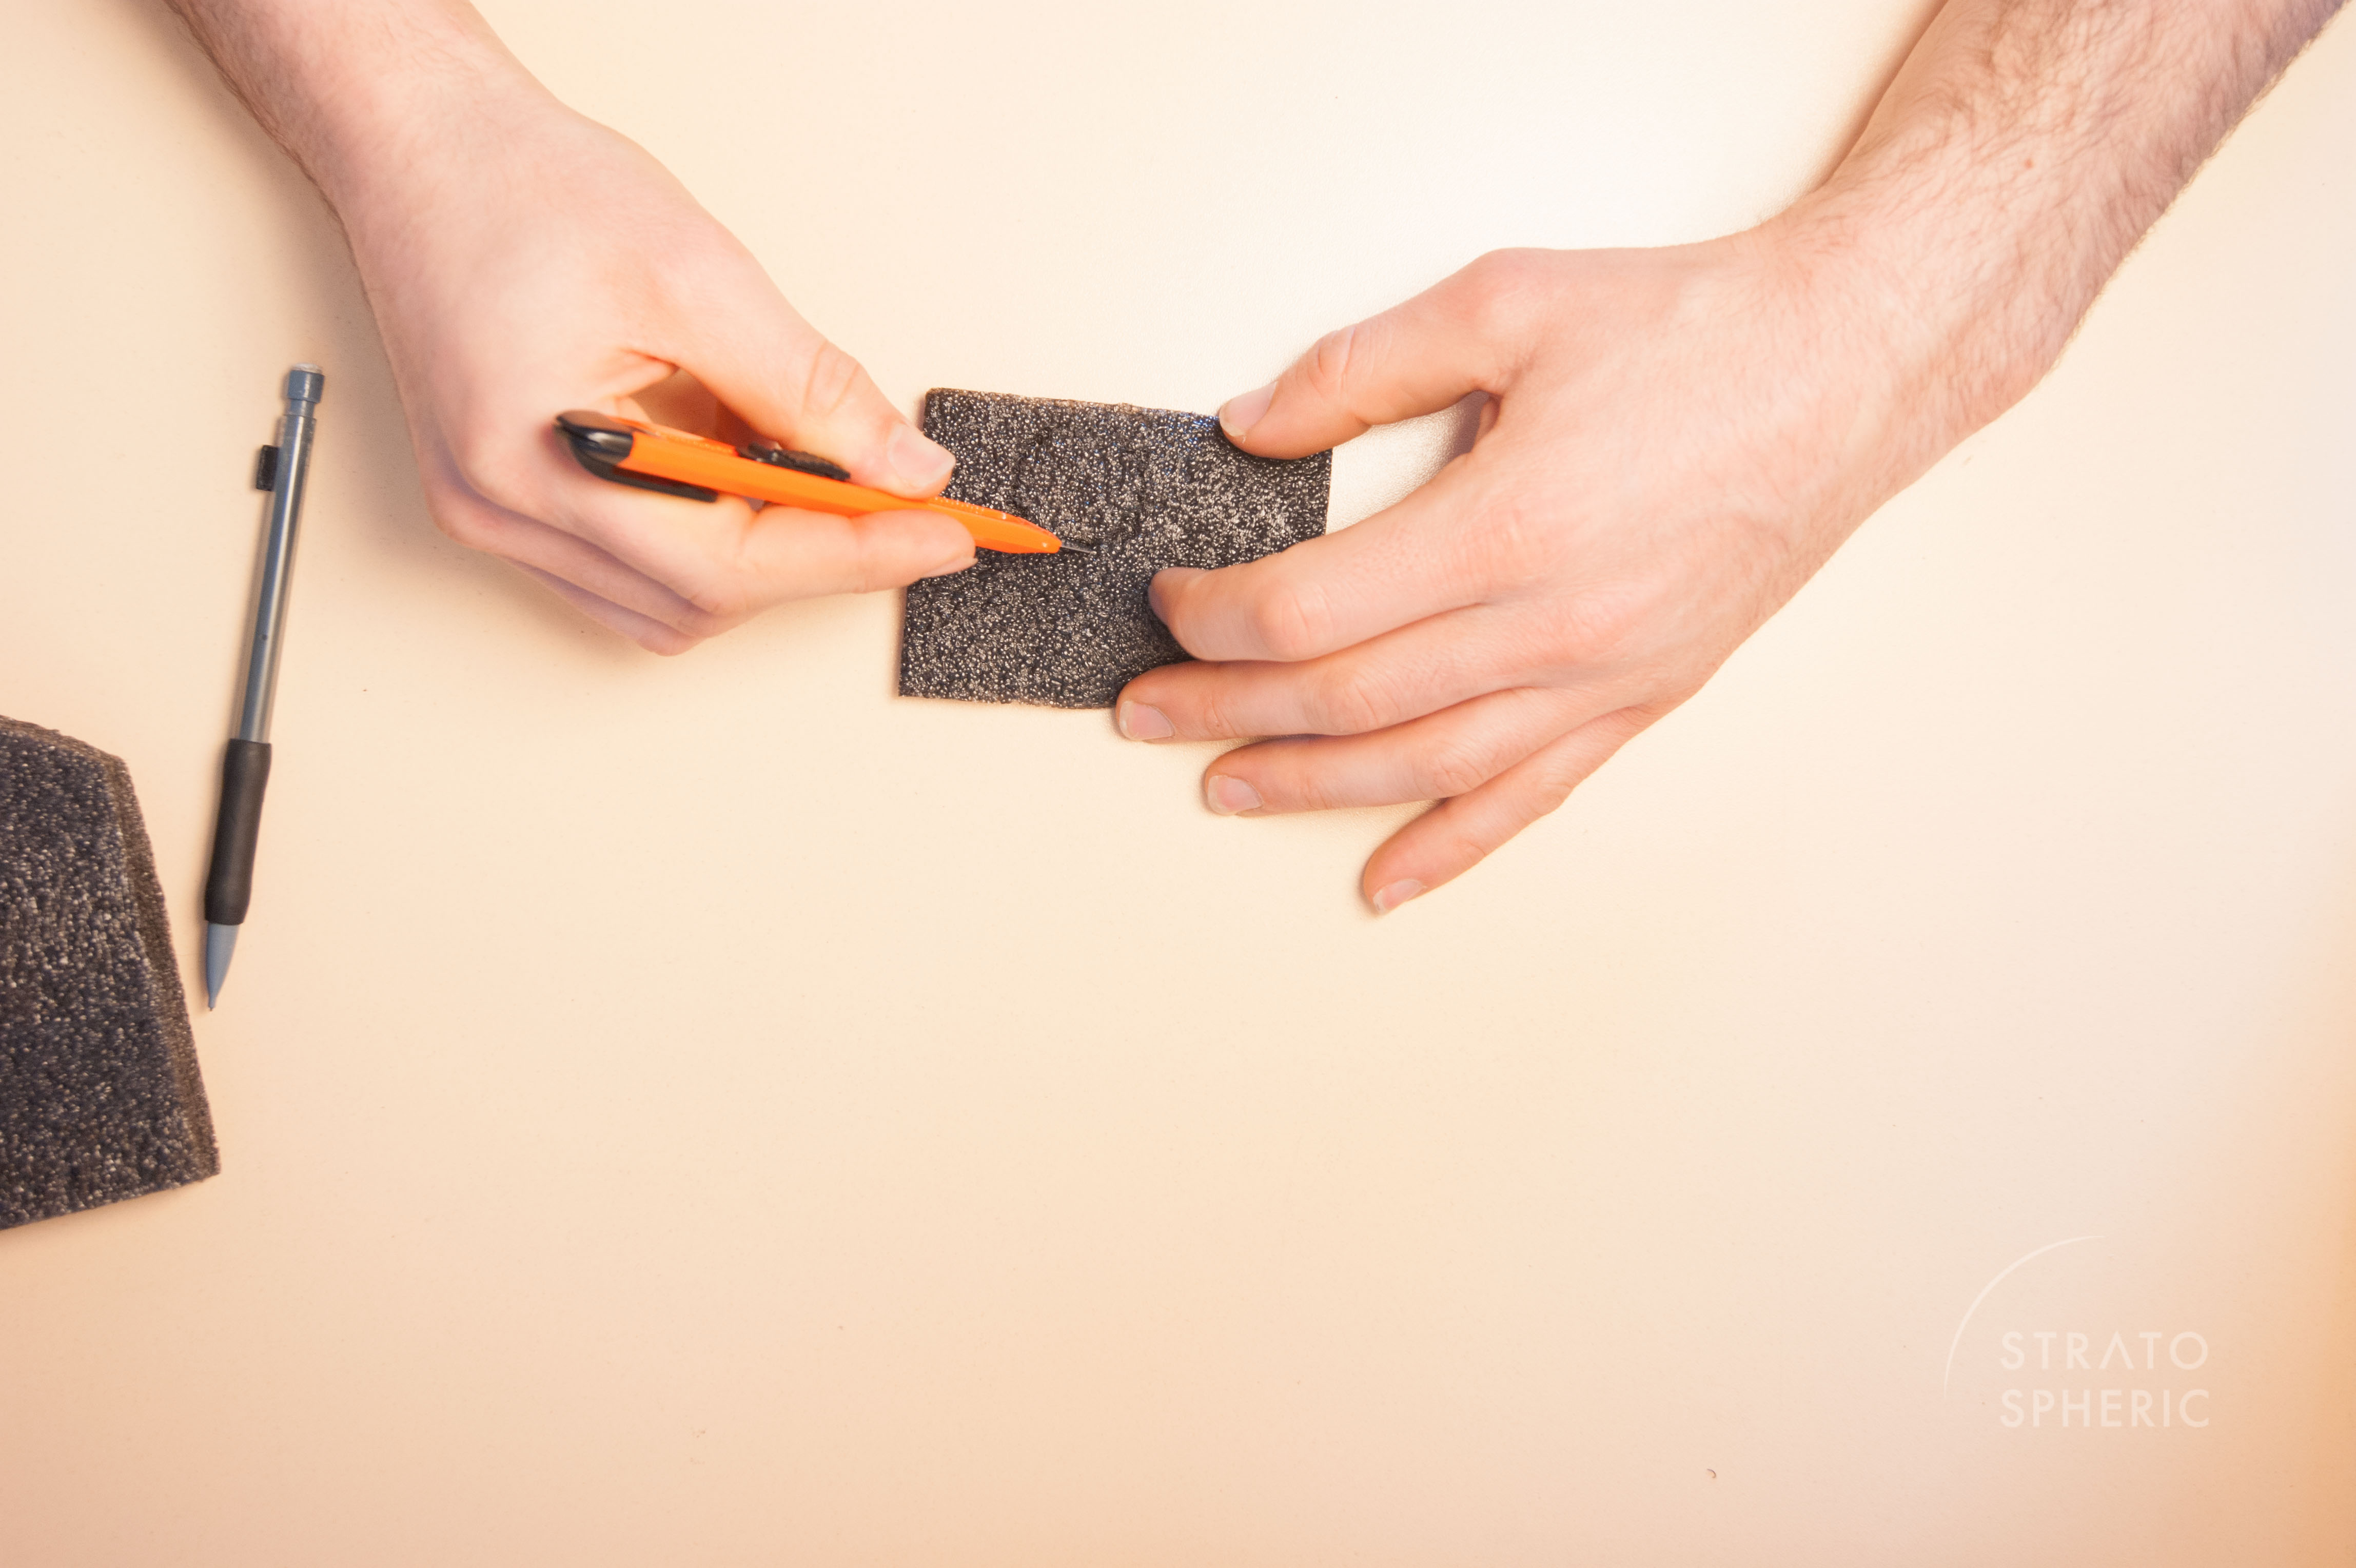
6. I found a good-sized piece of pvc foam that is suitable to cushion and hold the X3 in place. The material should be easy to cut with a scalpel/trimming knife. The thickness of the piece I used was 1.5cm. Other thicknesses will also work, but might require slightly different designs. As you will see in the steps below, I raised the height of the foam with an additional piece in order to make sure the camera rests on the foam rather than on the gimbal arm, whereas a for example thicker foam might not require that but need additional cutting to fit the cylinder that connects to the handle.
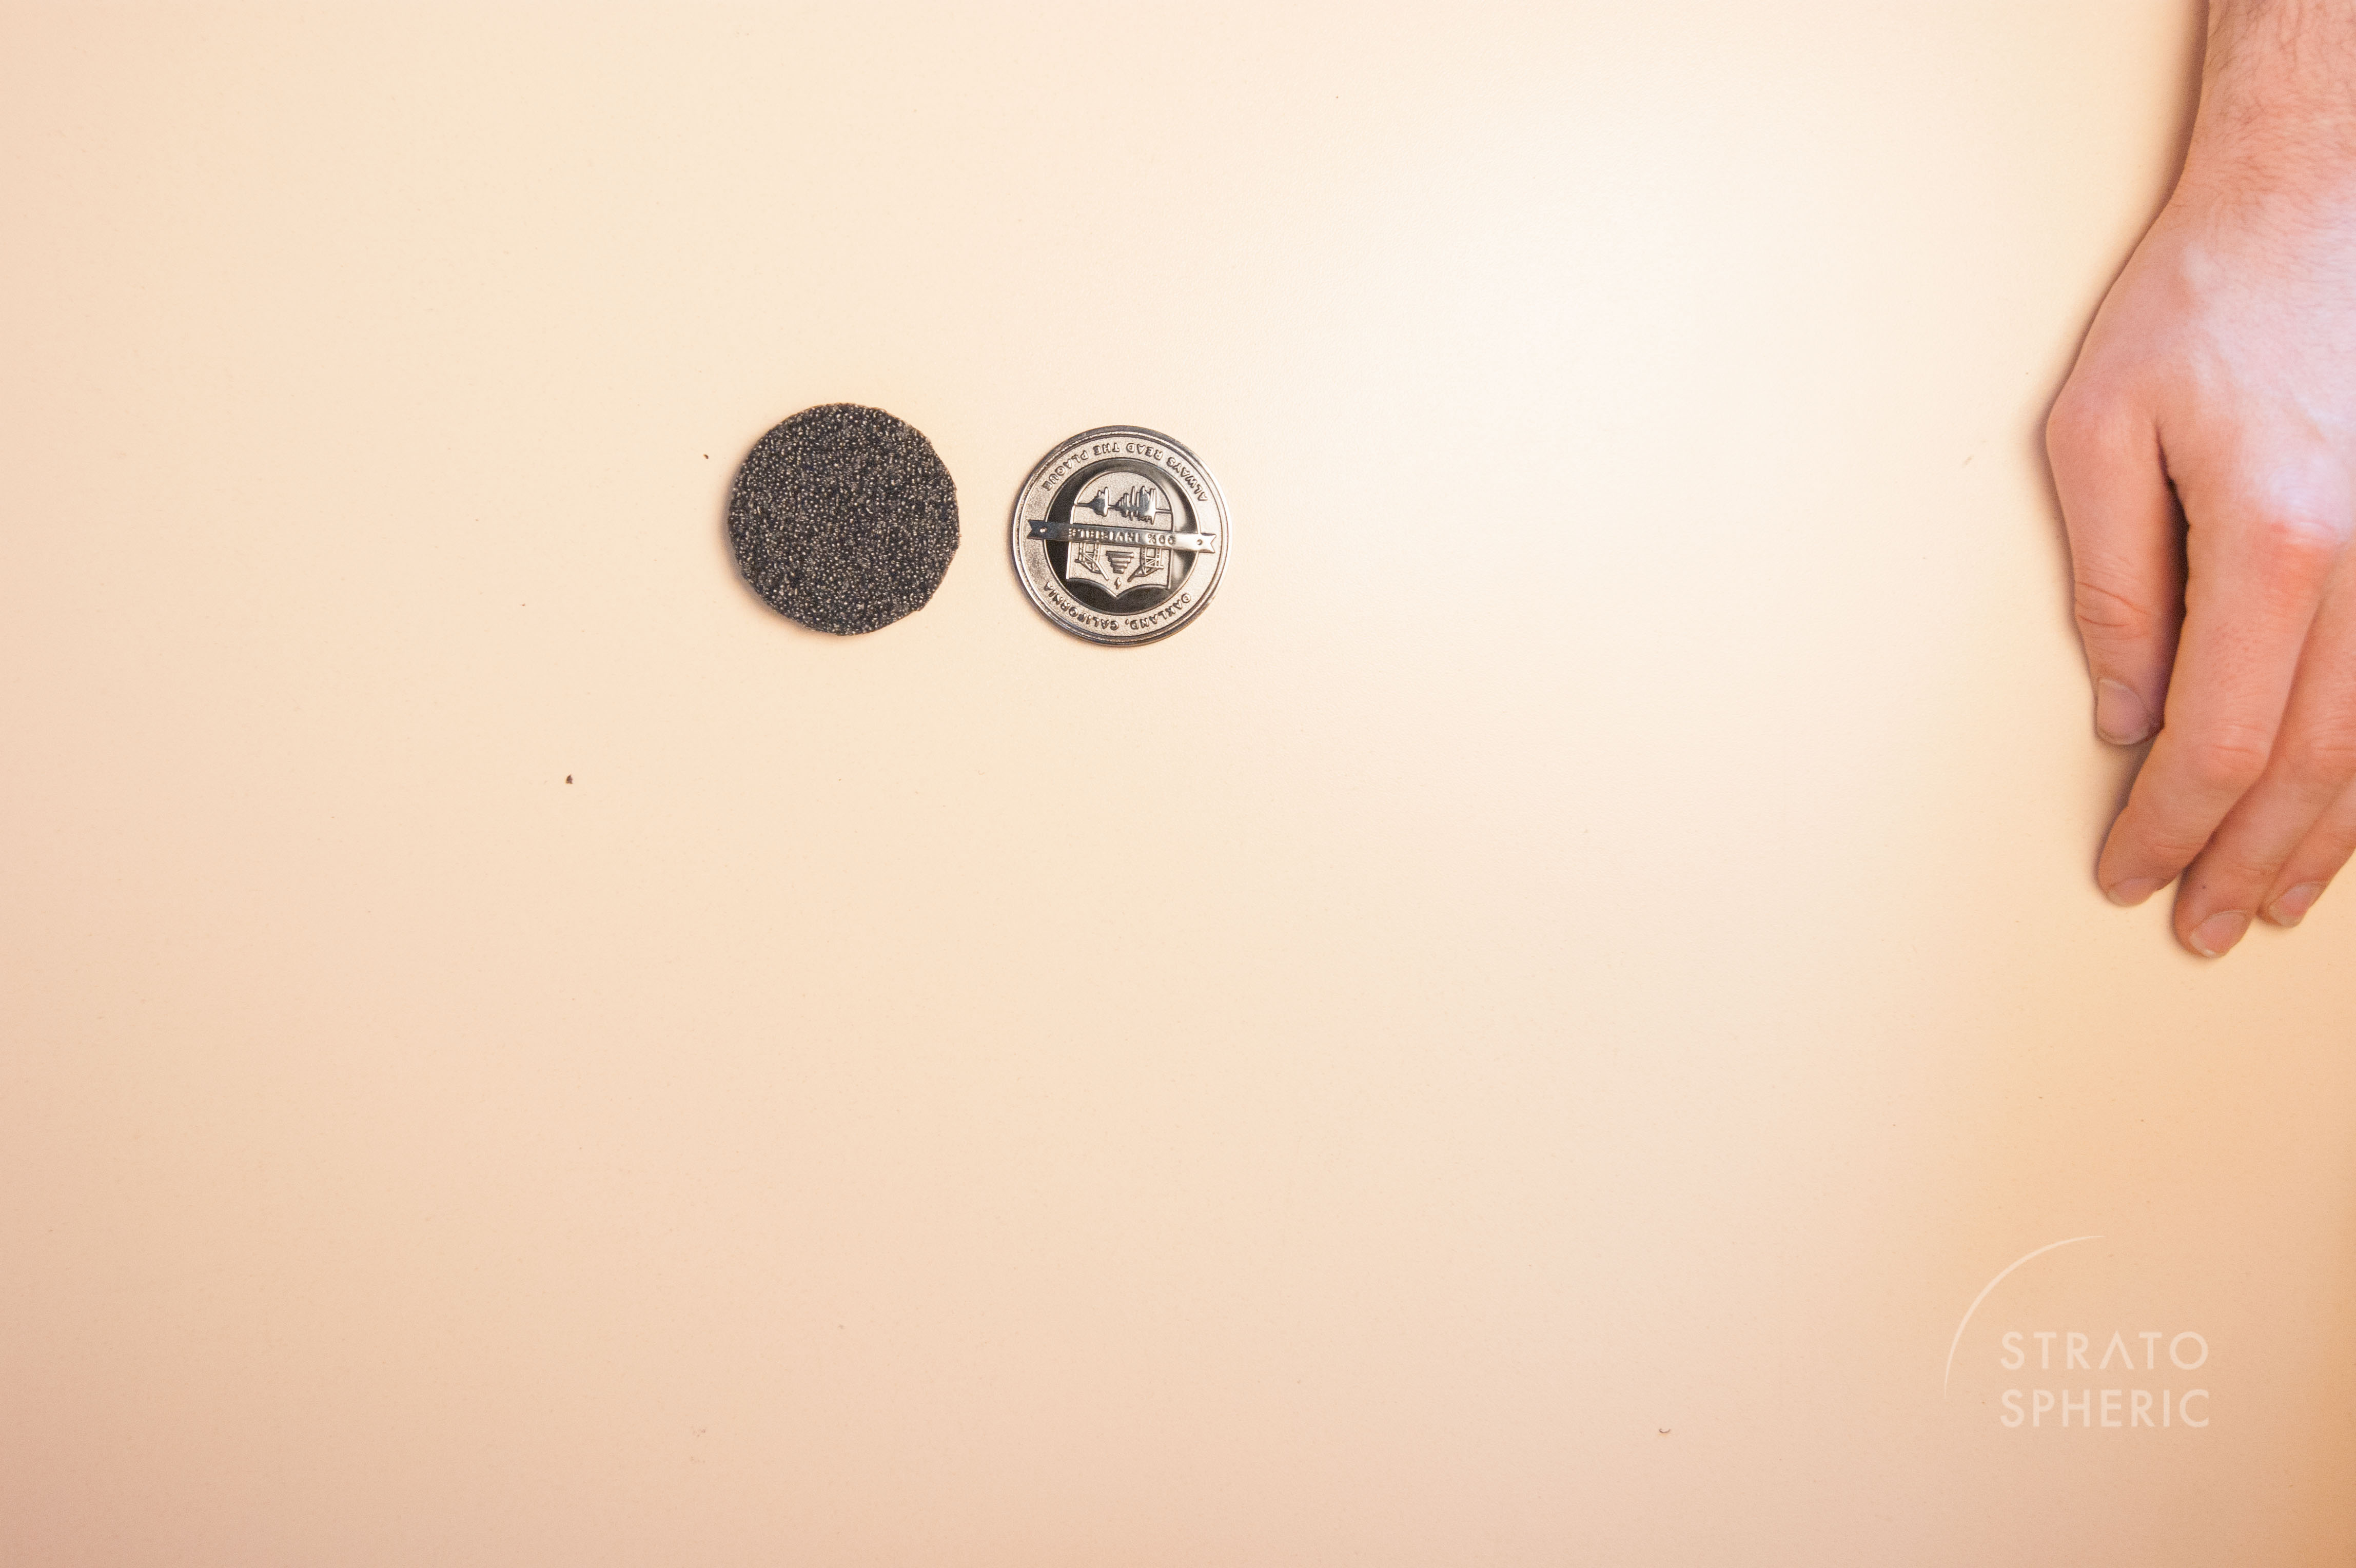
7. I used the piece I cut out from the bottom section inner lining as a stencil to mark & cut out the same shape from the PVC foam. In my case, there was a suitably sized square opening already in the foam, so I just positioned the 'stencil' so as to have the opening at the right place. If there is no suitably-sized opening in your piece, you'll have to mark and cut it out after cutting the stencil.
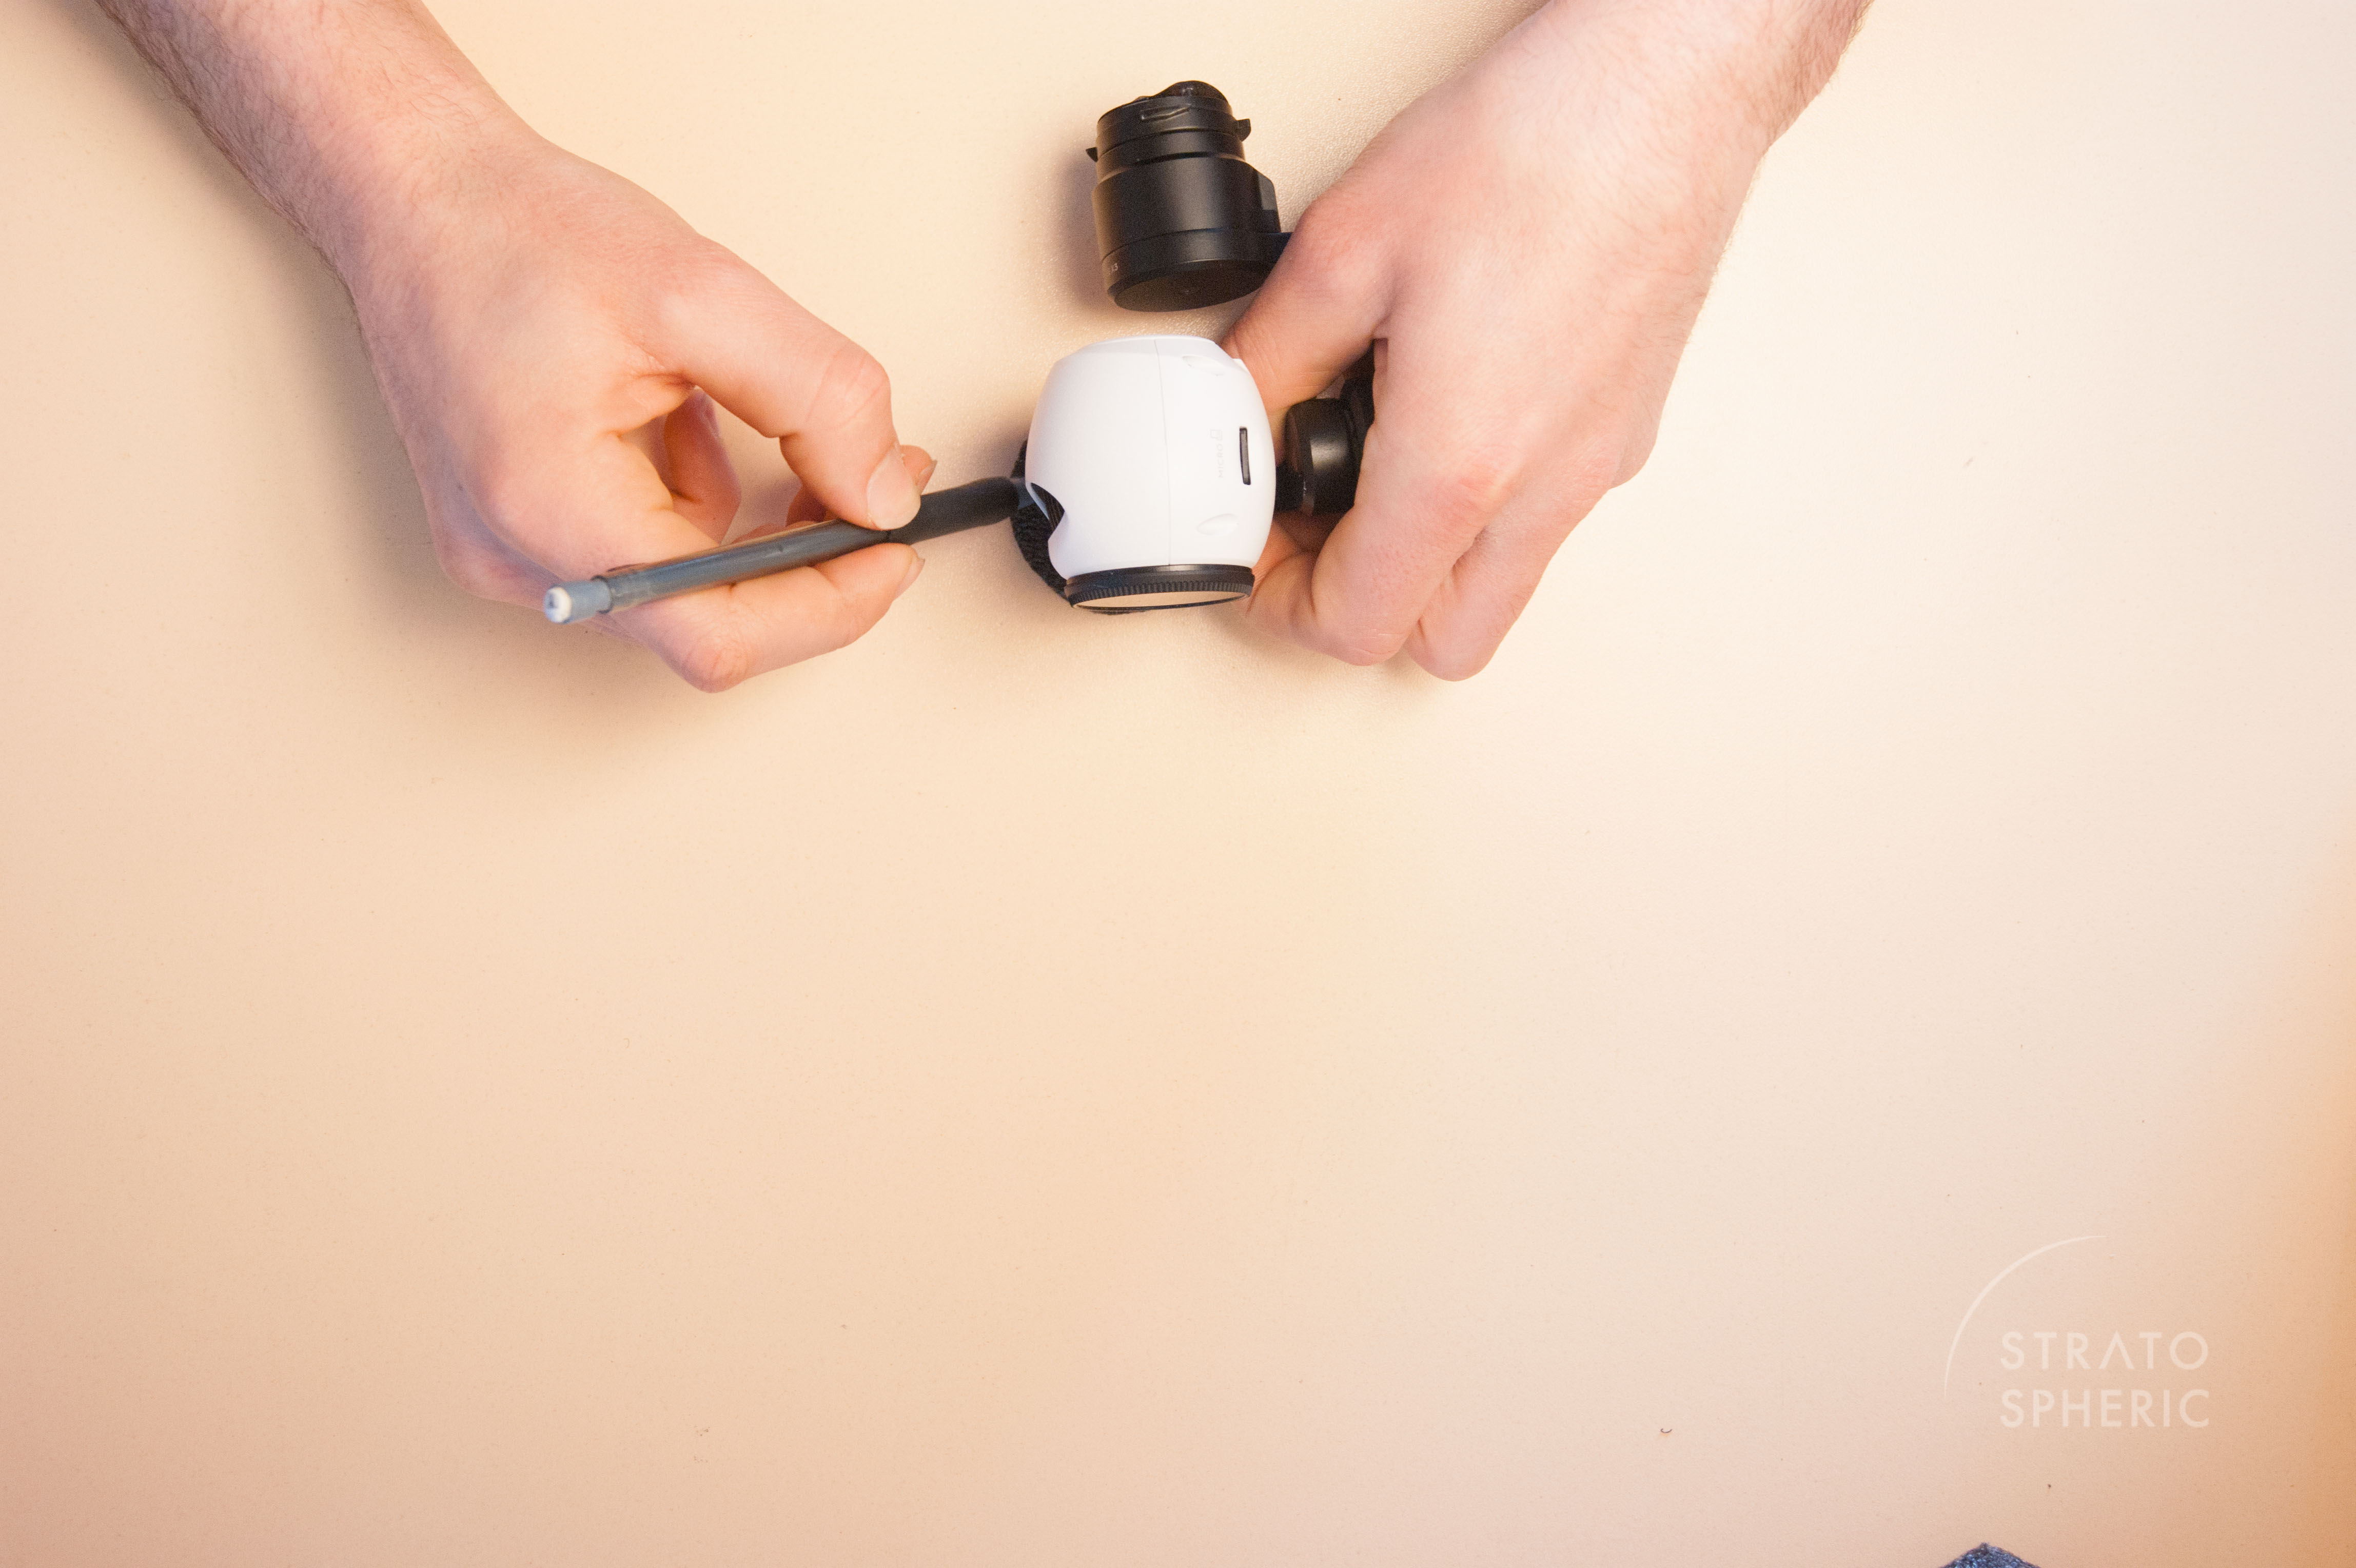
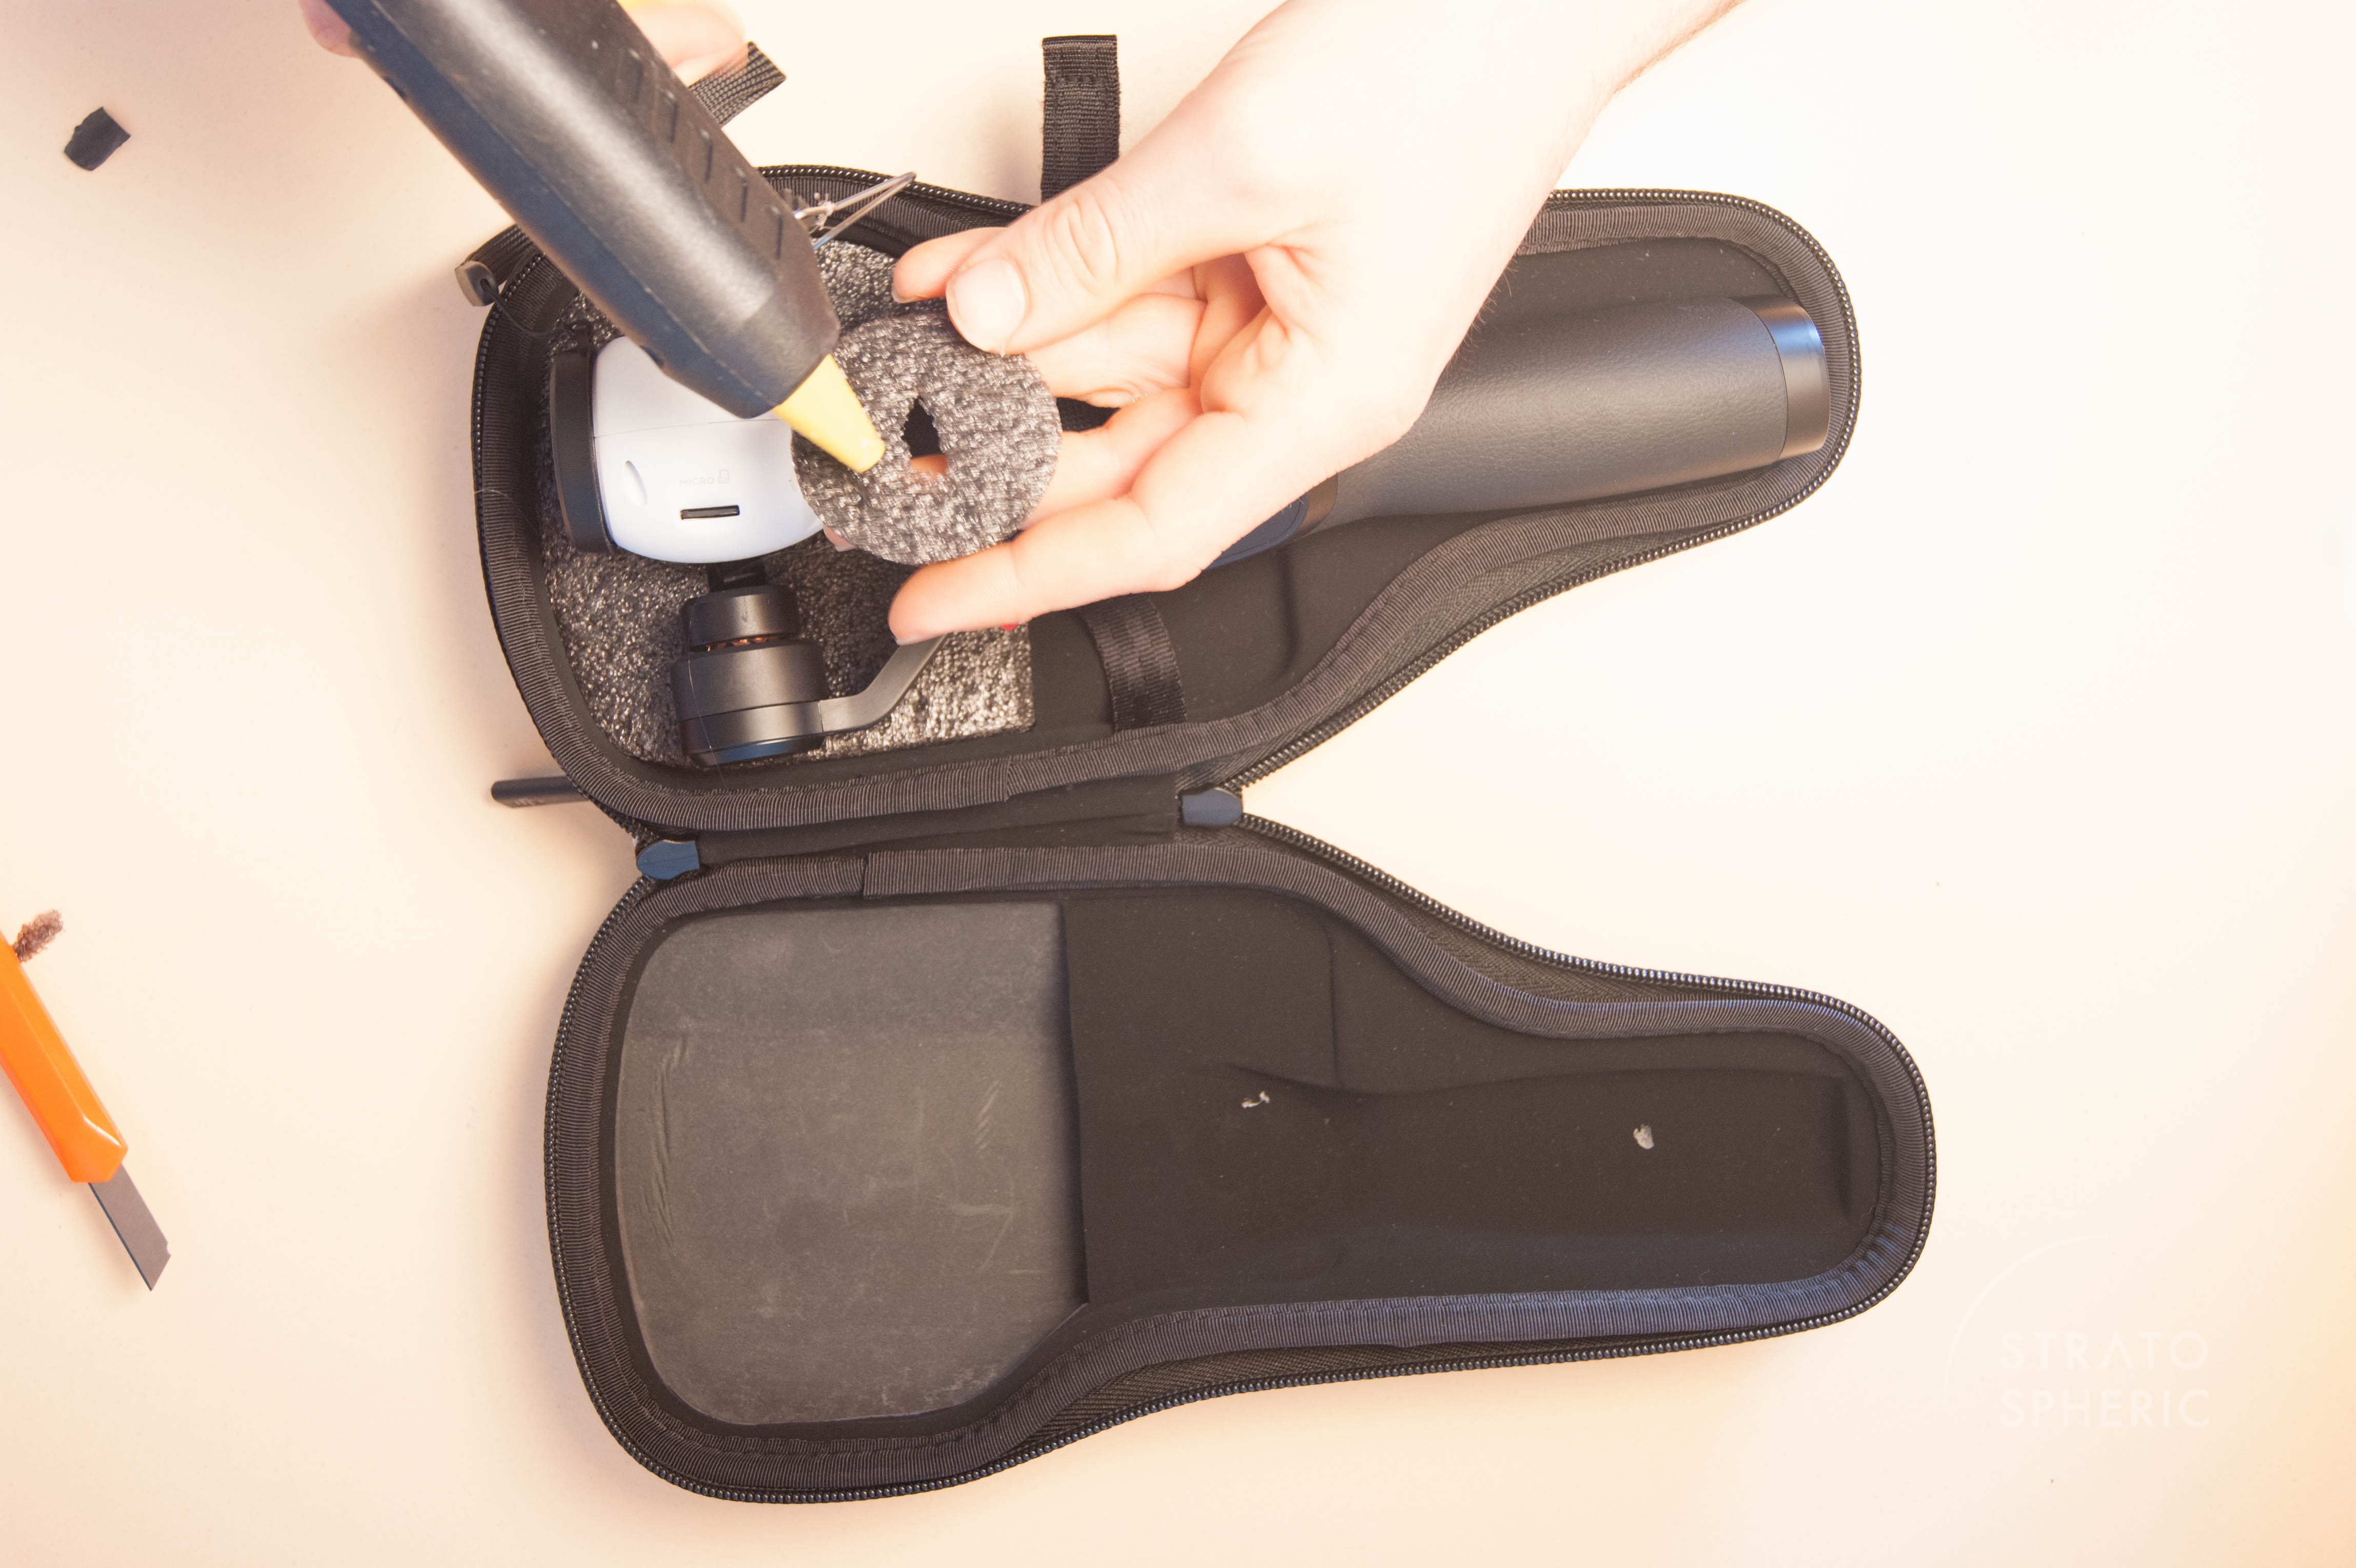
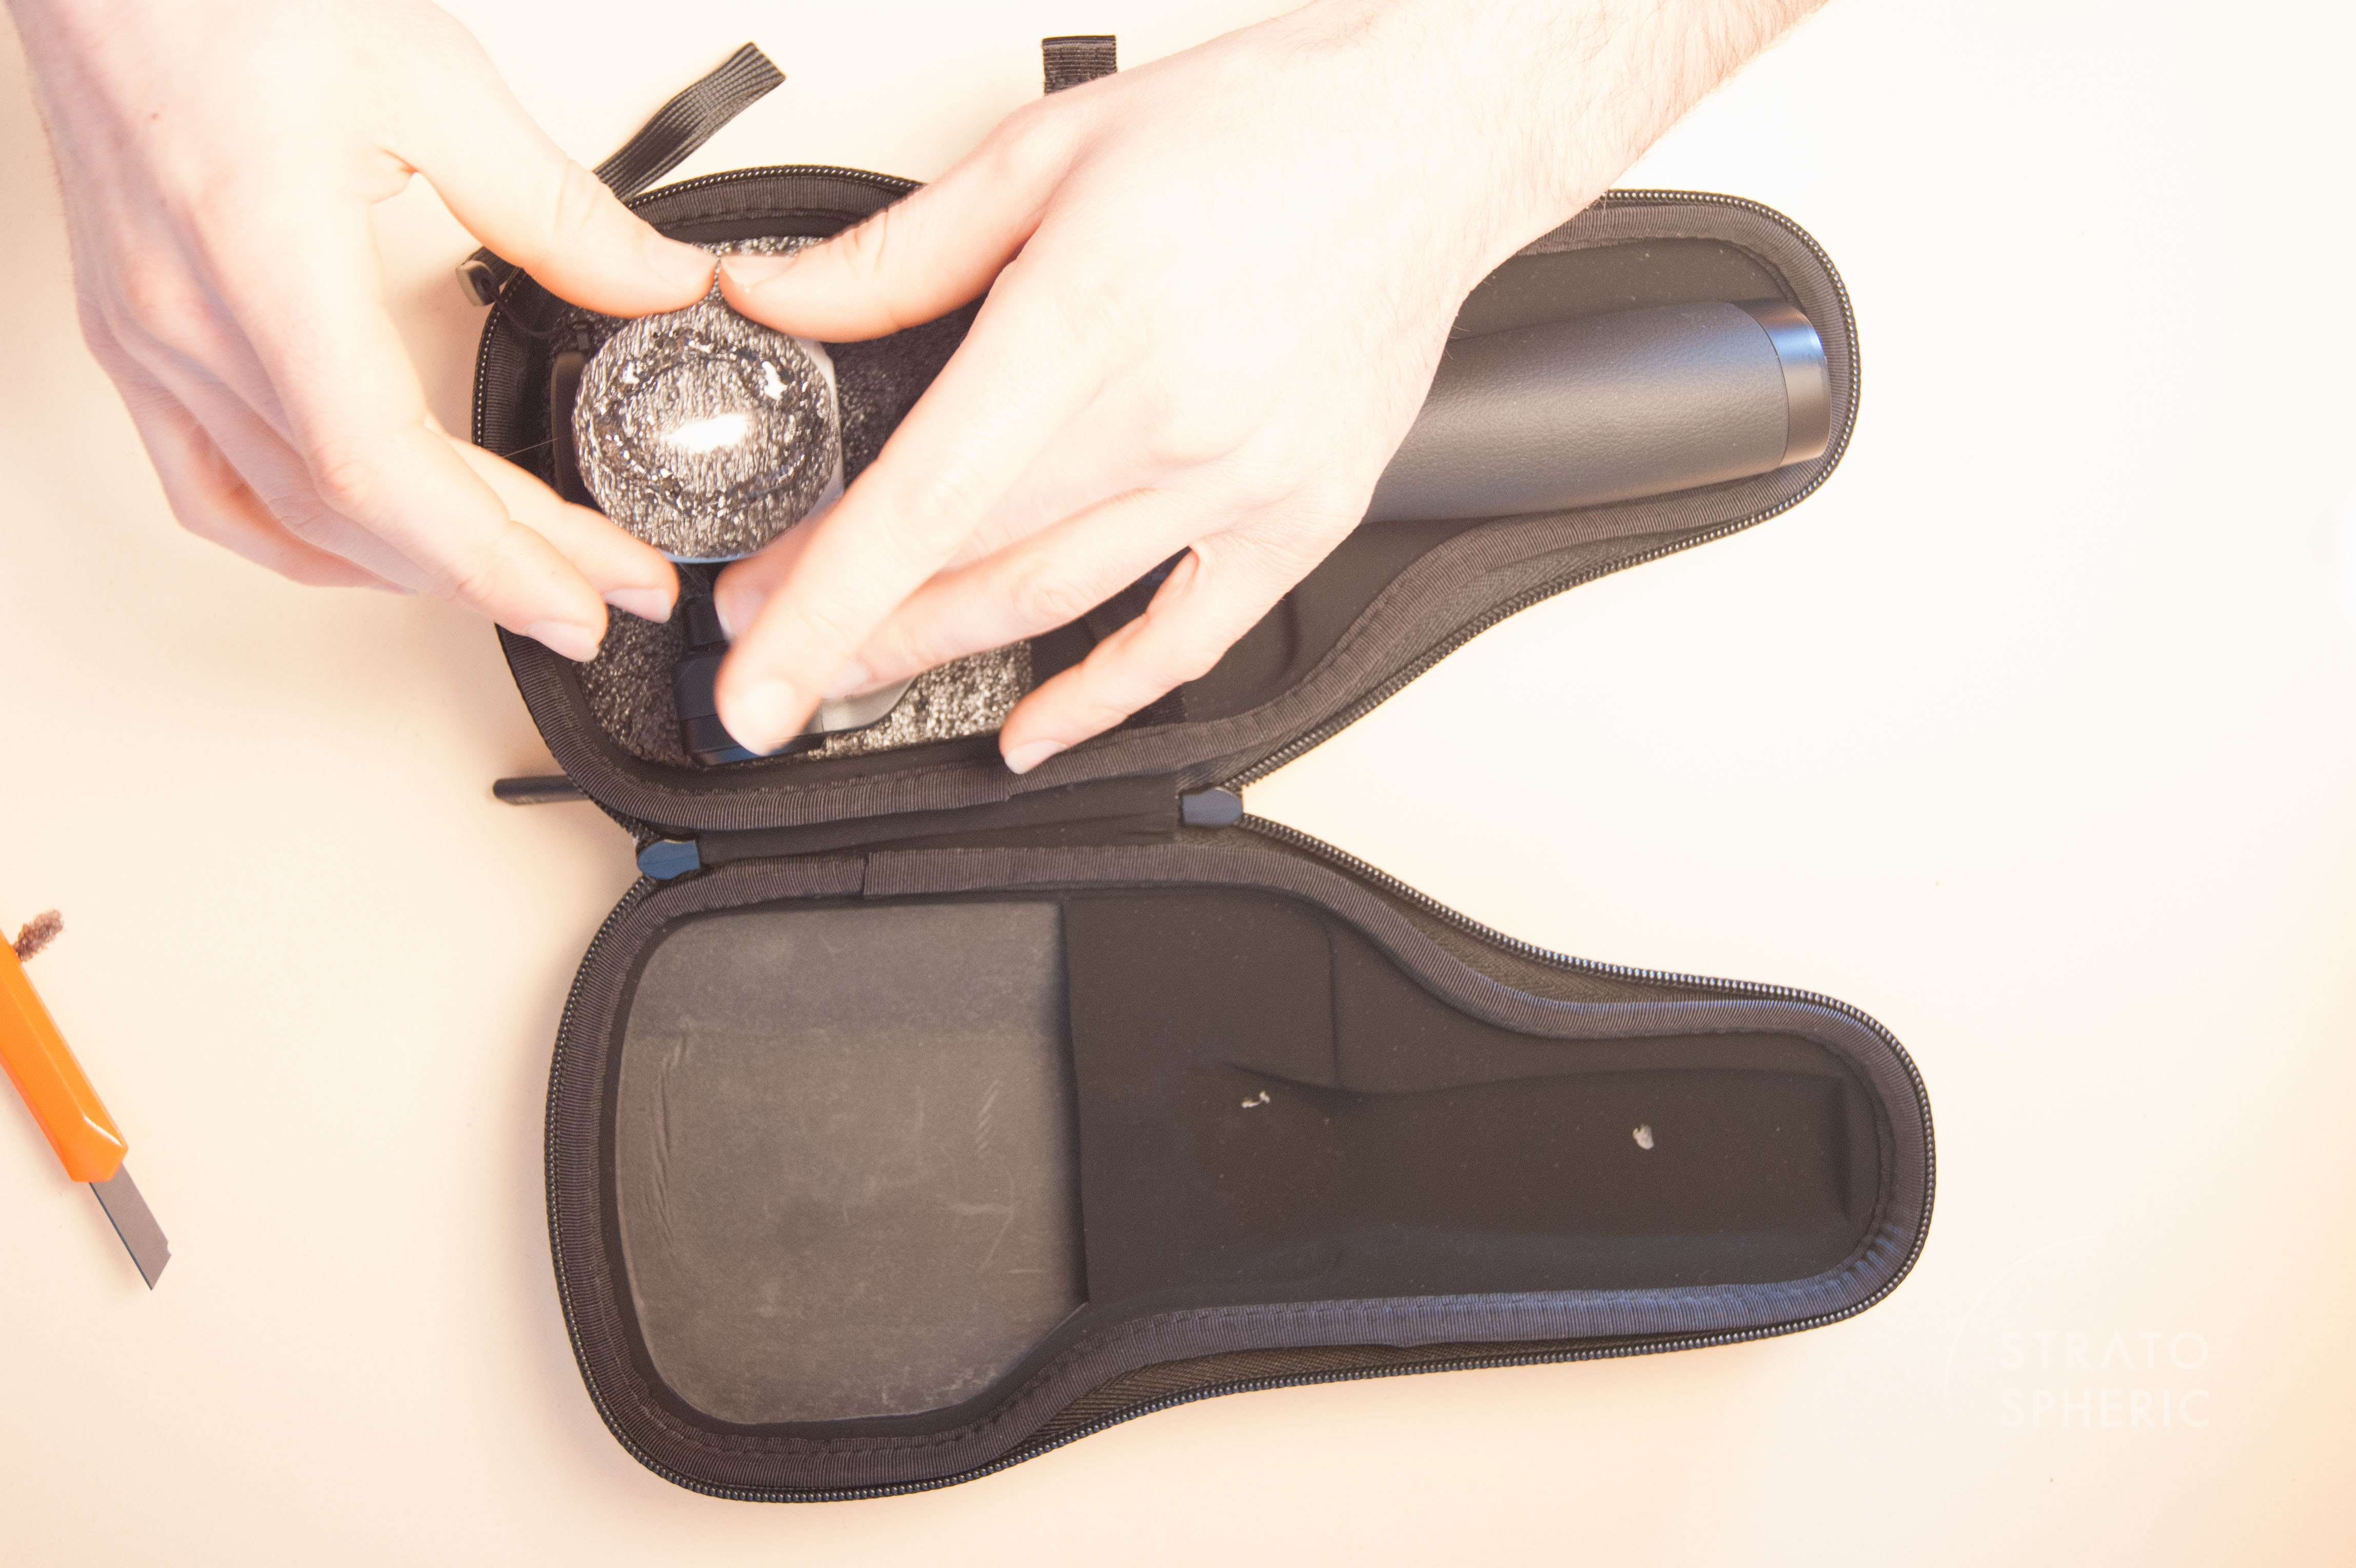
8. I placed the foam piece I cut out into the OSMO case. I then placed the OSMO with the X3 as it should sit and marked the orientation of the pitch arm of the gimbal in order to make sure that I cut it correctly in the next step.
Continued below...
However, since I travel, hike and generally move around quite abit, I was really disappointed to find out that the original OSMO carry case is not compatible with the I1 X3. There are other carry case options out there, but none I came across were as compact and travel-friendly as the original, nor did they allow having the OSMO out and shooting within seconds like the original case.
So after quite a bit of eye squinting & imagination, I decided I'll take the risk of ruining the case I have to try and rework it to fit the I1 X3.
This is how the result turned out. So far seems pretty safe & easy to use:
I'll be testing it in the coming weeks and will get back with info on performance, but it seems quite solid.
I think being able to use this case really opens up possibilities for using the OSMO that are otherwise not really possible (its a huge shame DJI didn't make the effort to make the I1 X3 compatible or at least to also offer a I1 X3 modification of the case).
I decided to document the process, so here it is in case anyone is interested:
PART 1
1. I used a plastic card & pencil to mark a straight line on the bottom section of the case about half a cm above the upper edge of the slot where the top end of the OSMO handle (the lock/unlock ring) usually sits.
2. I used a trimming knife to carefully cut the inner lining along the straight line and around the lower edges of the part of the inner lining where the OSMO gimbal usually sits. Remove the piece you cut out.
3. I used the card to mark as accurately as possible where the straight line cut should be made on the top section of the case (having the inner lining cut at approximately the same place on both the top & bottom section of the case looks better)
4. I carefully cut the inner lining along the straight line & along the lower edges of the top section of the case (where the gimbal usually sits) and removed the piece you cut out.
The OSMO with the I1 X3 could now fit nicely and the case could close fully without exerting any pressure.

5. I put piece I cut out from the lower section bain into the case. I placed the OSMO handle with the I1 X3 and marked where the hole for the pitch arm should be (the gimbal should be orientated the same way as when you place it inside the X3's hard case that comes with the I1).
6. I found a good-sized piece of pvc foam that is suitable to cushion and hold the X3 in place. The material should be easy to cut with a scalpel/trimming knife. The thickness of the piece I used was 1.5cm. Other thicknesses will also work, but might require slightly different designs. As you will see in the steps below, I raised the height of the foam with an additional piece in order to make sure the camera rests on the foam rather than on the gimbal arm, whereas a for example thicker foam might not require that but need additional cutting to fit the cylinder that connects to the handle.
7. I used the piece I cut out from the bottom section inner lining as a stencil to mark & cut out the same shape from the PVC foam. In my case, there was a suitably sized square opening already in the foam, so I just positioned the 'stencil' so as to have the opening at the right place. If there is no suitably-sized opening in your piece, you'll have to mark and cut it out after cutting the stencil.
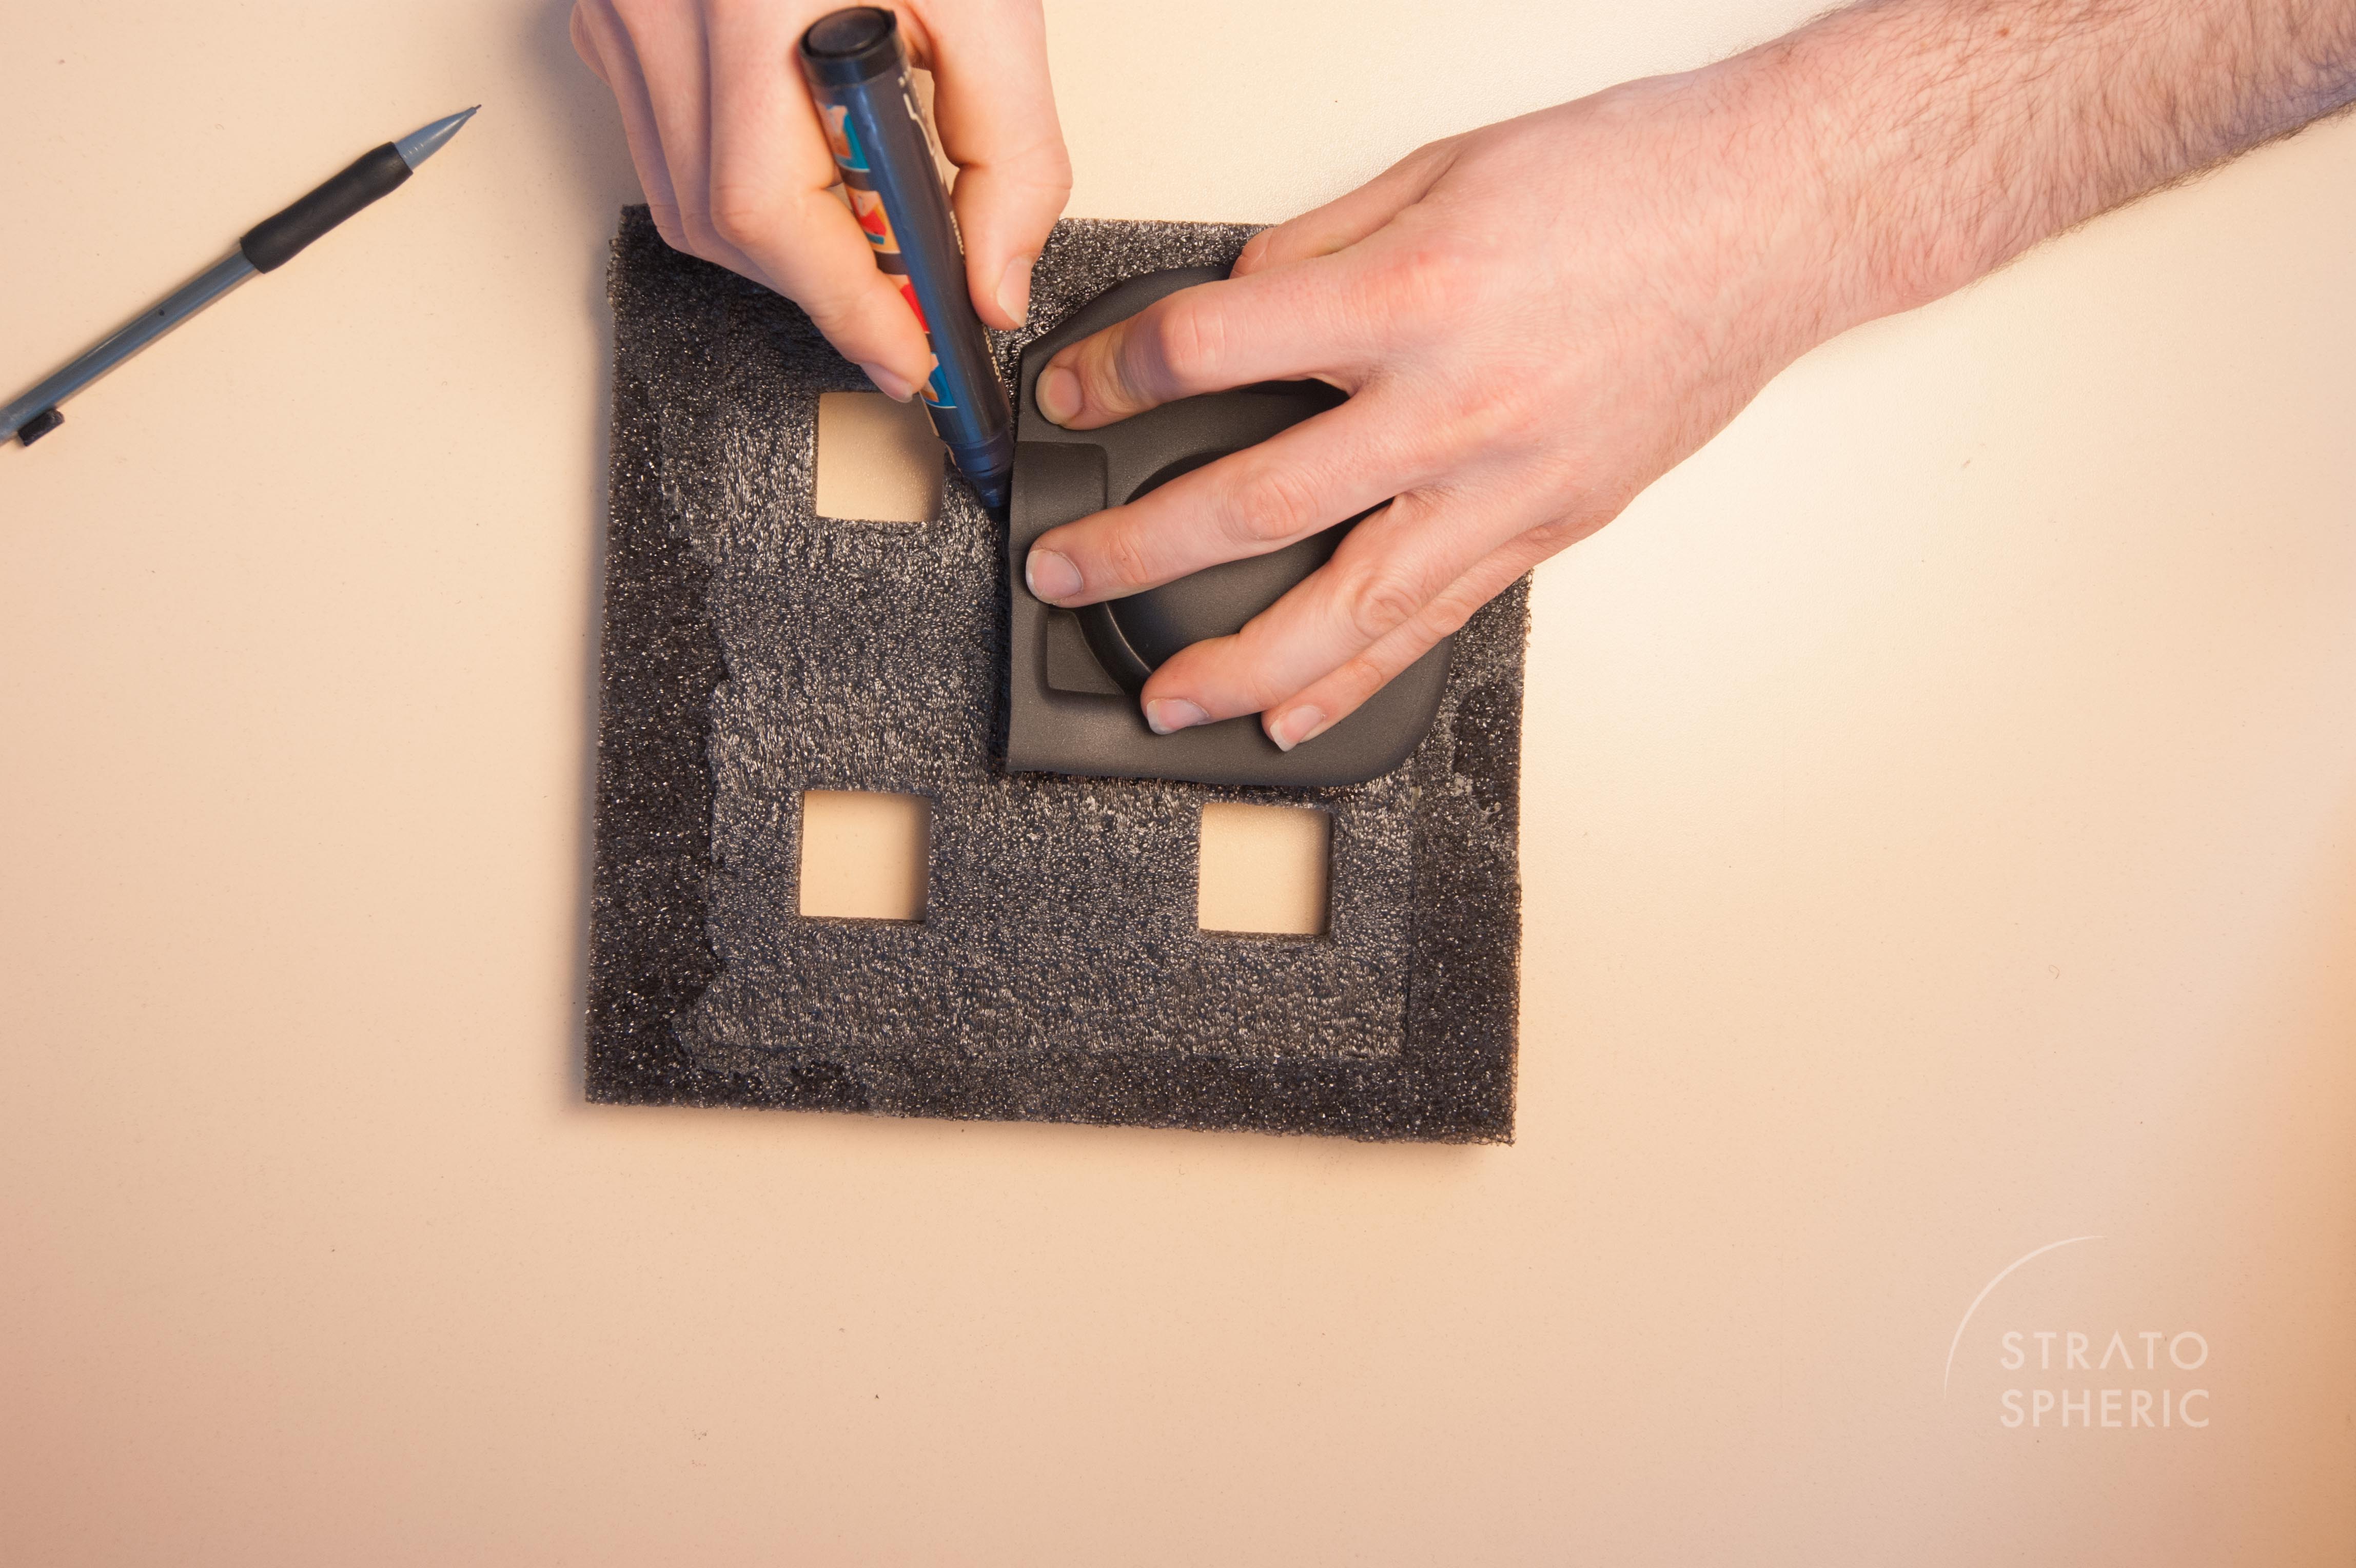
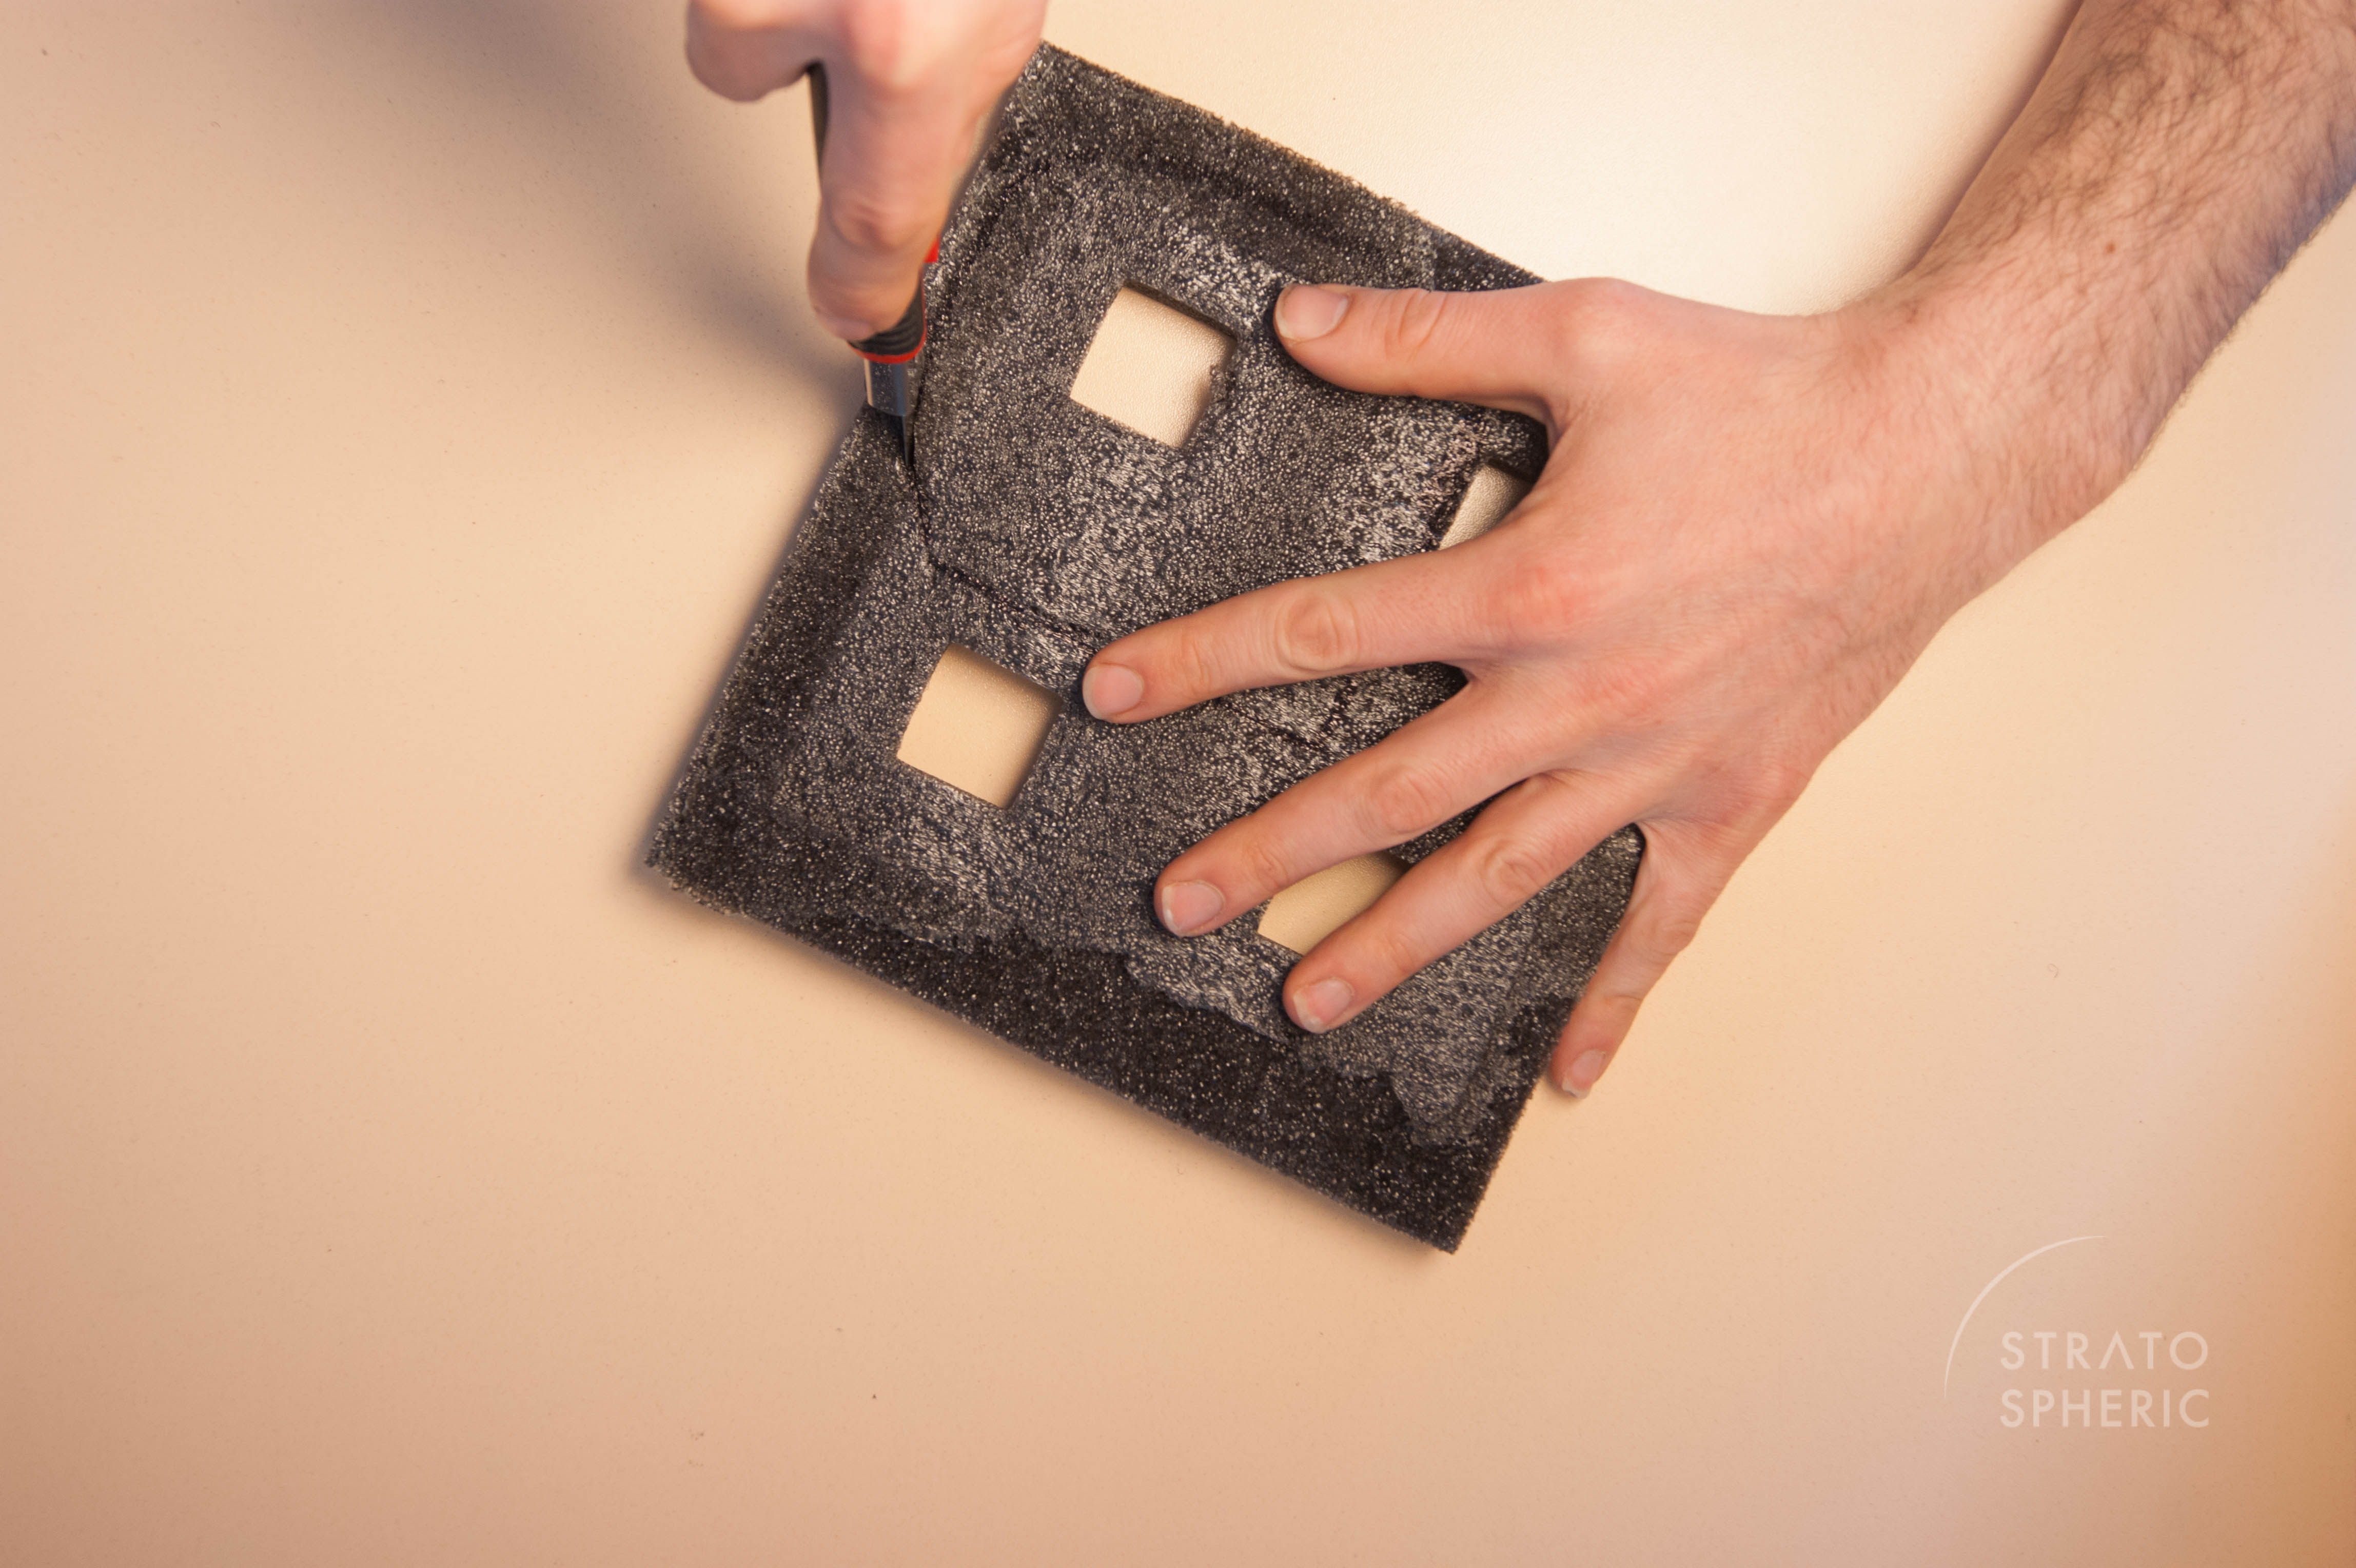
8. I placed the foam piece I cut out into the OSMO case. I then placed the OSMO with the X3 as it should sit and marked the orientation of the pitch arm of the gimbal in order to make sure that I cut it correctly in the next step.
Continued below...
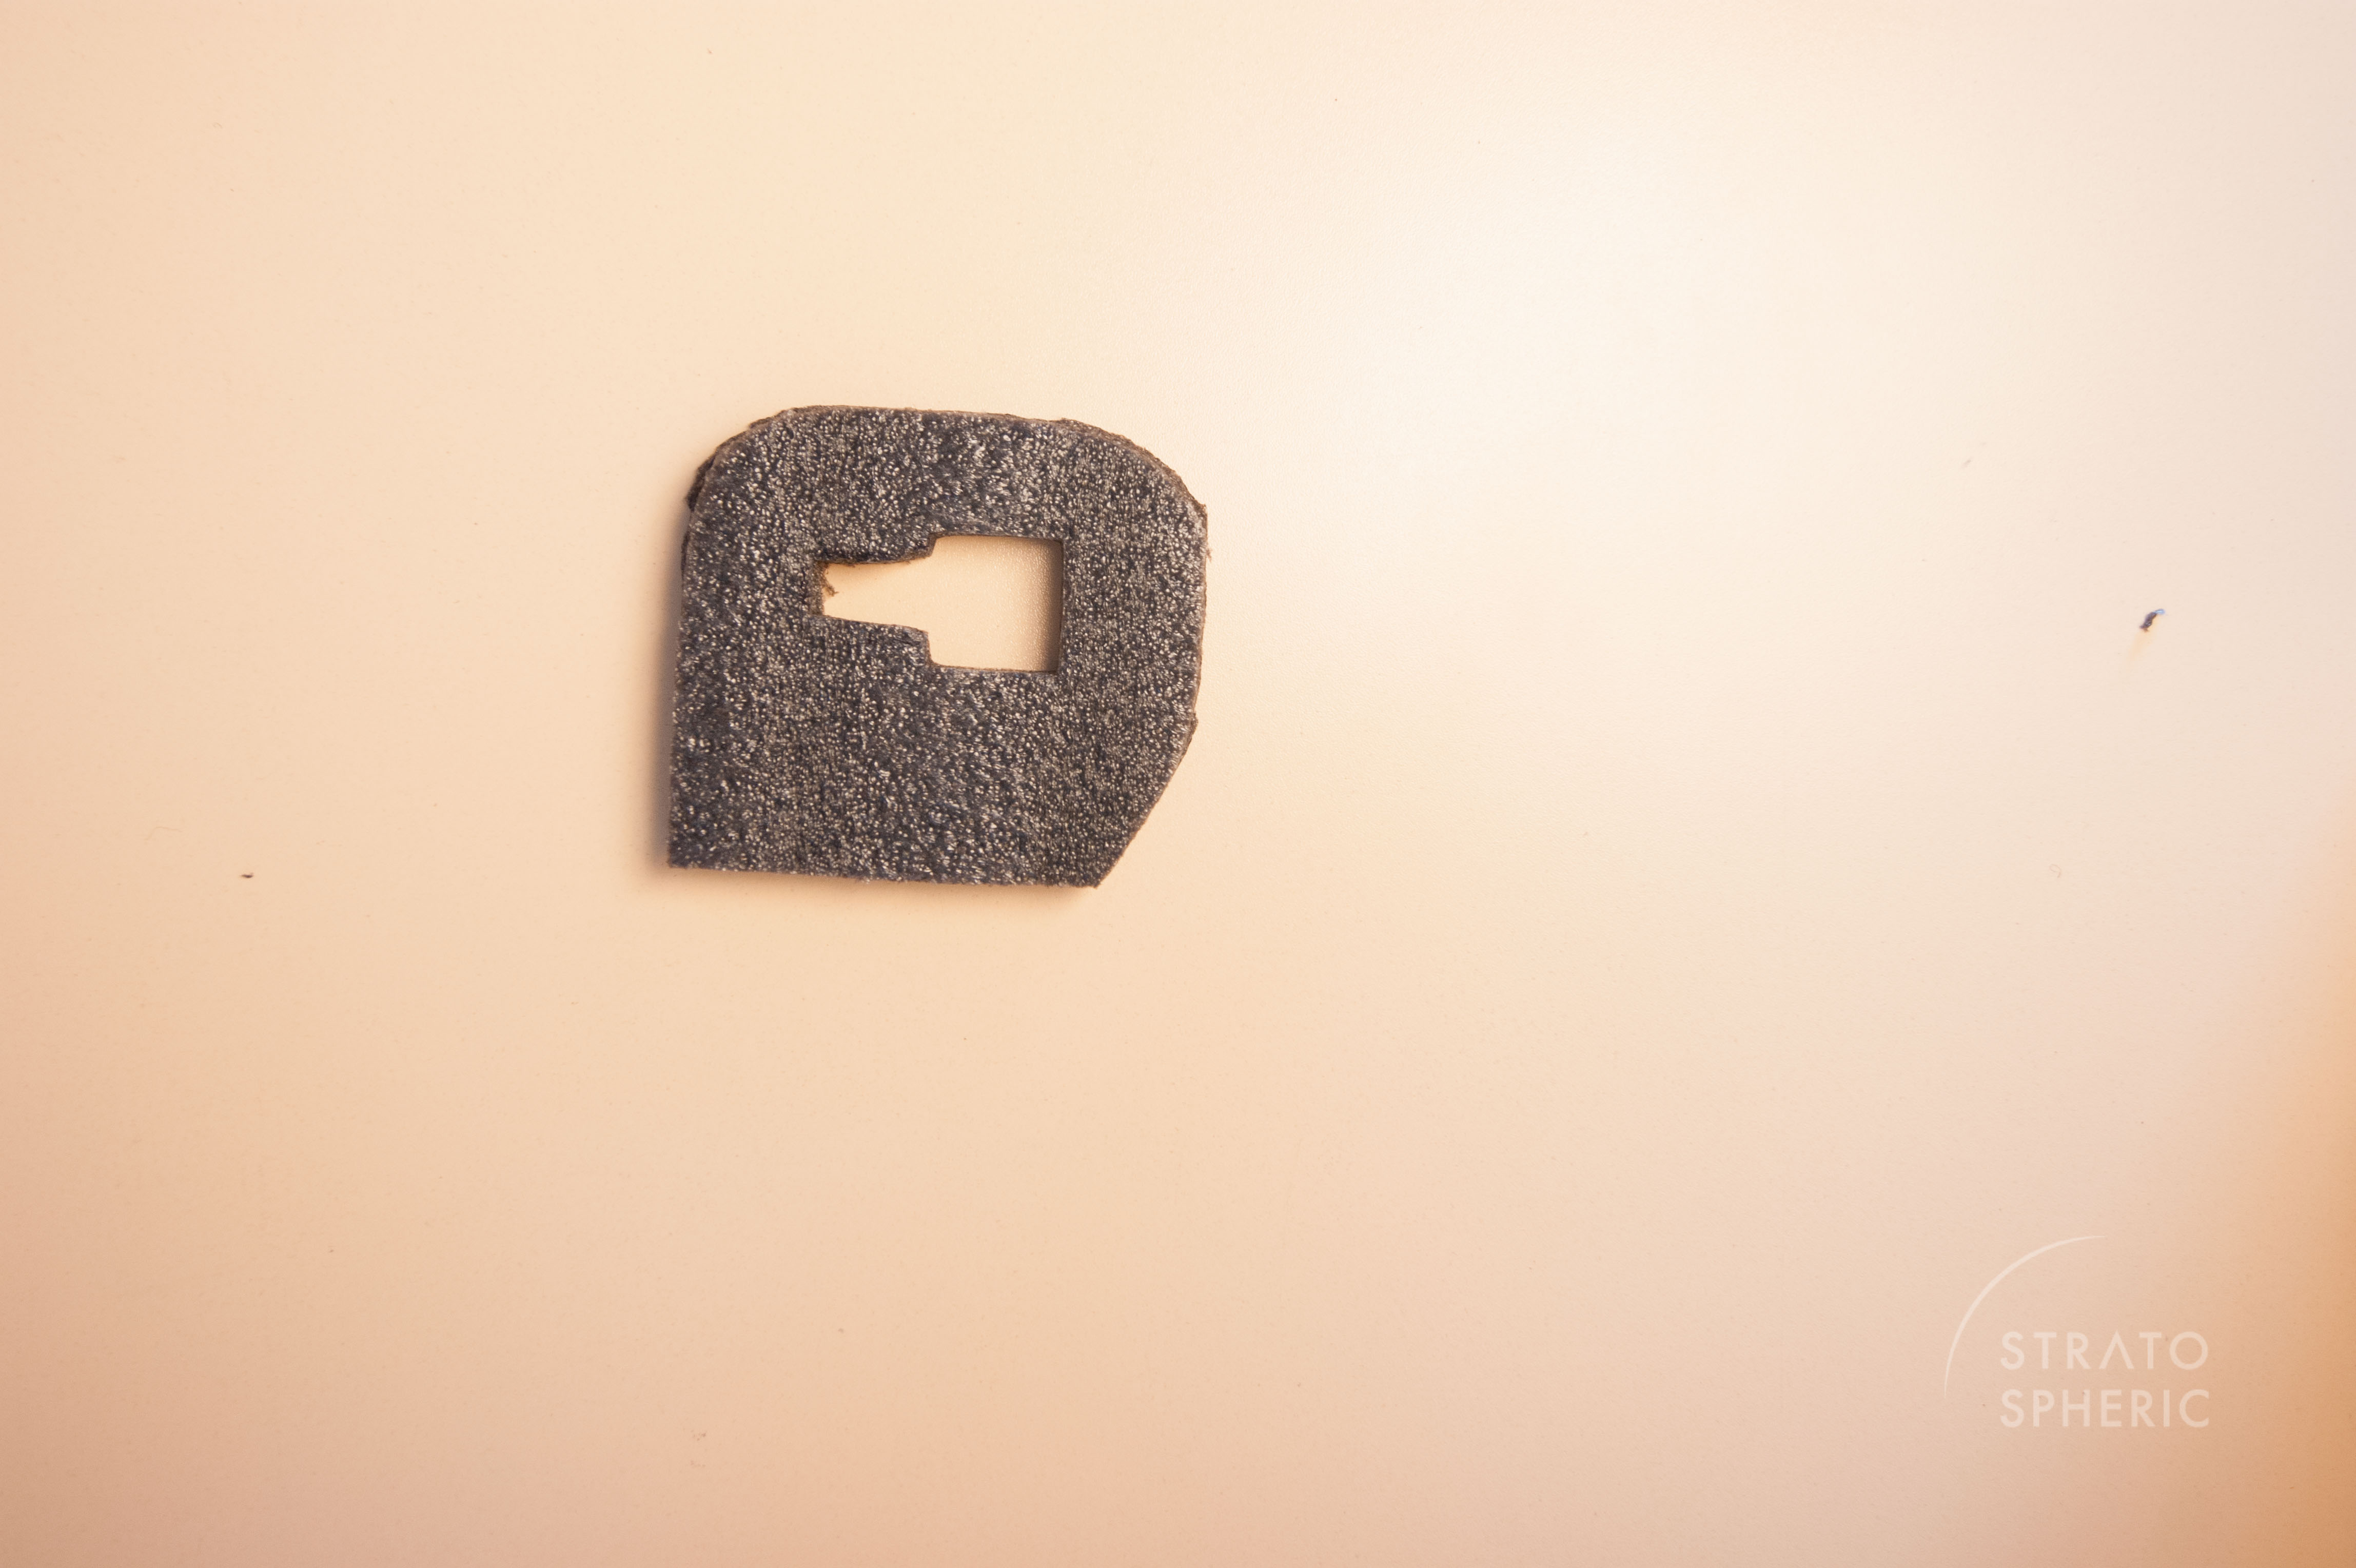
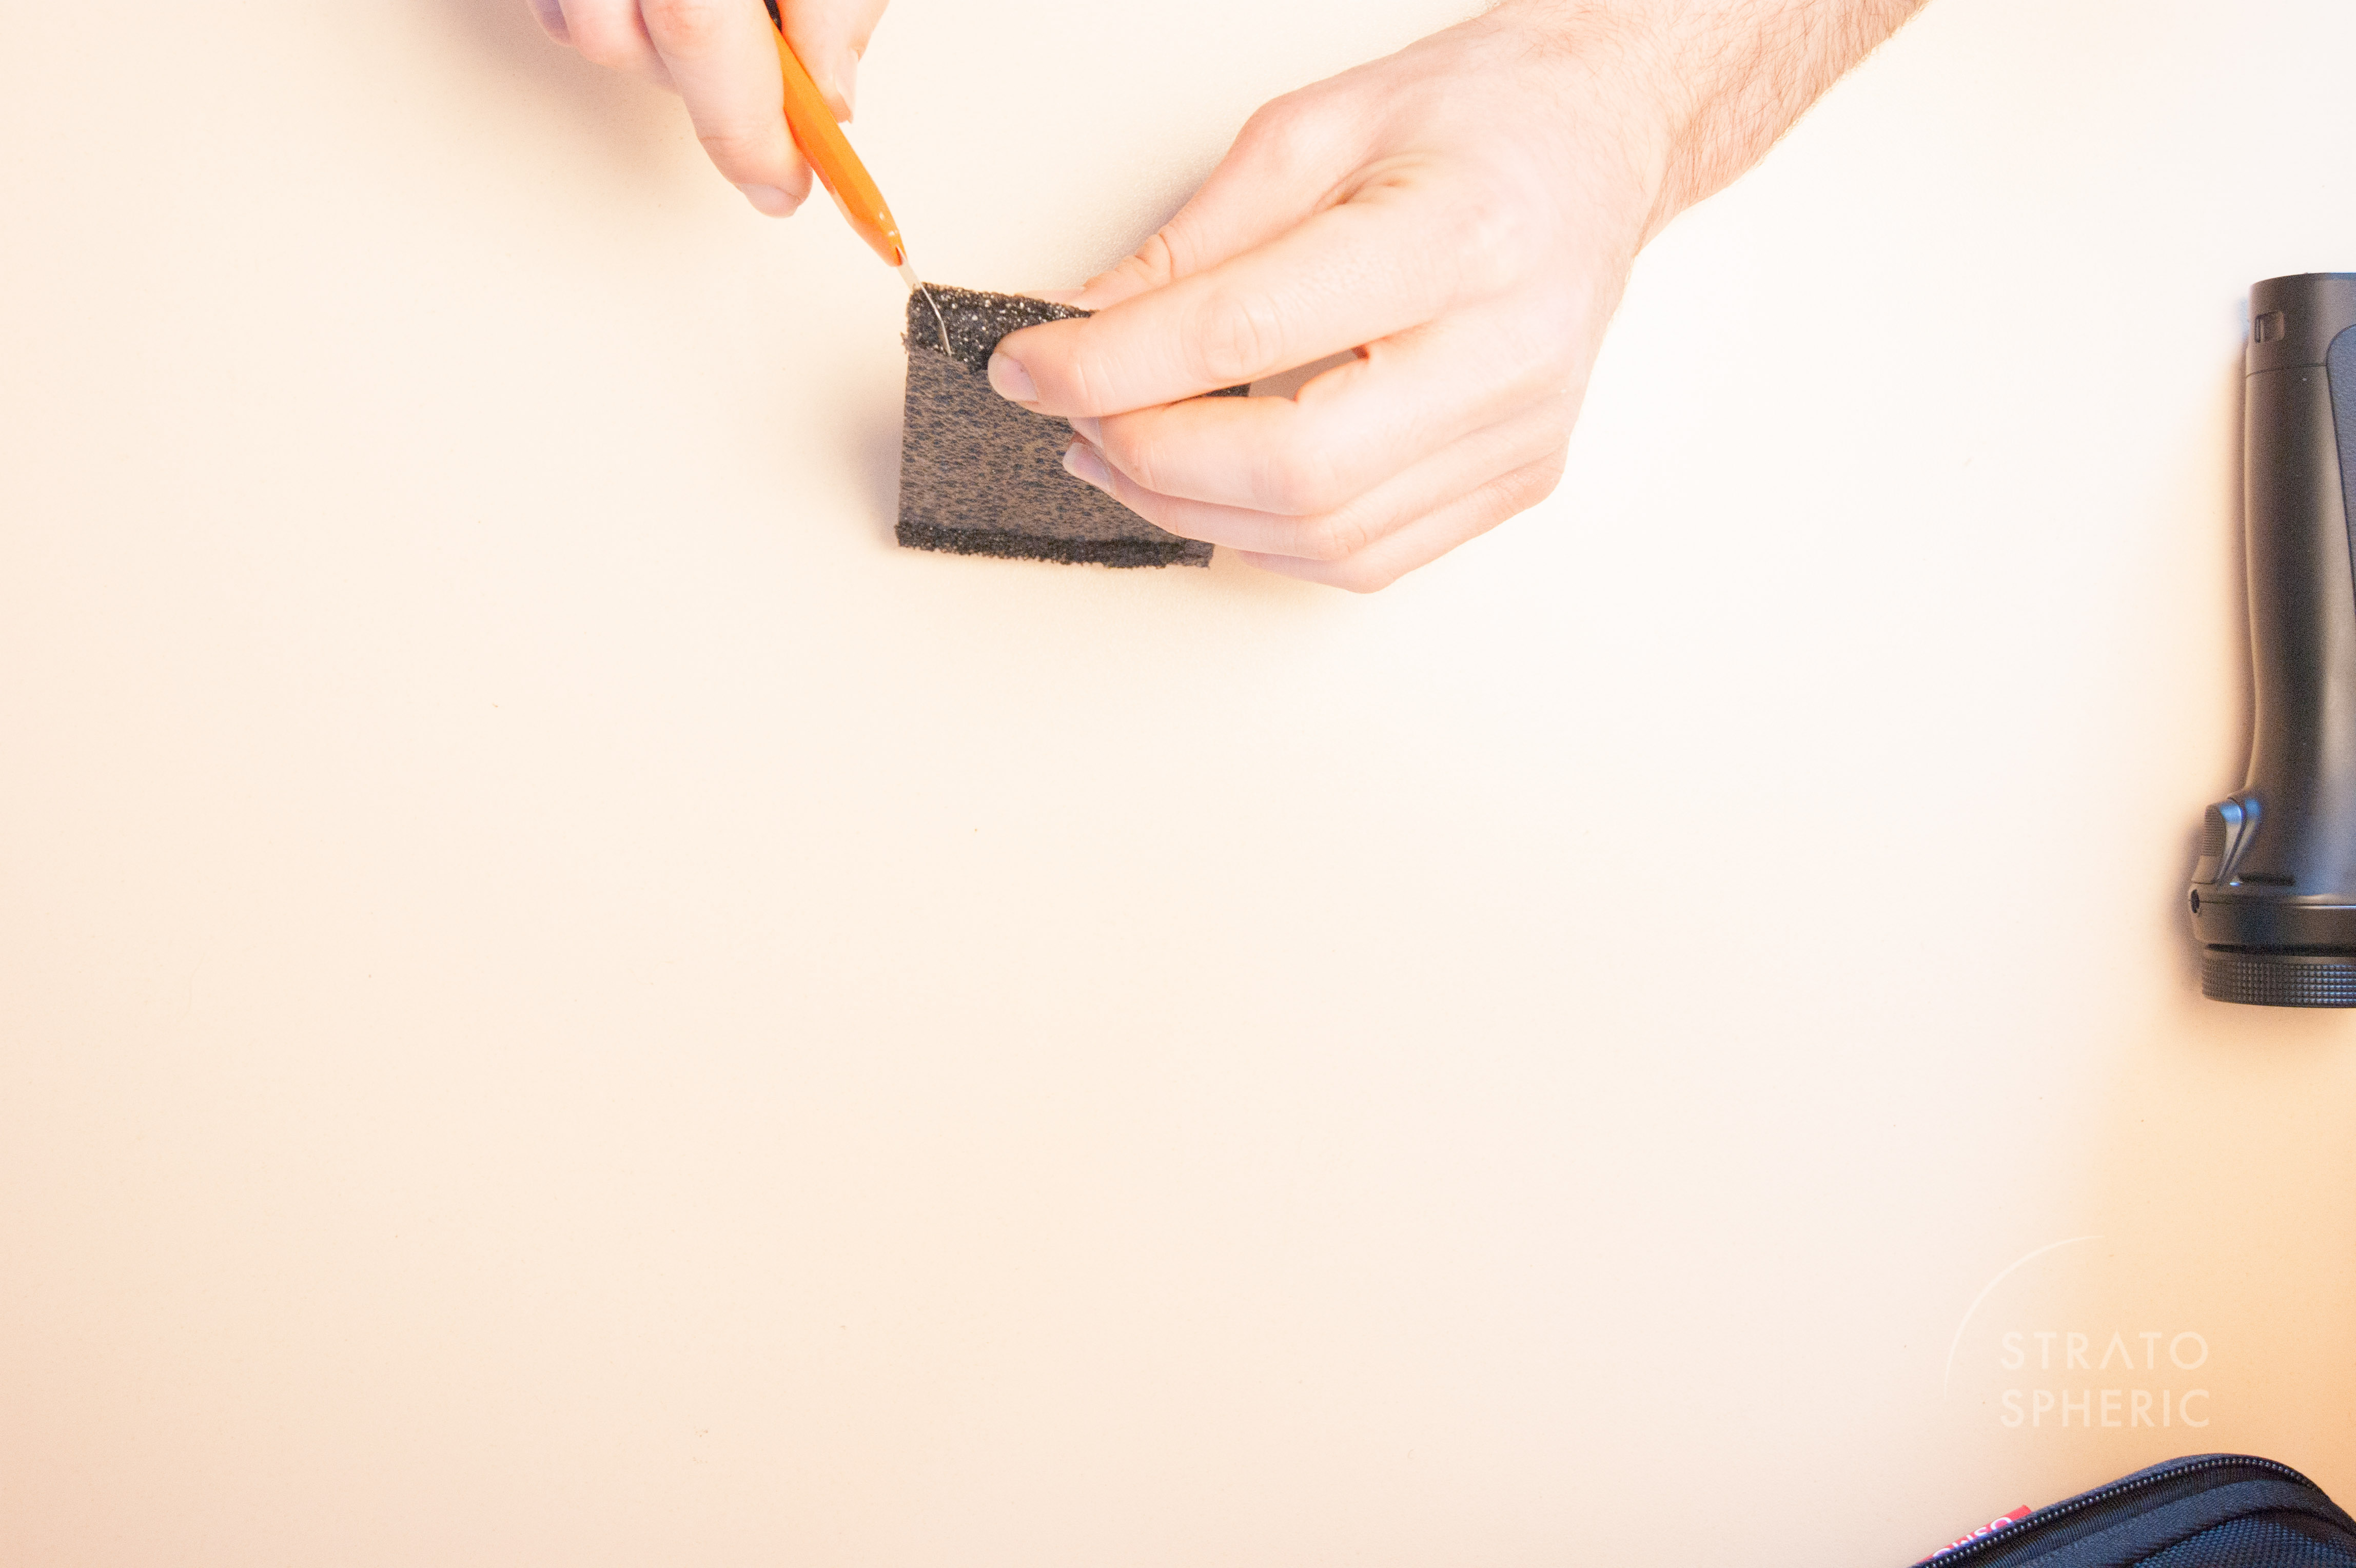
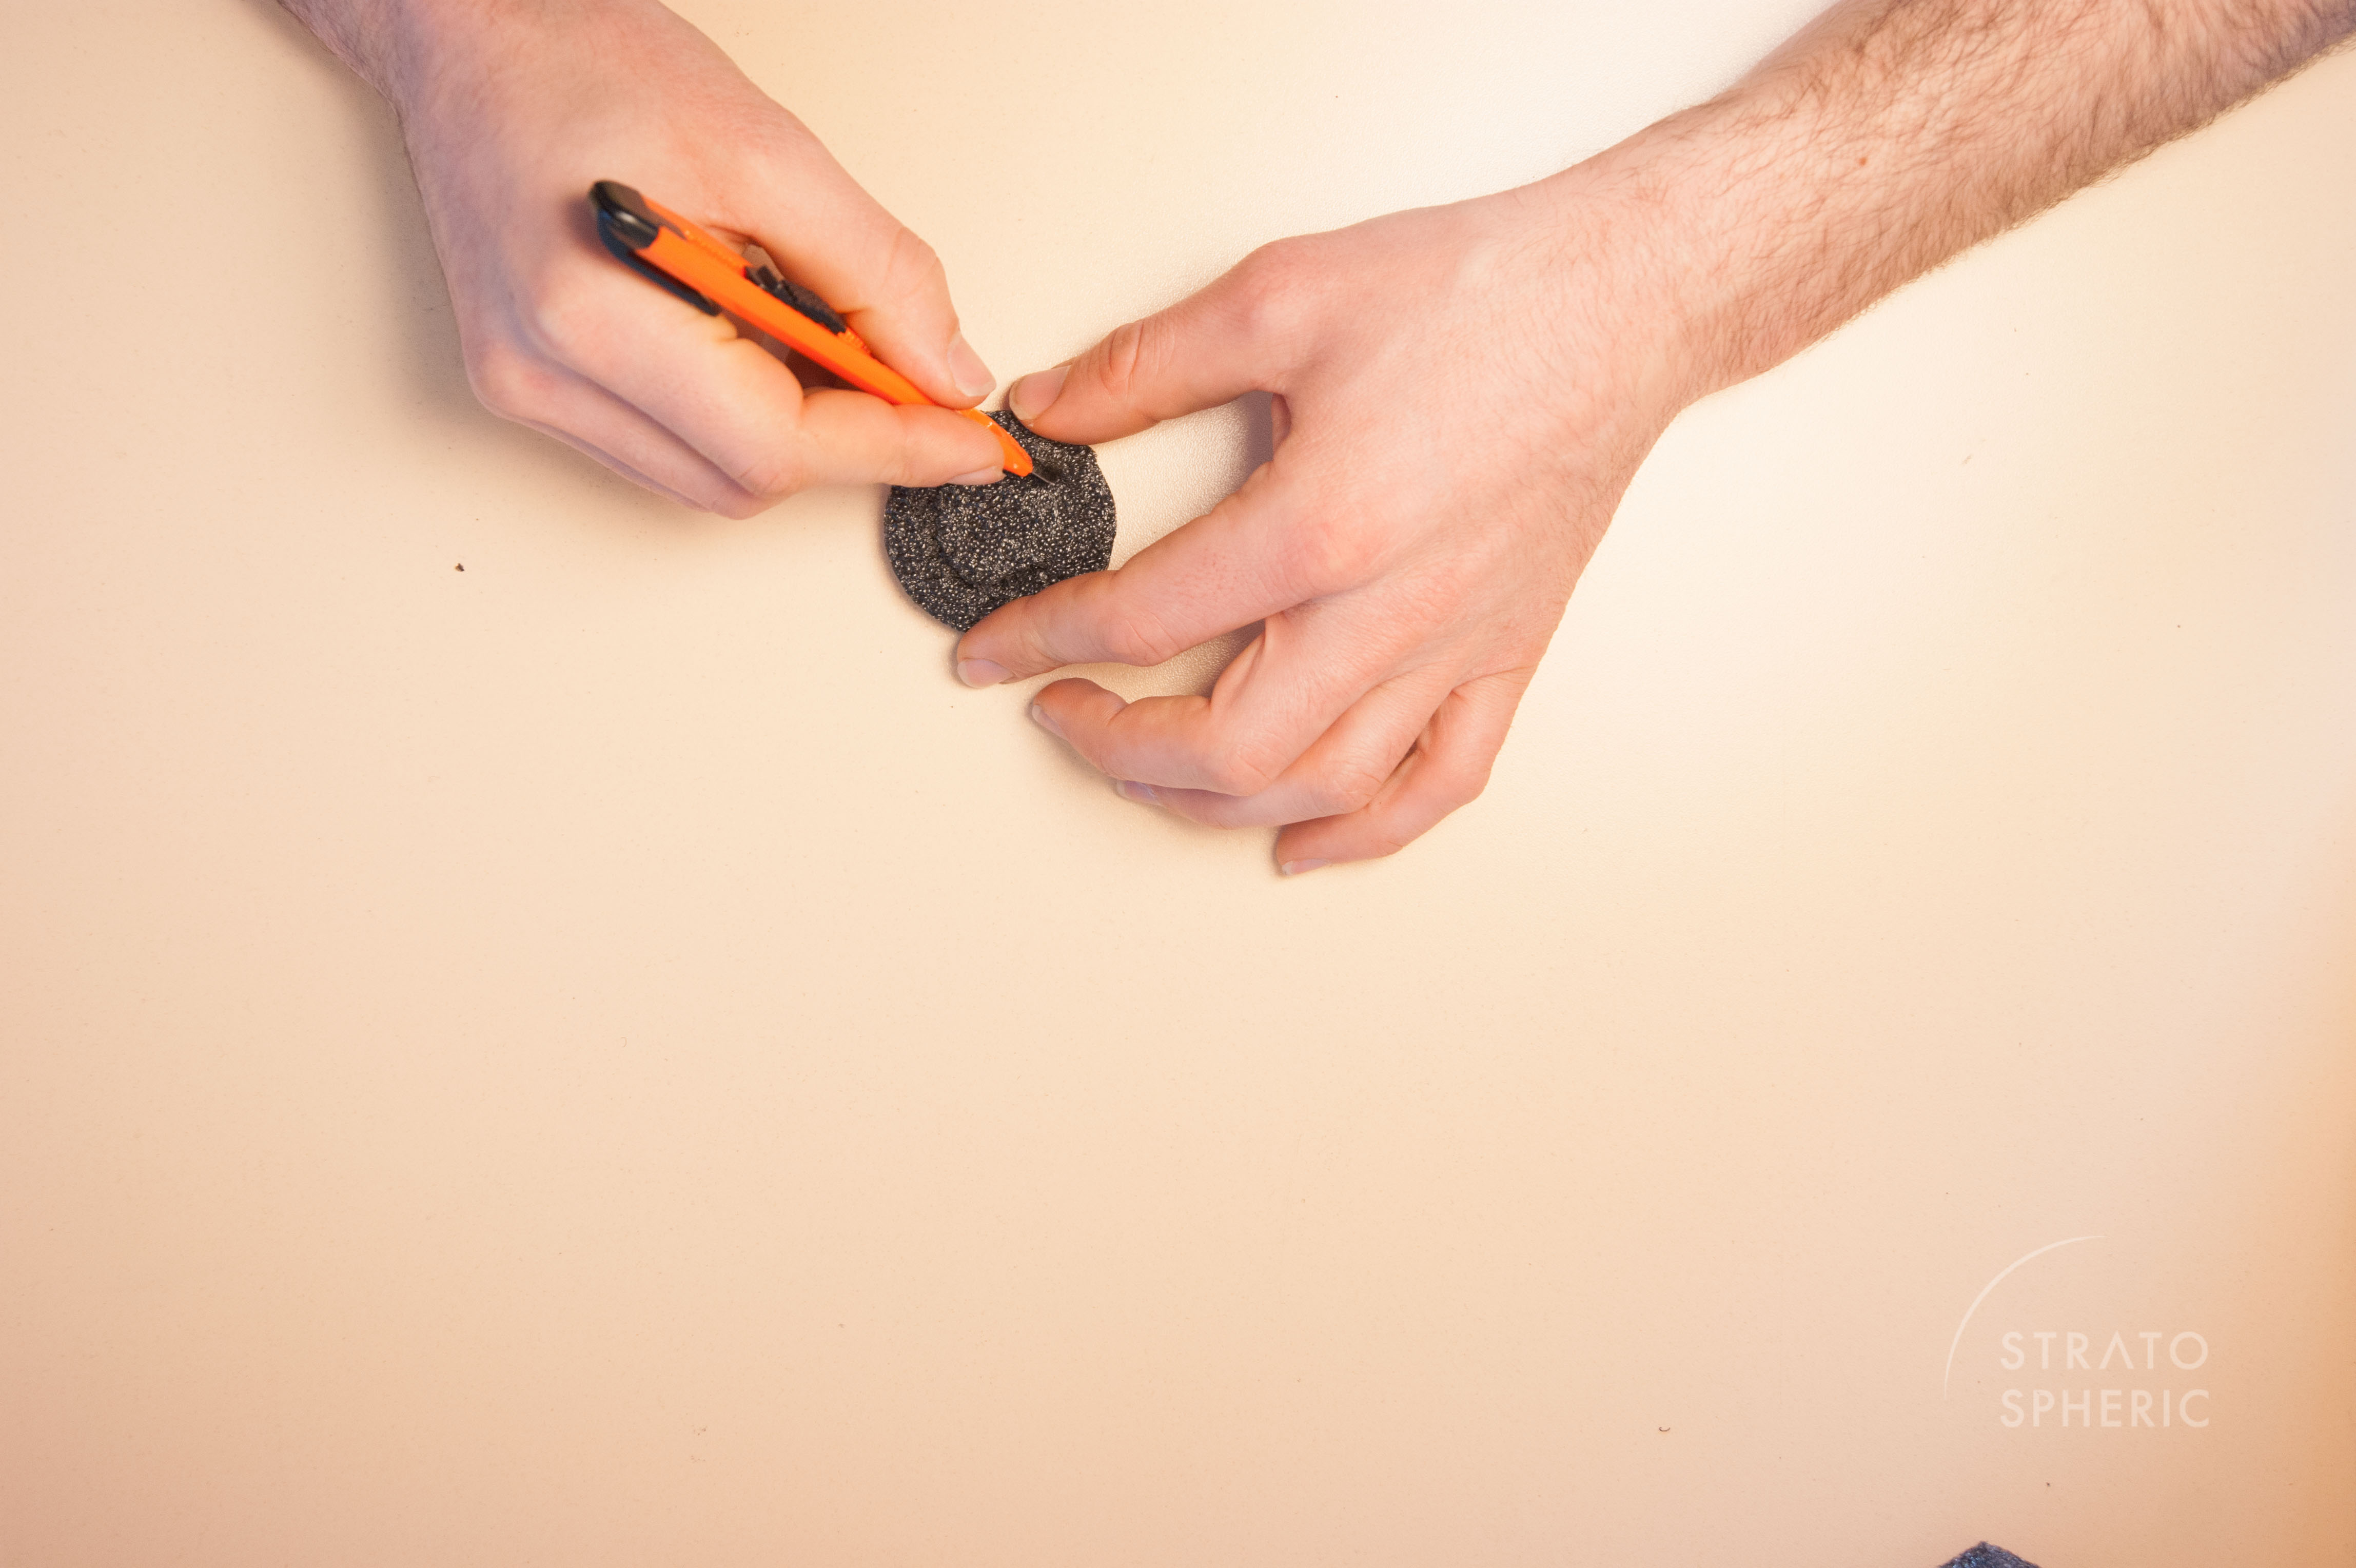
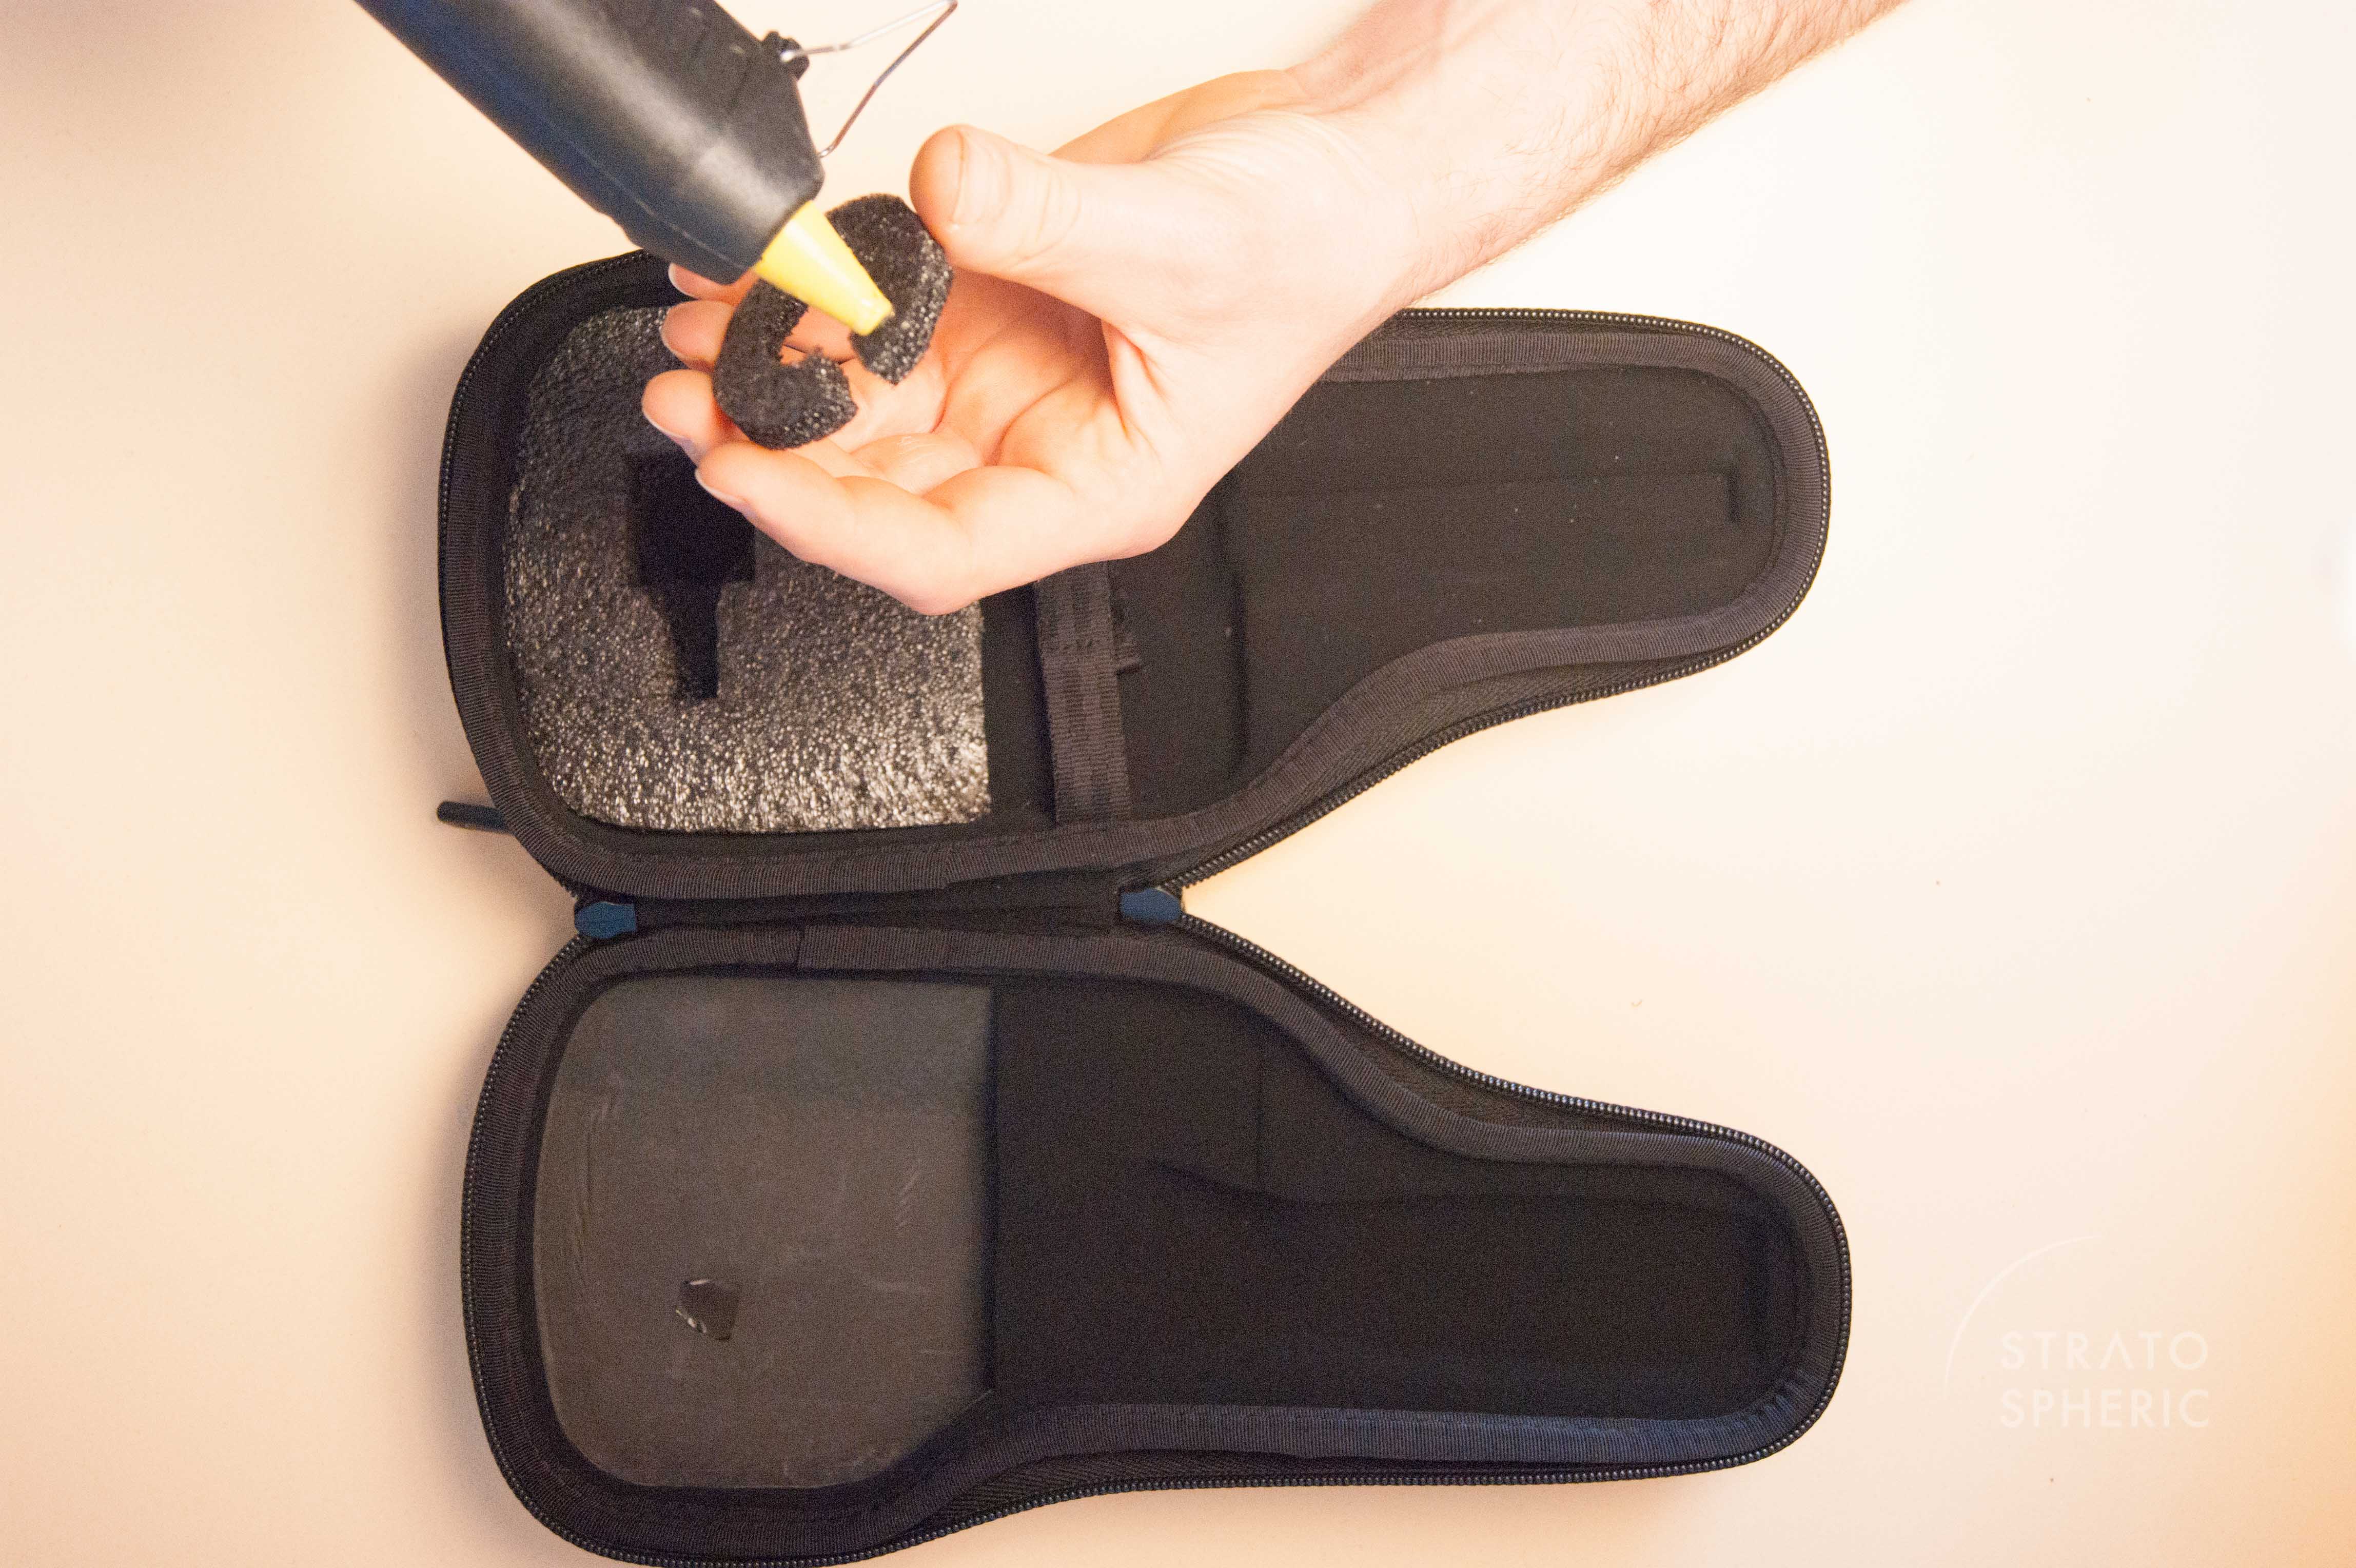
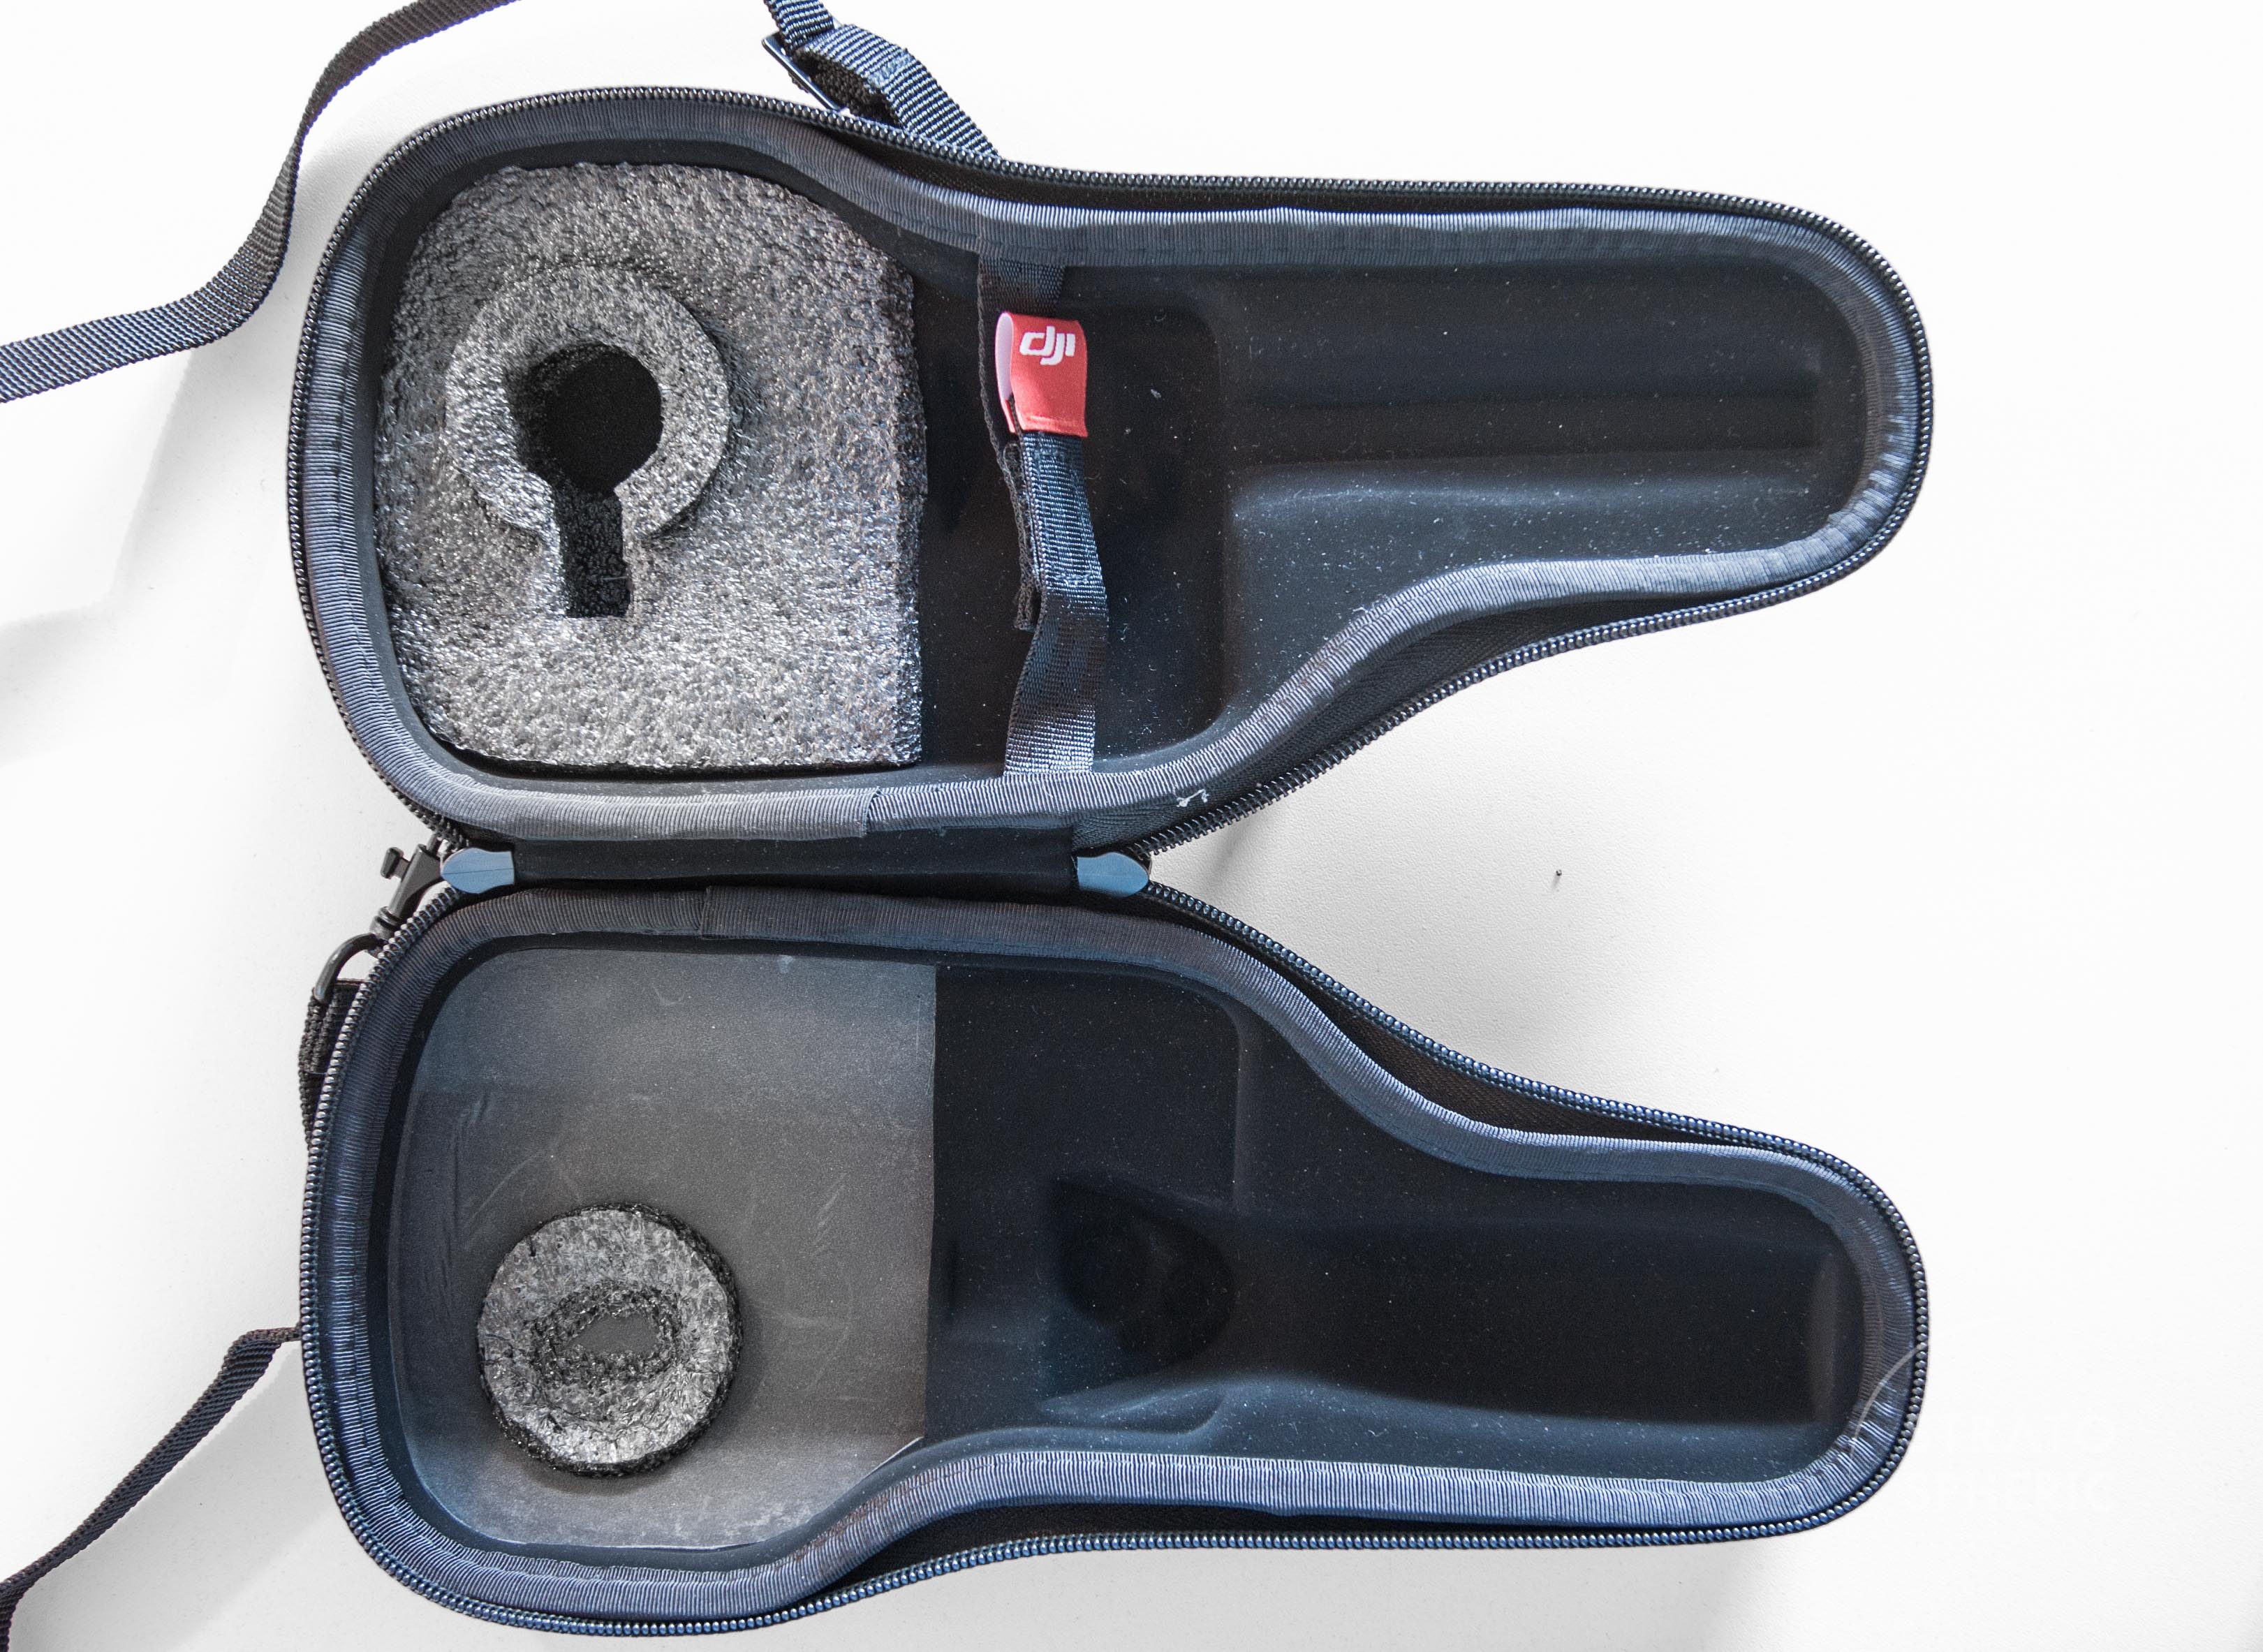
") ) to cut out the "C"-shaped piece on which the camera ball rests. I used the gimbal to mark & cut out the inner part where the gimbal arm slides in and then glued what was now a "C"-shaped piece to the main foam piece.
) to cut out the "C"-shaped piece on which the camera ball rests. I used the gimbal to mark & cut out the inner part where the gimbal arm slides in and then glued what was now a "C"-shaped piece to the main foam piece.