Before I start cutting up the foam within the standard DJI I2 case, I thought I would check that I am not missing something. With one or two batteries in the craft it will not sit properly in the case. From the attached pictures you will see that a small section of foam, on both sides, prevents the craft from settling down in its normal position. I am not intending to leave the batteries in the craft, in the case, for extended periods. Occasionally when moving locations, usually in a golf buggy or car, it would be easier to leave the batteries in the craft and pack everything up and close the case. It seems easy and I'm not sure why the case didn't come with a small step in the foam to allow this to happen anyway . Am I missing something?????


You are using an out of date browser. It may not display this or other websites correctly.
You should upgrade or use an alternative browser.
You should upgrade or use an alternative browser.
Maybe DJI did that so people would not leave batteries in the aircraft for extended periods of times just as you mentioned. Cut away!
- Joined
- Aug 7, 2016
- Messages
- 975
- Reaction score
- 470
If you do this I would suggest that you detach the batteries from the inspire so they are not plugged into the terminals and possibly think of putting the terminal covers back on the craft to further insulate the metal covers. Then if you cut carefully I think you can have the batteries mounted and keep the charging hub intact. I just looked at mine, and I think it would work.
PictoGraphica, Thanks for your comment. My intention is to have the 2 batteries secured in the craft when placed in the case. I feel the locking mechanism and rigid slides, hold the batteries securely in place. I will be the only one handling the case when in transit and clearly not "throwing it around" like an airline baggage handler or courier driver. Attached is a further image showing the extent of my intended cut; from which you will see it is not very deep and has no impact on the charging hub. It does impact slightly on the metal "stand" of the RC, but with only one RC I prefer to store this on the other side of the craft, lying horizontally. If necessary, with a second controller, a small shaving of the other side of the vertical bay for the controller, should see this fit easily.
I will post any issues I find i the next week or so.

I will post any issues I find i the next week or so.
PictoGraphica, Thanks for your comment. My intention is to have the 2 batteries secured in the craft when placed in the case. I feel the locking mechanism and rigid slides, hold the batteries securely in place. I will be the only one handling the case when in transit and clearly not "throwing it around" like an airline baggage handler or courier driver. Attached is a further image showing the extent of my intended cut; from which you will see it is not very deep and has no impact on the charging hub. It does impact slightly on the metal "stand" of the RC, but with only one RC I prefer to store this on the other side of the craft, lying horizontally. If necessary, with a second controller, a small shaving of the other side of the vertical bay for the controller, should see this fit easily.
I will post any issues I find i the next week or so.
View attachment 11862
Did you know that you can remove the remote control foam insert and move it to the other side? My second remote controller came with a precisely cut insert and that fit in the remaining hole. I don't know if this would help or knot. Just thought I'd mention it ...
Attachments

Thanks for the comment. Until you made this comment I had no idea that the RC foam could be removed. Glad I posted my query as moving the RC foam to the other side will work much better.Did you know that you can remove the remote control foam insert and move it to the other side? My second remote controller came with a precisely cut insert and that fit in the remaining hole. I don't know if this would help or knot. Just thought I'd mention it ...
Be careful it is very tight fitting. I was impressed with the utility of shipping the spare remote with the insert.
Took the plunge and cut out the small sections to allow the battery to stay in the craft when pack in the supplied case. So far so good and I can't see any problems. The cutting was fairly easy and the result looks okay. Before cutting I had thought the "handle bar" (DJI speak for the metal u-shaped piece on the bottom of the RC) would foul the battery. It makes contact, but overall the controller(s) still fit easily. Here are a few images.


Happy to answer any queries.
Happy to answer any queries.
- Joined
- Dec 28, 2016
- Messages
- 210
- Reaction score
- 75
- Joined
- Aug 7, 2016
- Messages
- 975
- Reaction score
- 470
Nice surgery!! Xacto knife I presume?Took the plunge and cut out the small sections to allow the battery to stay in the craft when pack in the supplied case. So far so good and I can't see any problems. The cutting was fairly easy and the result looks okay. Before cutting I had thought the "handle bar" (DJI speak for the metal u-shaped piece on the bottom of the RC) would foul the battery. It makes contact, but overall the controller(s) still fit easily. Here are a few images.
View attachment 11909 View attachment 11910 View attachment 11911 View attachment 11912
Happy to answer any queries.
First thing I noticed opening up the box - no space for batteries housed in the copter.
With the integration of the smash-power-to-enter-land-mode functionality I can see this as a precaution against it trying to exit travel mode inside the case and TBH fair enough. A real shame though, was great storing 6 batteries for the I1 in one case. And for the sake of it they could have included a removable insert for the batteries that fits in the empty 2nd RC spot and left it for users to choose batteries or second remote. As it currently stands everyone is left with not enough room for batteries and an empty space that isn't good for much. That is if you can source batteries from any of your suppliers....
All in all, good looking surgery. I'll be CAD'ing and shaping the said 2nd RC insert to house some more batteries as I'd prefer to not cut.
- Joined
- Mar 7, 2016
- Messages
- 17
- Reaction score
- 8
- Age
- 59
Hi David, My first thought when I opened the case was "were are all the battery slots and omg I can't fit 2 in the bird" I looked into cutting and thought that the metal bracket on the R/C would rub the battery and decided not to cut until I really needed to! here is me temp solution to extra storage of batteries until the second remote arrives ")


- Joined
- Mar 24, 2014
- Messages
- 40
- Reaction score
- 4
Good to know !! Thx ~Did you know that you can remove the remote control foam insert and move it to the other side? My second remote controller came with a precisely cut insert and that fit in the remaining hole. I don't know if this would help or knot. Just thought I'd mention it ...
- Joined
- Mar 24, 2014
- Messages
- 40
- Reaction score
- 4
My rig as of now on 'The Deuce'. Not sure what I'll do when 2d RC arrives (MON). I may keep it, the tablet(s), chord and accouterments in another case for when needed...maybe even use my old P2 case for it and batteries??? I put the 3rd set (not on A/C) in foam pouches that they shipped in . . hard to see in the pic, but they keep them from moving around.  I've run the numbers and with two (x4) chargers, assuming 30 min's between flights, I should be just about able to keep a bird flying the best part of a day --- assuming I immediately put next set of batt's on open slot each time. [ 22mins per flight, round up to 30/// set 1 goes on, ready in 90 min's, set 2 (30mins) [60min left on set 1], set 3 (30mins) [30 mins left on set 1], set 4 (30mins) [set 1 should be ready, at which time set 4 batt's go on where 1 was] I'll certainly get 2 more set's after these start getting decent cycle numbers.
I've run the numbers and with two (x4) chargers, assuming 30 min's between flights, I should be just about able to keep a bird flying the best part of a day --- assuming I immediately put next set of batt's on open slot each time. [ 22mins per flight, round up to 30/// set 1 goes on, ready in 90 min's, set 2 (30mins) [60min left on set 1], set 3 (30mins) [30 mins left on set 1], set 4 (30mins) [set 1 should be ready, at which time set 4 batt's go on where 1 was] I'll certainly get 2 more set's after these start getting decent cycle numbers.- Joined
- Jan 11, 2017
- Messages
- 2
- Reaction score
- 2
- Age
- 33

I took some foam I had laying around and used some of the foam that came with my extra batteries. I used it to create slots for two extra batteries and my three Olympus lenses.
Sent from my iPhone using InspirePilots
Here's my modifications. Added two pieces of foam made from some scraps.
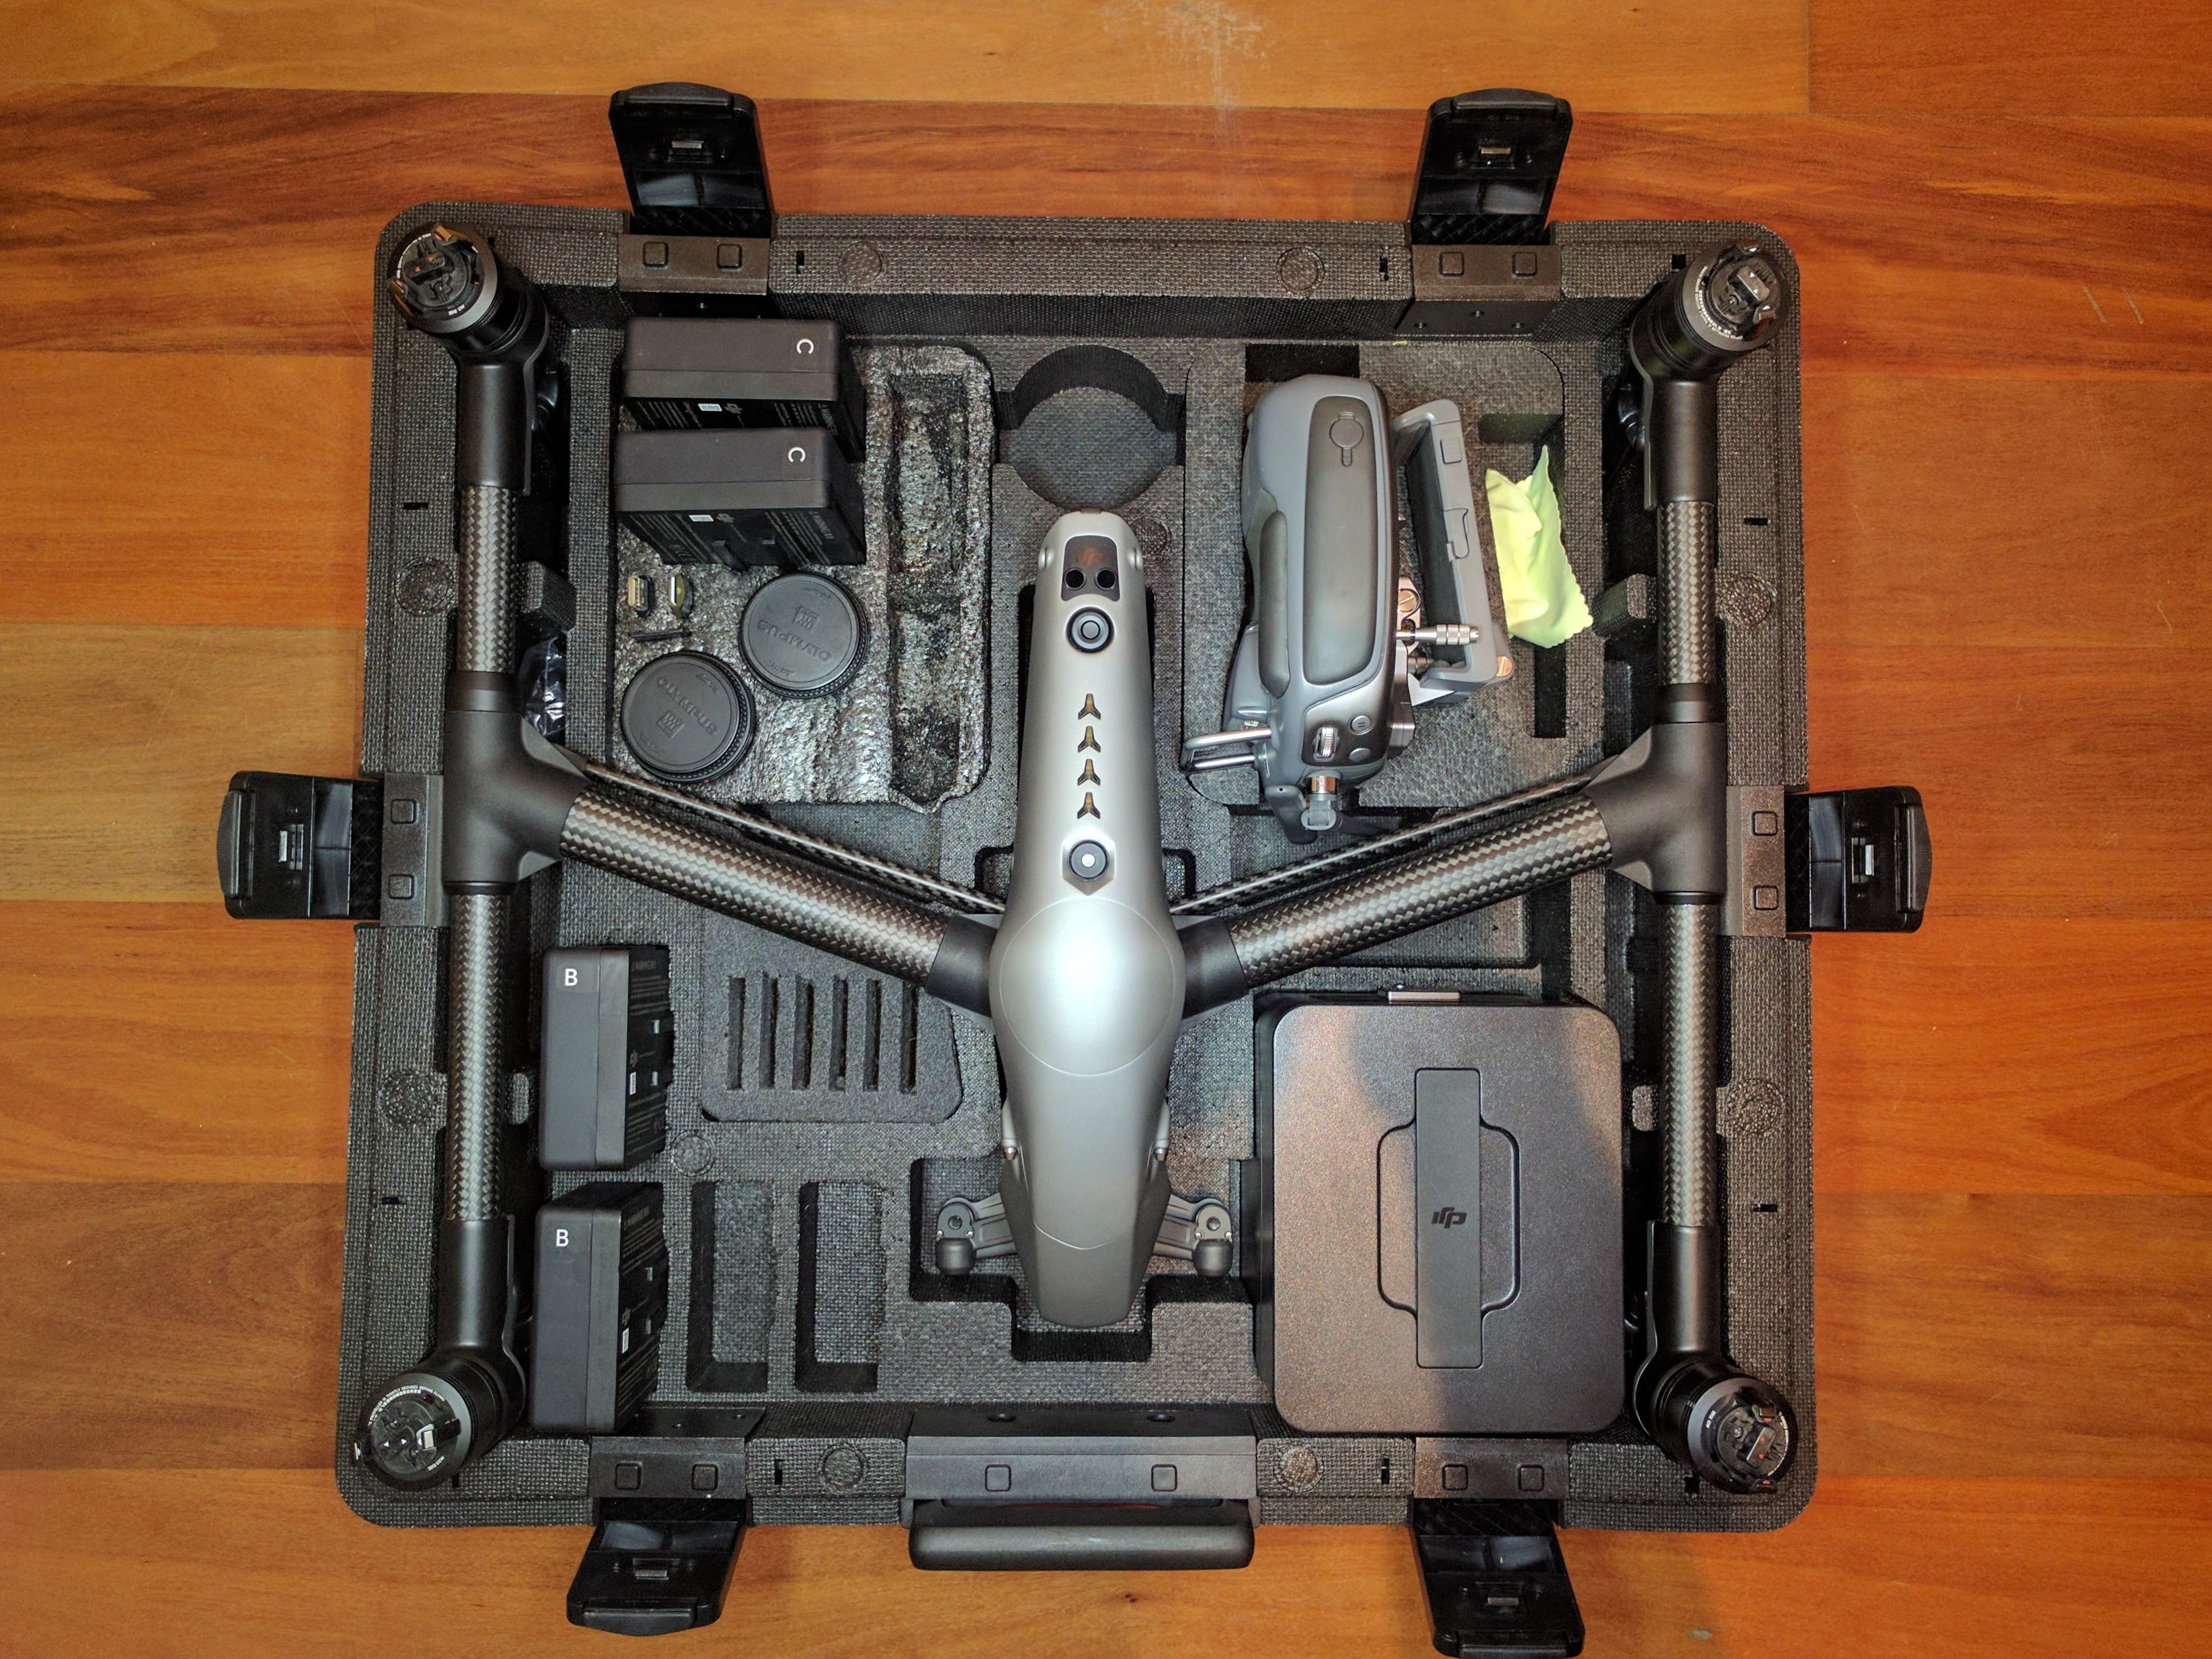
- 4x extra batteries
- Olympus 25mm and 45mm lenses
- 6x 46mm lens filters
- 2x microSD USB readers
- microSD to SD adapter
Inspire 2 Case Mod
Custom shaped foam inserts to house
- 4x extra batteries
- Olympus 25mm and 45mm lenses
- 6x...
- 4x extra batteries
- Olympus 25mm and 45mm lenses
- 6x...
Florida Drone Supply
Approved Vendor
We stock the landing mode and travel mode version of the GPC case - and yes, they are heavier! Other than the weight how do you like it?I gave up on the factory case but now I need a chiropractor
I gave up on the factory case but now I need a chiropractor
I am solving that issue buy purchasing the GPC I2 battery case from @Florida Drone Supply. It will carry all of my 16 batteries and 2 chargers leaving me extra room in the GPC I2 landing mode case for other lighter items needed for a days worth of flying.
Similar threads
- Replies
- 27
- Views
- 6K
- Replies
- 0
- Views
- 2K
- Replies
- 8
- Views
- 3K
- Replies
- 3
- Views
- 3K
- Replies
- 2
- Views
- 2K

