- Joined
- Feb 18, 2016
- Messages
- 101
- Reaction score
- 26
- Age
- 42


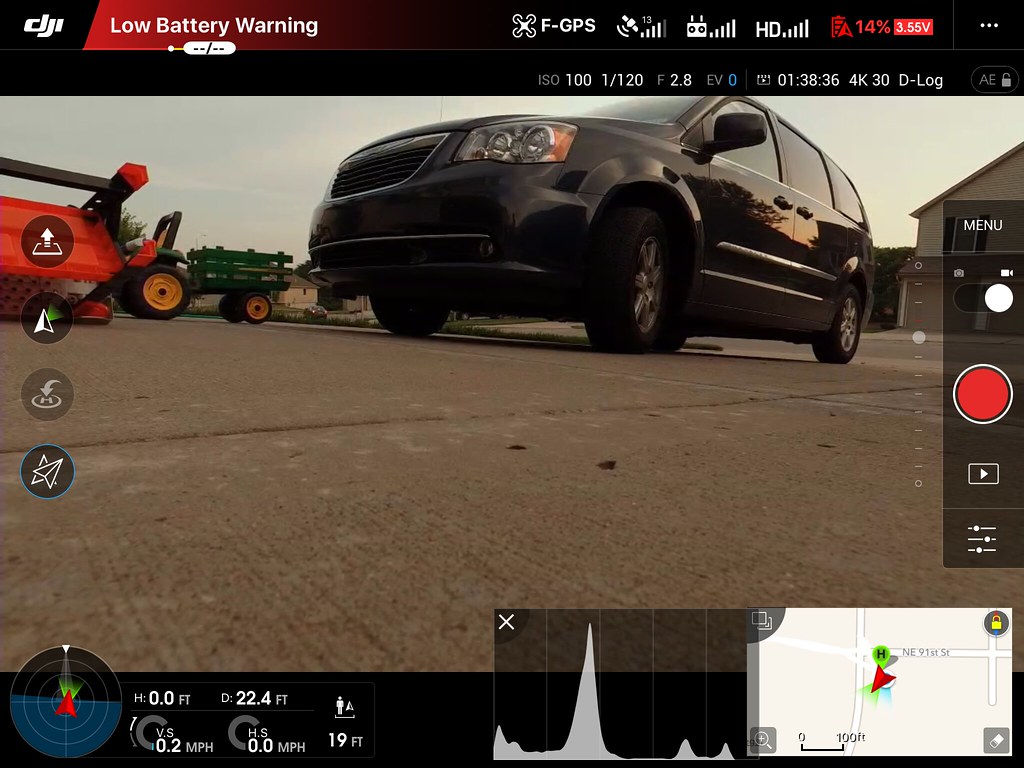
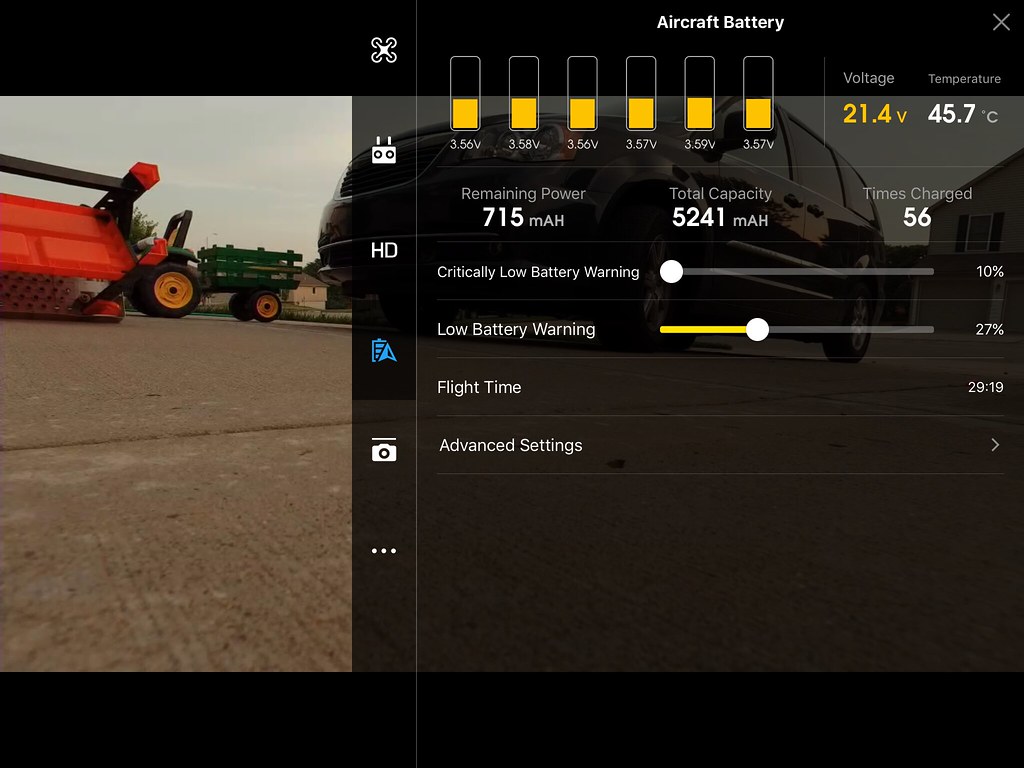
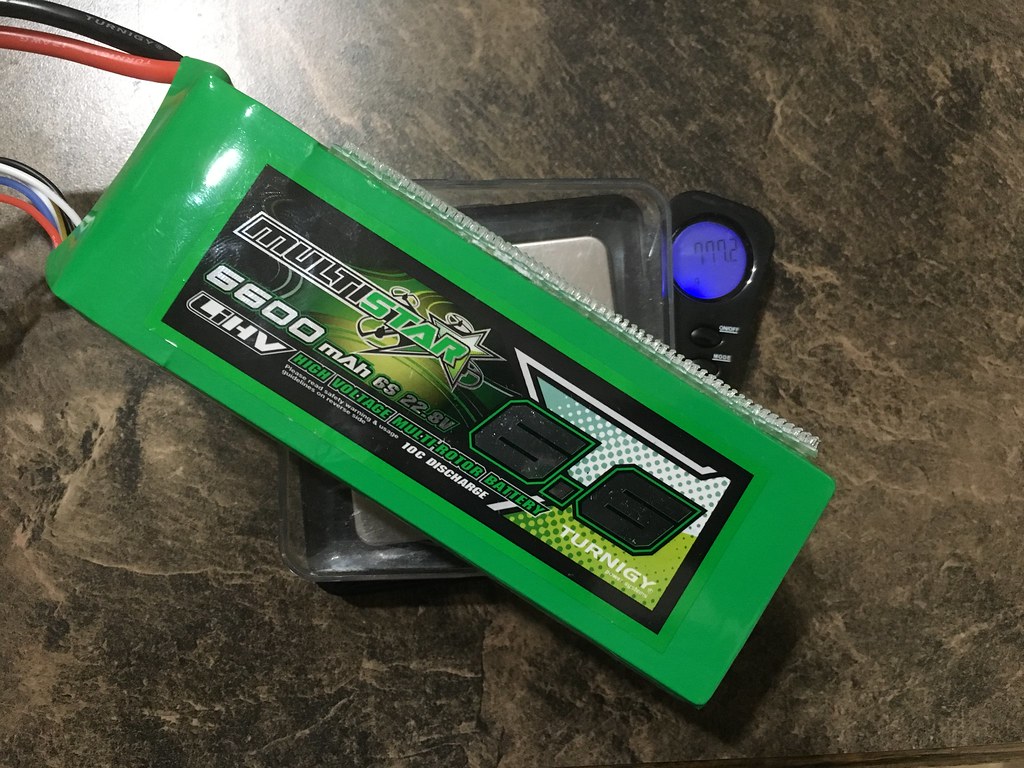
Wow. Great increase in flight time when I changed over to the Multistar 6600 LiHV batteries. 29 minutes to 14%. I'll take it! That was with an X3 camera as I'm still waiting for my X5 to return to me, but my guess is that the X5 will be around 25 to 26 minutes. Again, I don't do any hover tests. I just go out and fly my normal way. The Multistars are a hair bigger than the Lectron 5400 Lipos I've been using. I'll have to weigh them both. No big deal to mount it up in the same way that I was doing before. Even better, they are only $60 each (leave the page open for a few minutes and the $60 deal comes up). Definitely a lot better than the $95 price I've been paying for the Lectron Lipos. I figure there are still better options out there to get more flight time, but I'm very impressed with the bang for the buck you get out of the 6600 LiHVs from Multistar.
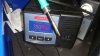
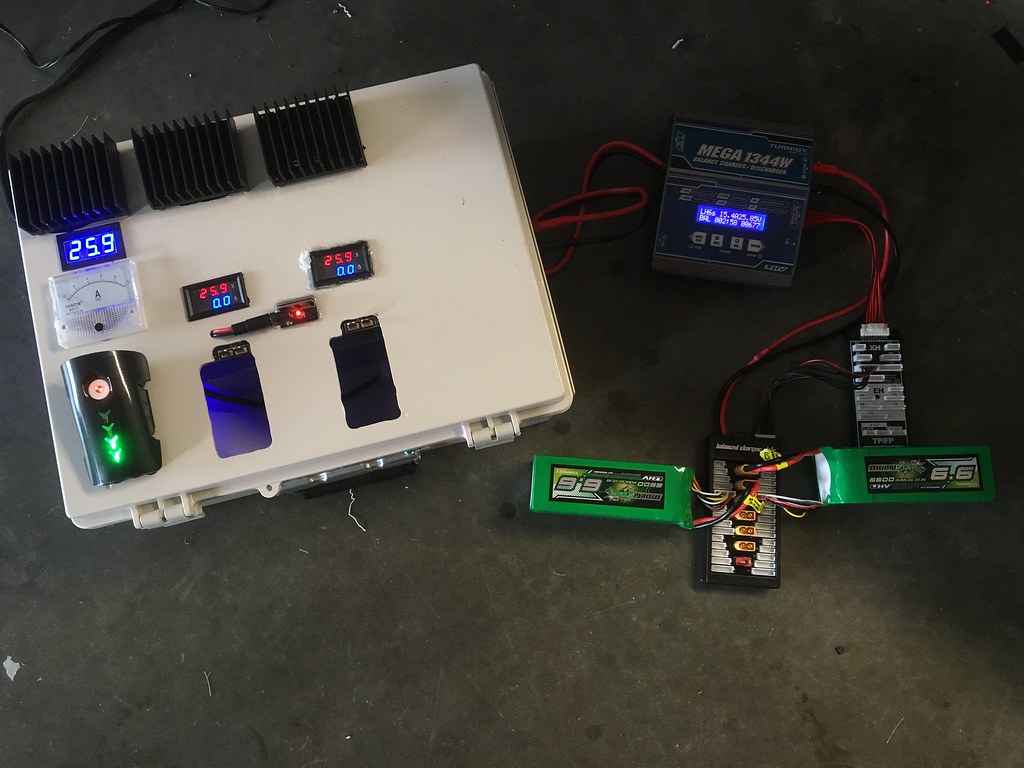
In addition, it allowed me to try out the Turnegy Mega 1344W. This charger is surprisingly small. I was expecting something a lot bigger considering the amps and watts it can put out (assuming you have a power supply capable of maxing out this charger). It only has one output, but considering my main use for it will be the LiHVs for my Inspire, that's not a concern. I simply hooked up a parallel charging board to it and all was well. The charger can supposedly pump out 40 amp, but I don't have anything to test that on (or at least, I don't think I do). The Multistars did not come with a charging rate that they can handle so I only slightly went above 1C (around 15 amp) since both multistars in parallel would be 13200mah. The charger handled that with no problems at all and I didn't feel any heat buildup. Are the electronics in it the same as the Powerlab? Don't know, but I don't really care either if it can keep performing at this level. I'm getting both of my Multistars charged up in 1 hour or less and that is good enough for me. Of course if I get 2 more to plug into the parallel charging board, it will need to bump up to 30 amp or so. I'll see if the charger can handle that when the time comes. All in all, I'm super impressed considering this charger only costs $74! That is a steal considering there are not a ton of choices out there right now for an LiHV charger.
Here is my current charging setup. I built my own charger for the Inspire batteries. I use a 1000watt power supply and have made 3 charging bays although I do have room for a 4th. I'm sure one of these days I'll make one more bay, but considering I also connect my Turnegy LiHV charger to it as well, that's a lot of power output. Works out pretty well getting my Inspire batteries and LiHV batteries charging at the same time while only needing the one power supply to do both.

 IMG_0239
 IMG_0238
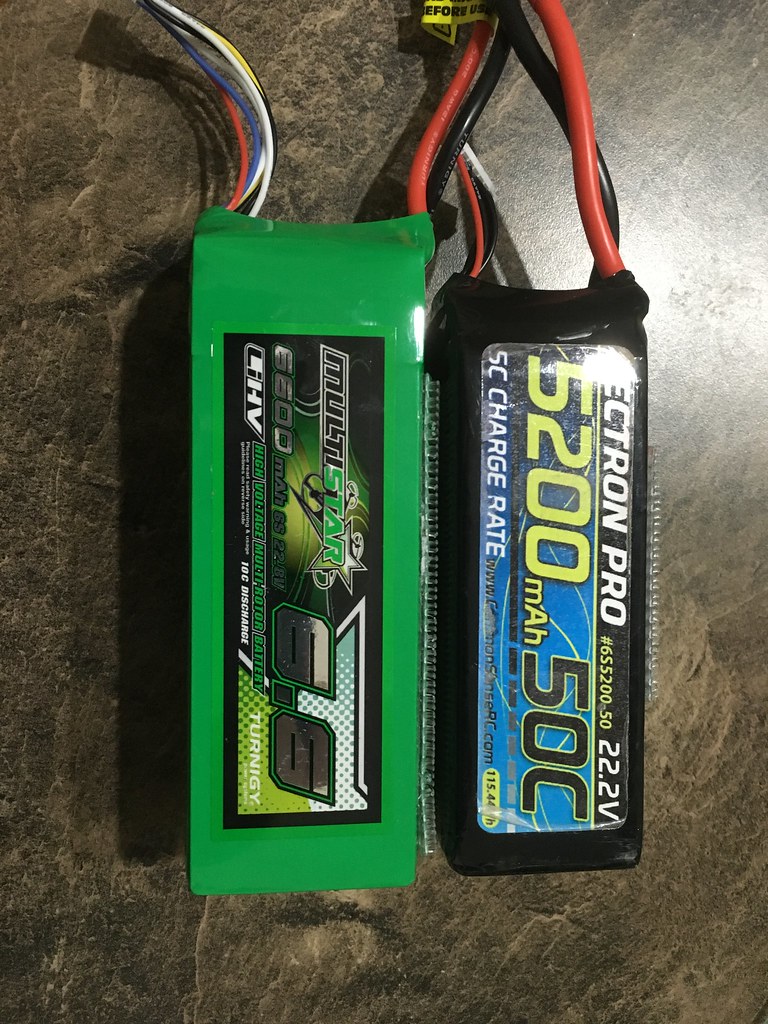 IMG_0240
  IMG_0232
  IMG_0231
  IMG_0230
  IMG_0233
 IMG_0234
 IMG_0241
 IMG_0242
Just pull it out. It is the same kind of connector that is underneath the Inspire batteries (the ones you pull out to reset the calibration of the batteries). I would wait to pull that plug last after you remove the back portion from the center portion of the Inspire. It'll be easier to get to. Better yet, remove the small phillips screws on the back of the plastic case around the circuit board. You'll be able to separate the two plastic halves and then see the plug underneath.
Just got it out! Kinda messed up the plastic real good but oh well... Thanks!!I wish I had a better picture of it, but you can see on page 69 that I have all the plugs removed along with the plug that is giving you difficulties. It is slightly blurry, but on my PCB, it is one of those standard jst plugs that just pushes in. No clicking/spring tab or anything like that. If you don't want to tug on it too hard, I suggest getting a pick and slowly start prying up the edges around the plug.
Just got it out! Kinda messed up the plastic real good but oh well... Thanks!!
Can't seem to be able to reach the motor wires inside the arms now to disconnect it. I've removed the rubber grommets but no way to get to the connectors so that i can remove the board entirely...
Okay, you guys must be soldering gods because I don't see how I can get an iron in there, not melt everything around it, and get a good connection at the same time. Is there an easy way to disconnect the motor wires so I can get the entire board out?
You can un-solder the motor wires from the opposite side of the board if you really wanted to have the board free and clear of everything to make soldering easier. Secondly, I always "scuff" up the area I'm trying to solder for a better connection. Due to the difficult location of soldering these wires, I simply took a hobby razor blade and make a bunch of scratches. Tin the surfaces and the wires, then solder together. Also, an iron with a thin tip to fit in there along with a third hand device goes a long way.
Please let me know that it is Multistar 6600mah single + DJI TB48(5700mah)?Ok, as promised, here is some more info on the Multistar 6600 LiHV. It weighs about 110 grams more than a typical 5200 Lipo (the weights here include the 3M dual lock).
As mentioned before, the "volume" size difference isn't that much considering it is being mounted under the craft.
And here it is mounted on my Inspire. I've made a little groove cut in the mounting plate I made so that it would stay more flat against the bottom of the Inspire while there is a re-useable ziptie in there. The Dual Lock pretty much handles all the lifting, but I like using something redundant just in case.
Here is the exit for the wires where the sonar thing used to be.
Lastly, I did the same waypoint setup that I used the previous night, but this time I had my X5. 26 minutes to 15%. Great results as far as I am concerned! I wasn't very far away, but if I was up to 2 miles away, I can still conservatively subtract 4 minutes off that still say that I have a "useable" 22 minutes of flight where I am taking pictures or video the entire time. I think I'll be sticking with the 6600 multistars for awhile.
BTW, I'm not sure if it happened with version 1.8 or this new 1.9, but my Olympus 14-42mm EZ now collapses back down to a pancake when I turn off my Inspire! It used to just stay fully open and extended.
I noticed that last night when I got my X5 back from DJI and updated the firmware.
You can un-solder the motor wires from the opposite side of the board if you really wanted to have the board free and clear of everything to make soldering easier. Secondly, I always "scuff" up the area I'm trying to solder for a better connection. Due to the difficult location of soldering these wires, I simply took a hobby razor blade and make a bunch of scratches. Tin the surfaces and the wires, then solder together. Also, an iron with a thin tip to fit in there along with a third hand device goes a long way.
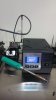
You probably aren't transferring enough heat to the piece you're soldering to. When I first did the battery mods, to actual batteries, I was using a smaller tip at 350 Celsius and could not melt the original solder on the terminals, I got bigger station that uses larger tips that hold and transfer more heat, I have at 315 Celsius and works in a second and done. I pre-tin the wire first, then add solder to the piece I'm soldering to, then just press together hold with screw driver or something and remove tip within a second or two and have really strong joints. If your trying to solder to the big tabs you might need more heat on the large tab and it should work. I use solder with 2% silver it's supposed to be stronger.Nope. I melted part of the GPS wire by accident and part of the plastics around it and still can't get the wire to stick. Might just forget about this whole thing at this point.
I've got a 100Wiron that goes to 480C (according to the manual), I just can't get it in position to make it work...I think I'm throwing in the towel and I'm just going to mod two of my TB48 batteries and call it a day.You probably aren't transferring enough heat to the piece you're soldering to. When I first did the battery mods, to actual batteries, I was using a smaller tip at 350 Celsius and could not melt the original solder on the terminals, I got bigger station that uses larger tips that hold and transfer more heat, I have at 315 Celsius and works in a second and done. I pre-tin the wire first, then add solder to the piece I'm soldering to, then just press together hold with screw driver or something and remove tip within a second or two and have really strong joints. If your trying to solder to the big tabs you might need more heat on the large tab and it should work. I use solder with 2% silver it's supposed to be stronger.

I've got a 100Wiron that goes to 480C (according to the manual), I just can't get it in position to make it work...I think I'm throwing in the towel and I'm just going to mod two of my TB48 batteries and call it a day.
Putting the bird back together now...I'm hoping I didn't melt the GPS wires...here's the damage.
View attachment 8903
you should never go above 350 degrees celcius on pcb's. you mostly need a wide tip for the heat to spread and then aolder it. if you have no or not much experience then like me ask someone who can help with that.
Sent from my iPhone using Tapatalk


We use essential cookies to make this site work, and optional cookies to enhance your experience.