
You are using an out of date browser. It may not display this or other websites correctly.
You should upgrade or use an alternative browser.
You should upgrade or use an alternative browser.
Battery Mod Info
- Thread starter damoncooper
- Start date
- Status
- Not open for further replies.


Damon, have you tested the flight time with the 7000 mah yet ?
This weekend
Try these ones bud!This weekend

Sent from my SM-N910G using Tapatalk
Try these ones bud!
Sent from my SM-N910G using Tapatalk
Weight?
I'll let ya know. They're used on this animalWeight?

Sent from my SM-N910G using Tapatalk
Too heavy. They're around 1500 grams :/
Maxamps have lots and lots of different batteries. Might pay to give them a buzz.
They can probably make the battery you're longing for")
LiPo 8000 8S 29.6v Dual Core Battery Pack - Allow 2 Weeks
Sent from my SM-N910G using Tapatalk
Maxamps have lots and lots of different batteries. Might pay to give them a buzz.
They can probably make the battery you're longing for
LiPo 8000 8S 29.6v Dual Core Battery Pack - Allow 2 Weeks
Sent from my SM-N910G using Tapatalk
Last edited:
Damon, have you tested the flight time with the 7000 mah yet ?
Results: Shitty.
26:40 to 10%.
The 5200 LiHV MS continues to impress however.
The 6600mah LiHV MS is outta stock but I hear good things about that
Hello, all.
Finally read through this entire thread. Lots of great information. Damon, I believe it was you on the Facebook page that originally talked about the auxillary pack idea? I remember seeing that a long time ago. I finally tried it out a few weeks back, then decided to read up some more on the subject. I couldn't find your original Facebook posts but I did find this thread. Glad I did as this looks like a better overall discussion.
I'll have to post some pictures of my Inspire along with my charging and discharging setups later on. For now, I'll add in that I'm using only 1 auxillary battery as opposed to two in parallel. The two setup looks awesome and I like that mount that Damon developed, but a single battery appears to be less intrusive to the camera, less wires and less expense. I use Autopilot for a lot of video and am constantly turning the camera 360 degrees. So far, my setup has not had the battery in the way of the camera (camera view, that is). Either way, both setups appear to work just fine depending on your application.
The battery I'm using hasn't been mentioned here yet, but I've found it to be a viable choice. I've been using the 6S, 50C 5200mah Lectron Pro.
Amazon.com: Lectron Pro 22.2 volt - 5200mAh 50C Lipo Pack: Toys & Games
The discharge properties of this pack have been impressive thus far and I never get the "low propulsion due to low voltage" warning. It has consistently been depleted to 14% remaining while the main pack I've stopped at 10%. I've really been happy to see that I'm getting the max use out of my batteries (or as much as I can). I'm still in the process of "fixing" my DJI packs with the reset method to get their capacity back. Pain the neck, but I've finally gotten one of my packs all the way back to 5700.
I haven't done any hover tests. I just assume fly around the way I would for any other flight. So far, I've been getting a consistent 21-22 minutes of normal flight time while using an X5 camera. Not really close to the crazy numbers some of you have gotten, but I've been more than pleased considering I was getting 11 minutes with a TB45 and 13-14 minutes with a TB48. Having 20+ minutes of "useable" flight time for video with the X5 is amazing. I don't feel like I'm wasting my pack when I want to stop and change settings, so this modification has been amazing to me.
I'm currently using RCTimer 1448 props. These are exactly the same as the T-motor 1448 at a fraction of the cost. Same weight, same stiffness. Probably came out of the same factory. They've worked perfectly for me for a very long time. As for flight characteristics, I have noticed the extra weight on the craft, but it really hasn't affected me adversely. I think it still flies smooth, just a bit more sluggish with acceleration. Top end speed still hits low 40s. For those of you that might want more typical flight characteristics that you would see without using aux packs, try the Tarot 1455 props. They are cheap and have a lot more punch/lift at the cost of flight time. I dropped down to 18-19 minutes of useable time (still great in my eyes), but the Inspire flew similar to a normal setup.
For those waiting on the Multistar LiHV packs, I just noticed HobbyKing has them in stock again. I ordered two 6600 packs from their international warehouse (still none in the US warehouse). I'm in the US, but I didn't want to wait for the US warehouse as it is unknown when they will get them. At least now I know I'll have them in about 2 weeks. Definitely looking forward to possibly getting another 2 minutes. That would be great. In addition, and I never knew this about HobbyKing, if you leave your browser open on one of their products for sale for about 5 minutes (maybe about 10?), a message pops up with a lower price for the item. Cool. Never knew that. I got both of my packs for $10 less ($10 off both packs) and $16 off the LiHV charger I picked up from them as well. Nice.
I'll post some pictures later and I'll report back when I get the new Multistars in the mail.
Hi all ") finally my antennas have arrived... (was some adventure) but I got them.
finally my antennas have arrived... (was some adventure) but I got them.
my question would be if someone (admin
 ) could point me to the video with the RC mod that has been done where the user kind of stripped the whole thing and also cut one of the antennas of the RC to separate the two band from each other.
any help and / or link would be greatly appreciated
finally my antennas have arrived... (was some adventure) but I got them. my question would be if someone (admin
) could point me to the video with the RC mod that has been done where the user kind of stripped the whole thing and also cut one of the antennas of the RC to separate the two band from each other. any help and / or link would be greatly appreciated
Sent from my SM-N910G using Tapatalk
thank you
saved my day
cheers
Sent from my iPhone using Tapatalk
Careful in there. One mistake can cost you $500thank you
saved my day
cheers
Sent from my iPhone using Tapatalk
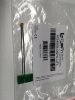
as I mentioned before I got them antennas right BUT...
the cable is to short... pics below.
the two possibilities I see at the moment are:
1. I unsold and extend the wire to relocate the 5.8 Ghz module so I can put that thing on the inner top of the RC or
2. I cut and slice the antenna mast like in the video provided ( thank you Sir Nikolas for the re- linking ) and unsold that cable for re-soldering it onto my little antenna I got so I do not have to cut the original in half like in the video and just use the cable...
the problems that I could bump into:
1. when extending (is never a good idea the loss of the band or frequency could cause problems.
2. having to take out the original mast would or could damage it and putting it back could be a pain and probably even fail if I don´t get it right the first time.
3. If I could unsolder the 5.8 Ghz original cable off without damaging the original mast to much that would be the best and easiest solution at the moment. what I do not know is, if I put the omni directional 5.8 Ghz onto the inner side where the hands would be when holding and the side rubber if the signal would be significantly weakened or not.
if not, I will just unplug - replug and close it up and check if it works well or not. (video signal) - shoot... wrong thread I believe... sorry.
if someone could give me some advice on what the result be when I stick it on the side would be (significant signal loss or ok to go that would be great.
cheers.
Martin
BUT... the cable is to short... pics below.
the two possibilities I see at the moment are:
1. I unsold and extend the wire to relocate the 5.8 Ghz module so I can put that thing on the inner top of the RC or
2. I cut and slice the antenna mast like in the video provided ( thank you Sir Nikolas for the re- linking ) and unsold that cable for re-soldering it onto my little antenna I got so I do not have to cut the original in half like in the video and just use the cable...
the problems that I could bump into:
1. when extending (is never a good idea the loss of the band or frequency could cause problems.
2. having to take out the original mast would or could damage it and putting it back could be a pain and probably even fail if I don´t get it right the first time.
3. If I could unsolder the 5.8 Ghz original cable off without damaging the original mast to much that would be the best and easiest solution at the moment. what I do not know is, if I put the omni directional 5.8 Ghz onto the inner side where the hands would be when holding and the side rubber if the signal would be significantly weakened or not.
if not, I will just unplug - replug and close it up and check if it works well or not. (video signal) - shoot... wrong thread I believe... sorry.
if someone could give me some advice on what the result be when I stick it on the side would be (significant signal loss or ok to go that would be great.
cheers.
Martin
Attachments
Careful in there. One mistake can cost you $500
just opened it and looking for some info and advice on how to relocate the 5.8ghz...
haven't done anything yet though
did not dare to do anything...forgot to mention it´s my third remote from the backup bird version B (the remote )...
am very careful fiddling around in there. the video helped me to open it up and i did not touch it before sirnikolas did not post me the link so i would not break anything
i will keep you posted and continue to ask "dumb" questions
sorry if I sounded offending before. did an edit.
cheers
Sent from my iPhone using Tapatalk
Last edited:
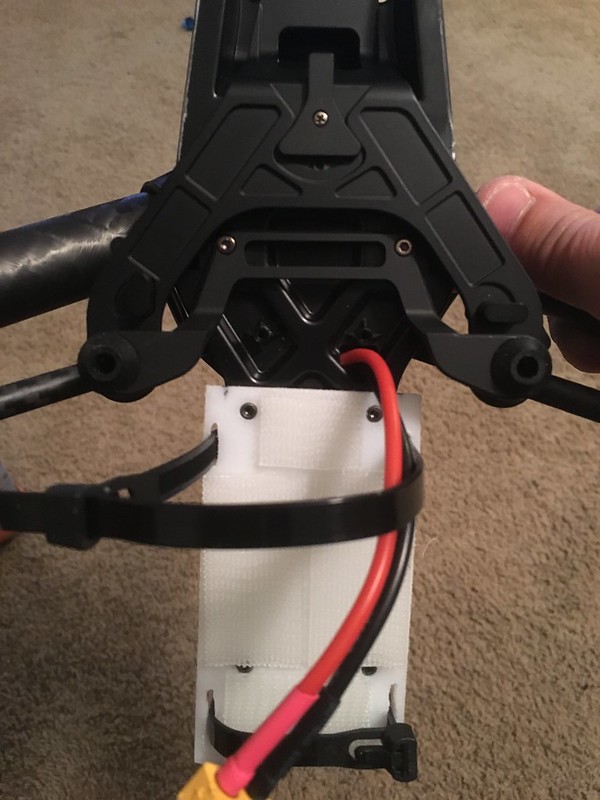
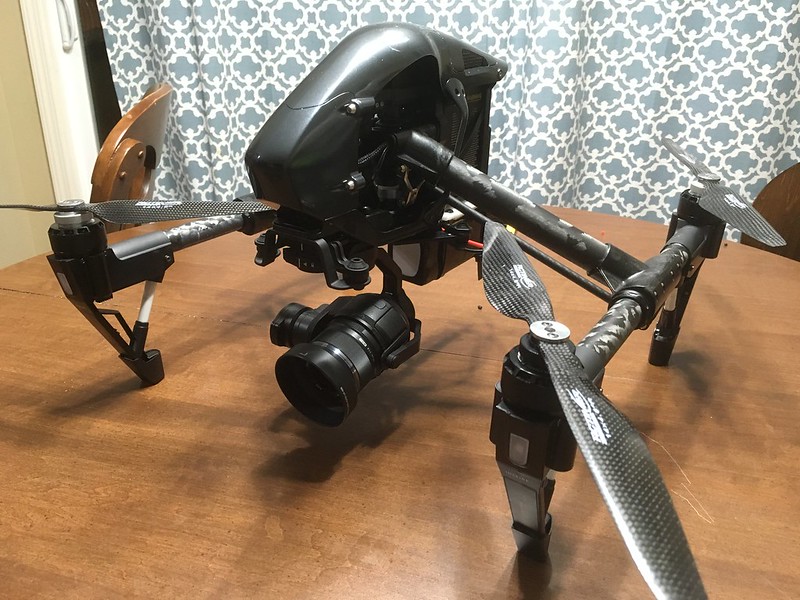
As promised, here are some pictures of my setup below. I got tired of hacking up batteries so I decided to do the modification to the Inspire. I was surprised at how difficult this ended up being to do. Well, not so much as difficult as very tedious. I had to partially remove the arms from the main center body then disconnect the motor wires from the long wires that extend through the arms to motors. The plugs for the motor wires are shoved into the plastic piece at the top of the central arms. That allowed me enough room to make a good solder joint where the main Inspire battery plugs in. I have those two wires going through the same holes as the motor wires to reach the PCB. That tucks them away nicely, then I threaded them through the wire hole on the bottom that would be used for the sonar thing (which I never used so I was glad to remove it). I made a little plastic plate on the back for installing the batteries. I'm a big fan of the 3M dual lock, but I am paranoid so I also used 2 re-useable zipties. Everything works together nicely. This same setup should also work for the Multistar 6600 LiHVs when they come in.
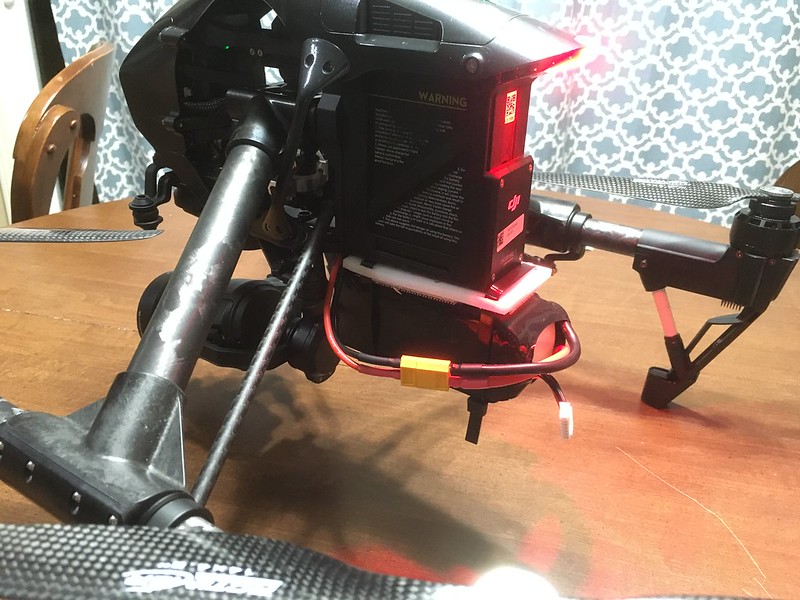
As you can see, I was able to travel 19,160ft over 23 minutes. Nothing earth-shattering but still a respectable flight for a considerably longer time than what the normal Inspire is capable of with only the main battery and an X5 camera.

Here are the pictures of my setup

https://flic.kr/p/H8akaW
https://flic.kr/p/H8akaW
https://flic.kr/p/H8akaW
As you can see, I was able to travel 19,160ft over 23 minutes. Nothing earth-shattering but still a respectable flight for a considerably longer time than what the normal Inspire is capable of with only the main battery and an X5 camera.
Here are the pictures of my setup
https://flic.kr/p/H8akaW
https://flic.kr/p/H8akaW
https://flic.kr/p/H8akaW
Last edited:
As promised, here are some pictures of my setup below. I got tired of hacking up batteries so I decided to do the modification to the Inspire. I was surprised at how difficult this ended up being to do. Well, not so much as difficult as very tedious. I had to partially remove the arms from the main center body then disconnect the motor wires from the long wires that extend through the arms to motors. The plugs for the motor wires are shoved into the plastic piece at the top of the central arms. That allowed me enough room to make a good solder joint where the main Inspire battery plugs in. I have those two wires going through the same holes as the motor wires to reach the PCB. That tucks them away nicely, then I threaded them through the wire hole on the bottom that would be used for the sonar thing (which I never used so I was glad to remove it). I made a little plastic plate on the back for installing the batteries. I'm a big fan of the 3M dual lock, but I am paranoid so I also used 2 re-useable zipties. Everything works together nicely. This same setup should also work for the Multistar 6600 LiHVs when they come in.
As you can see, I was able to travel 19,160ft over 23 minutes. Nothing earth-shattering but still a respectable flight for a considerably longer time than what the normal Inspire is capable of with only the main battery and an X5 camera.
Thanks for sharing! Any pics of the solder point on the board? Have you wired an arming switch for the auxiliary battery by the way or do you find it unnecessary?
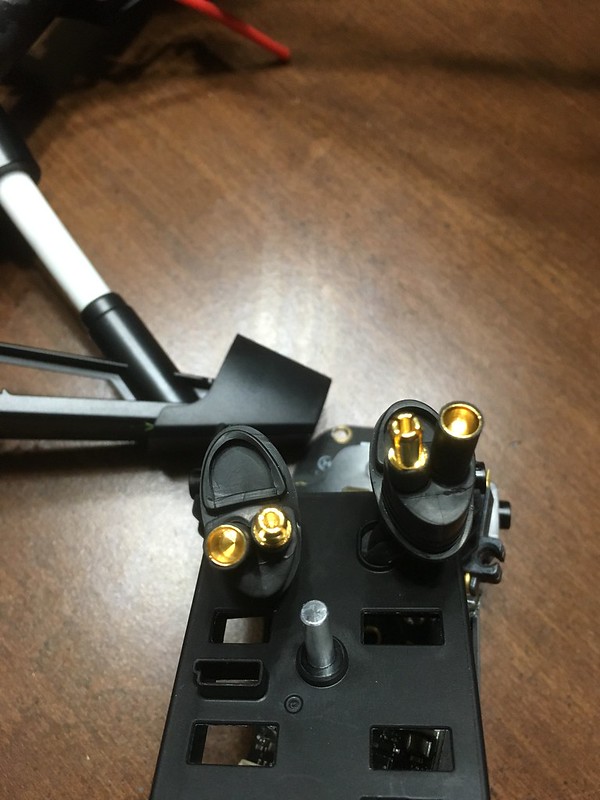
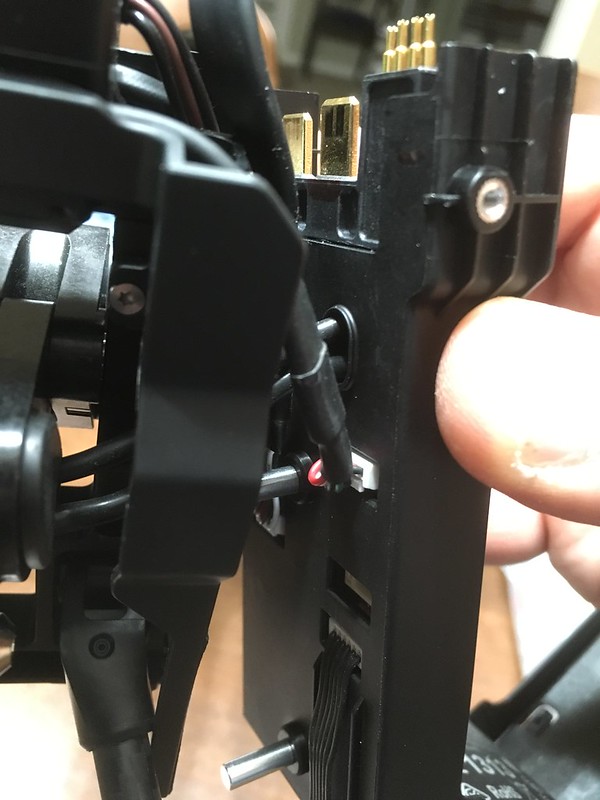
Emtea, I completely forgot to take a picture of my soldered connections. Don't know why I didn't do that. Took me awhile to get it to that point so I was probably happy to start rebuilding the quad. I did find a couple of pictures that should help my explanation.
image
image
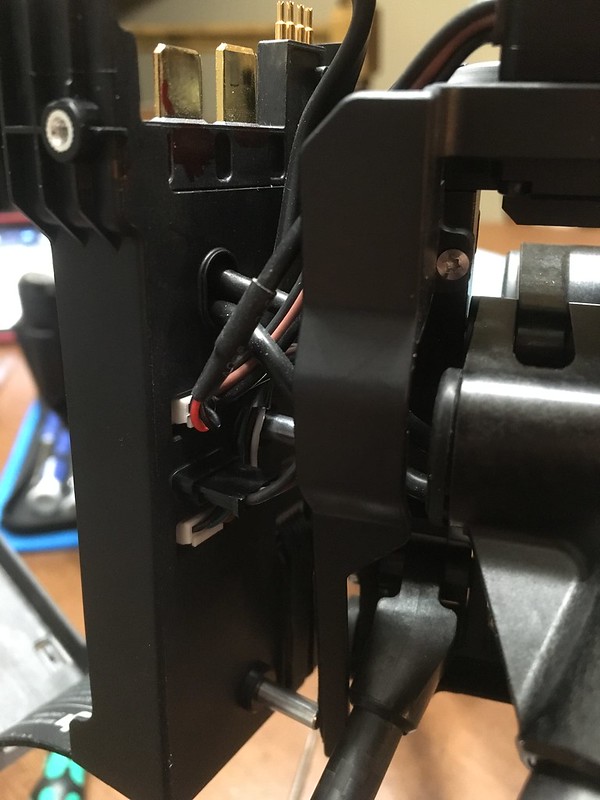
Notice how the two main battery tabs make a rounded 90 degree turn into the circuit board. That is the point I chose to solder. Secondly, you want to follow the direction of the black motor wires. What I mean by this is that you want to solder the wires in way that the wires are coming "towards" you instead of laying the wires flat. You'll be standing the wires up on their ends. Basically, the same way the motor wires are. In addition, try to angle the wires downward a bit so they are in a straighter line going towards the exit cutout used by the motor wires. I used 14 gauge wire and it was a tight fit but I was able to snap all the pieces back together without having to grind down anything. If I were to do it now, I would use 16 gauge to make it fit easier. Takes some time and effort to dot this, but I prefer to do it this way much more than modding the batteries. The wires are far out of the way of the props, my batteries fit in my case much better since there aren't wires going everywhere and any new battery I buy is already to go with no need for modification.
I did not install a switch. I do not see any need for one. If anything, I would prefer not having a switch as I could see myself forgetting to turn it on then carrying around a heavy battery without even using it!
image
image
Notice how the two main battery tabs make a rounded 90 degree turn into the circuit board. That is the point I chose to solder. Secondly, you want to follow the direction of the black motor wires. What I mean by this is that you want to solder the wires in way that the wires are coming "towards" you instead of laying the wires flat. You'll be standing the wires up on their ends. Basically, the same way the motor wires are. In addition, try to angle the wires downward a bit so they are in a straighter line going towards the exit cutout used by the motor wires. I used 14 gauge wire and it was a tight fit but I was able to snap all the pieces back together without having to grind down anything. If I were to do it now, I would use 16 gauge to make it fit easier. Takes some time and effort to dot this, but I prefer to do it this way much more than modding the batteries. The wires are far out of the way of the props, my batteries fit in my case much better since there aren't wires going everywhere and any new battery I buy is already to go with no need for modification.
I did not install a switch. I do not see any need for one. If anything, I would prefer not having a switch as I could see myself forgetting to turn it on then carrying around a heavy battery without even using it!
- Status
- Not open for further replies.
Similar threads
- Replies
- 0
- Views
- 1K
- Replies
- 4
- Views
- 2K
- Replies
- 16
- Views
- 9K
- Replies
- 0
- Views
- 1K
- Replies
- 6
- Views
- 7K

